Teams 40k is awesome. Its become a bit of a tradition now to trek up to the Birmingham ITT as Fire and Dice despite it being a very long drive away and its always blast. Its a firm favourite event - seeing friends, commiserating them after things go wrong, sharing the success and watching as Peter (this time on our other Fire and Dice team) proceeds to shock at least one person who hasn't met him before at the amount of food and drink he consumes.
 |
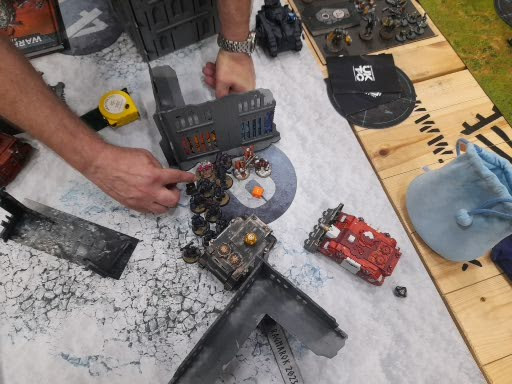
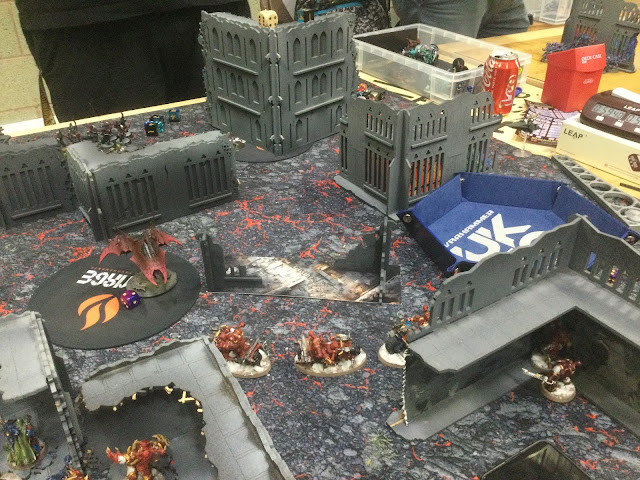
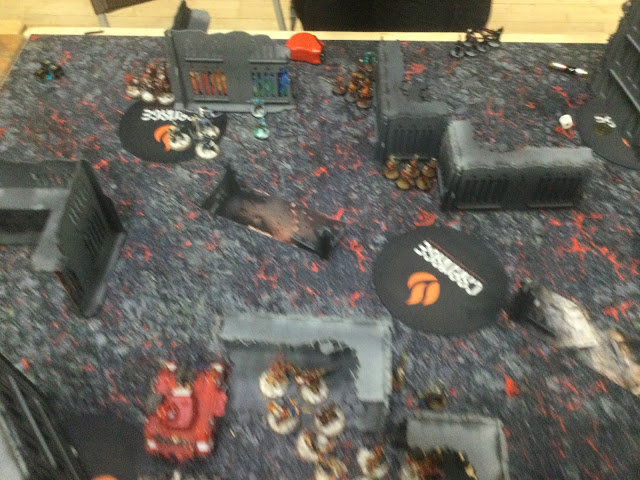
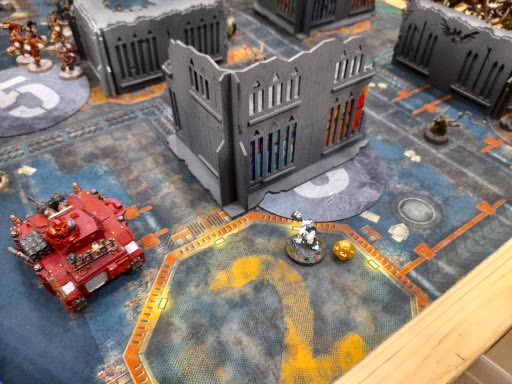
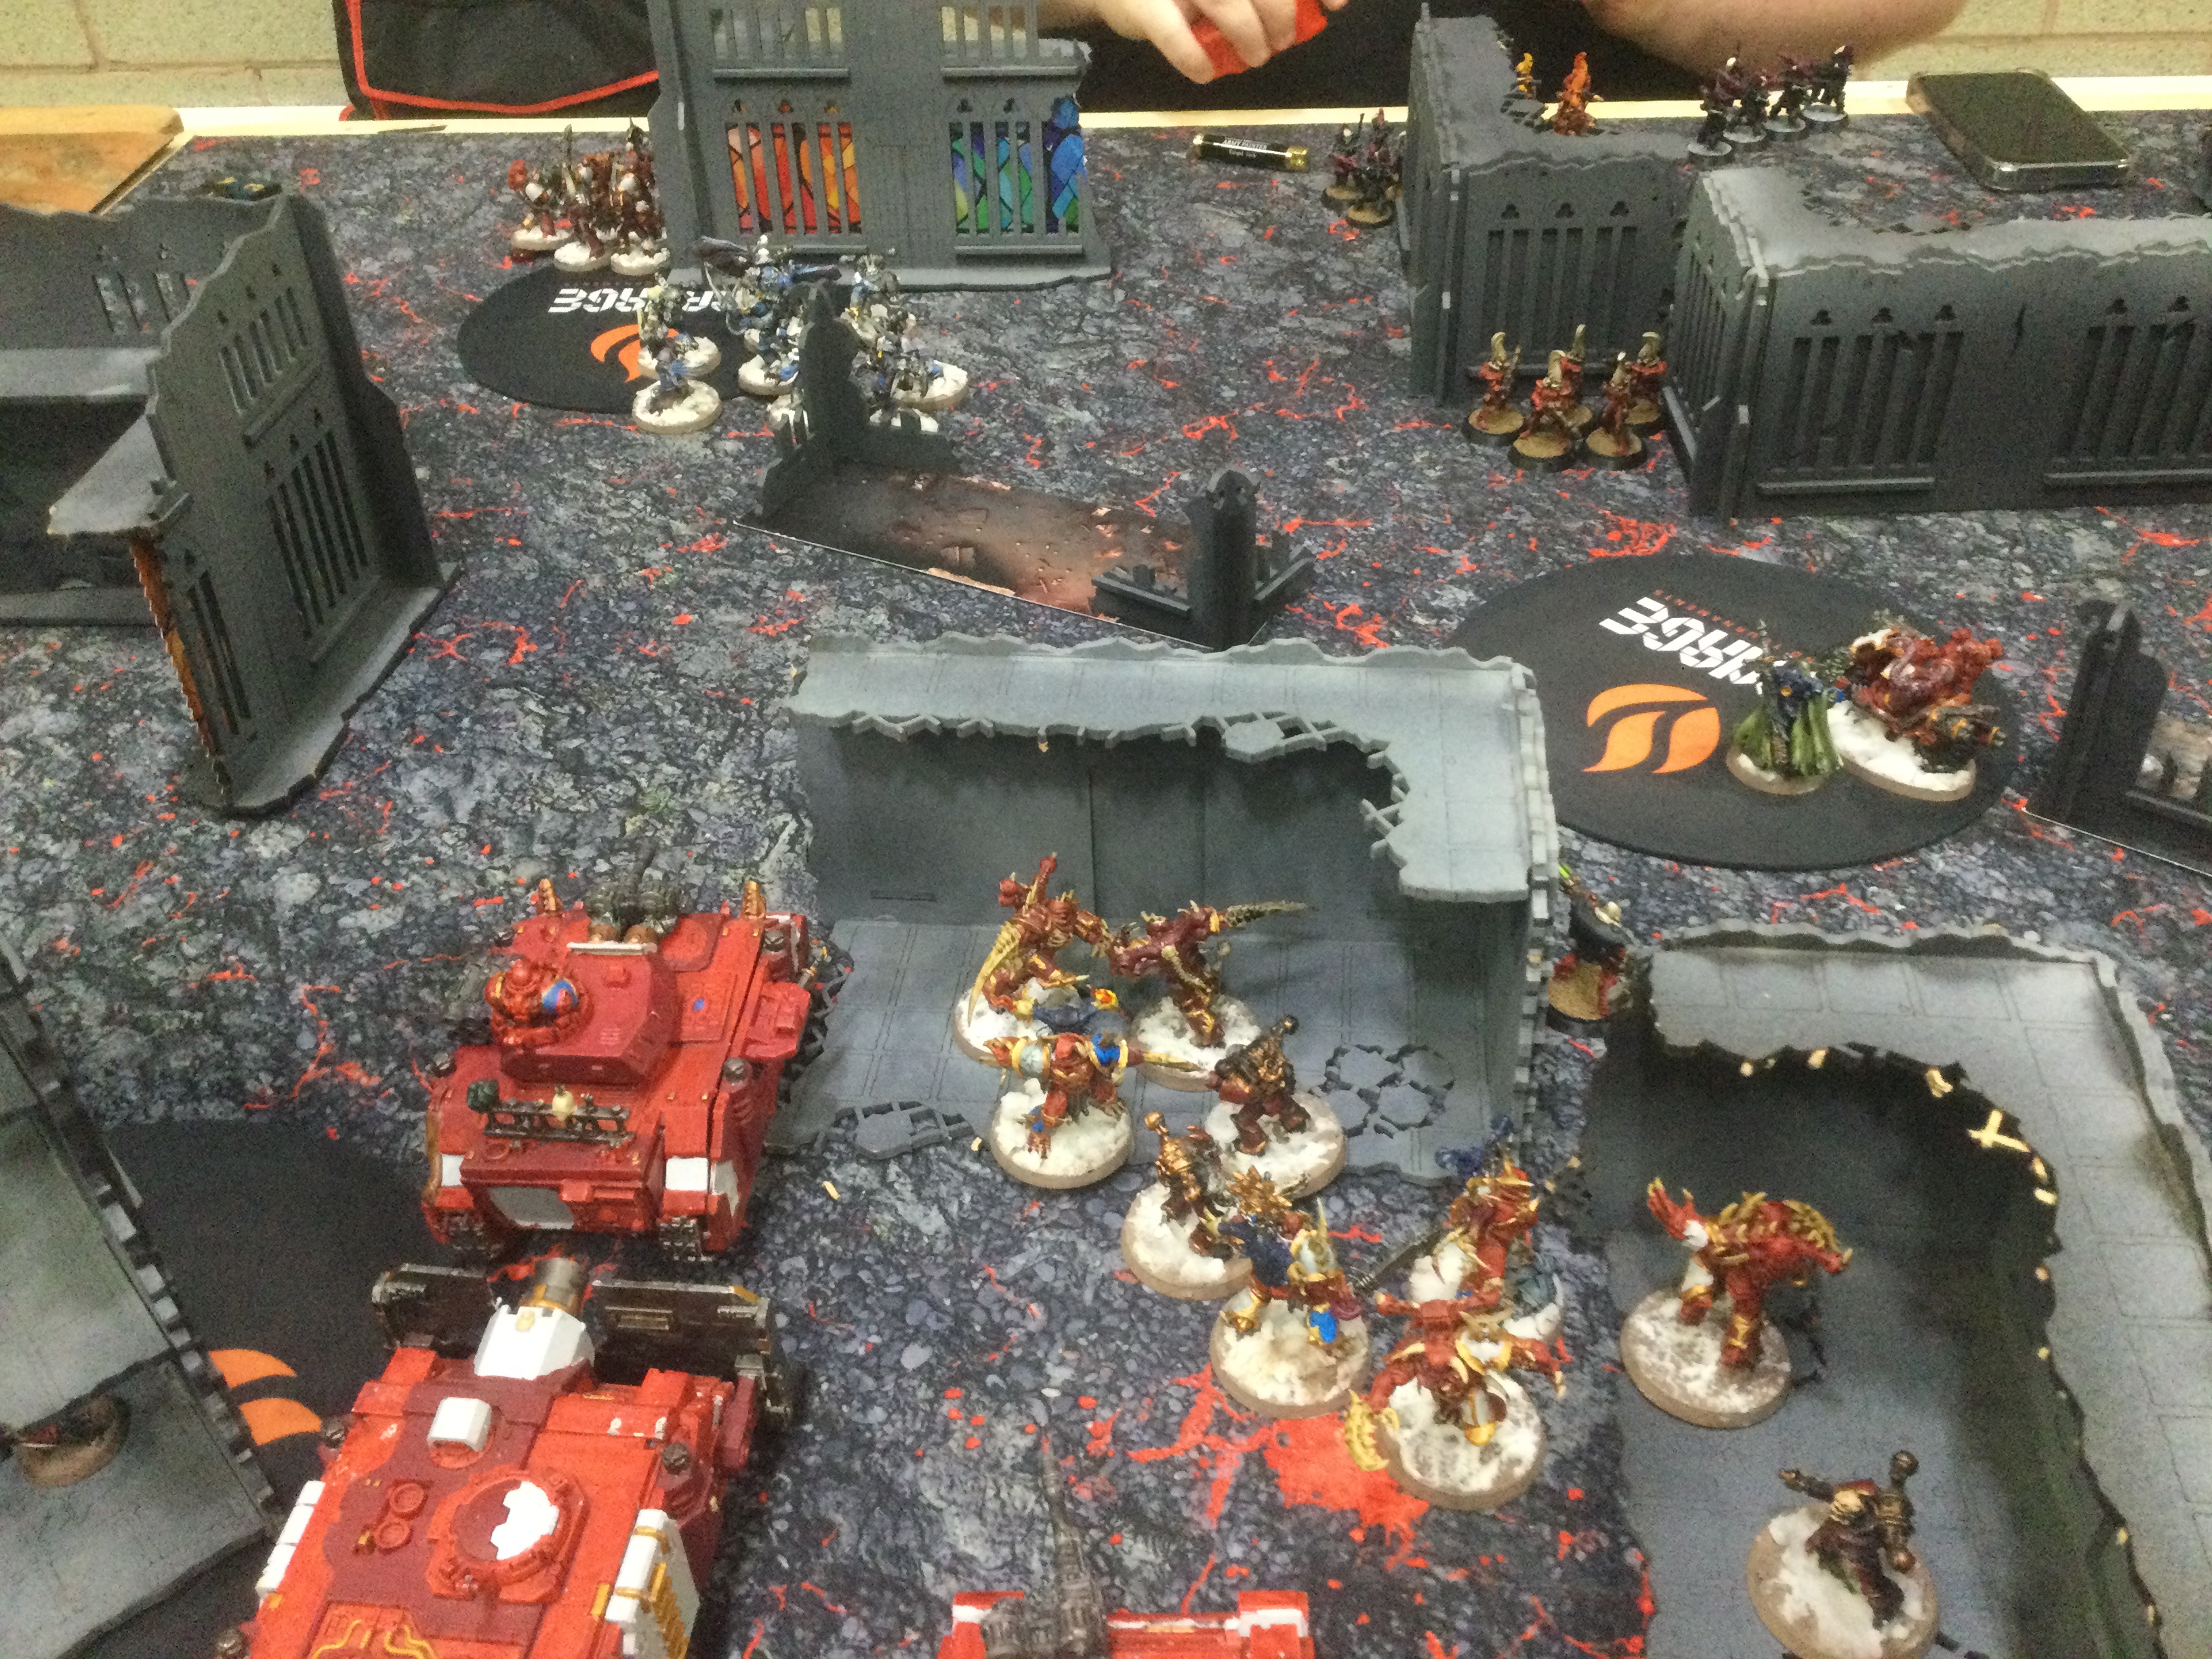
| CSM tanks line up await their turn as Possessed and Legionaries take the fight to Ynnari. |
As for the 40k I look Pactbound Zealots CSM because of course I did (my year of less Chaos has rather failed, especially as I'm really excited by both DG and especially the new World Eater book.) As for the the list - I won't go over in too much detail as my last post on the site goes over the list in much more depth but in brief - 4 Nurgle tanks to blast firepower downrange and protect themselves via 18 inch lone opp, lots of trading pieces to draw out big threat, 2 Possessed squads to destroy just about anything and be the final wave and two tech pieces in Cypher/Nemesis Claw to help me lock down opponents strats
Yay PBZ (1995 points)
Chaos Space Marines
Strike Force (2000 points)
Pactbound Zealots
CHARACTERS
Cypher (90 points)
• Warlord
• 1x Cypher’s bolt pistol
1x Cypher’s plasma pistol
BATTLELINE
Cultist Mob (50 points)
• Mark of Chaos: Nurgle
• 1x Cultist Champion
• 1x Bolt pistol
1x Brutal assault weapon
• 9x Chaos Cultist
• 9x Autopistol
9x Brutal assault weapon
Legionaries (90 points)
• Mark of Chaos: Slaanesh
• 1x Aspiring Champion
• 1x Chaos Icon
1x Close combat weapon
1x Heavy melee weapon
1x Plasma pistol
• 4x Legionary
• 2x Astartes chainsword
4x Bolt pistol
4x Close combat weapon
1x Heavy melee weapon
1x Lascannon
Legionaries (90 points)
• Mark of Chaos: Slaanesh
• 1x Aspiring Champion
• 1x Chaos Icon
1x Close combat weapon
1x Heavy melee weapon
1x Plasma pistol
• 4x Legionary
• 2x Astartes chainsword
4x Bolt pistol
4x Close combat weapon
1x Heavy melee weapon
1x Lascannon
Legionaries (90 points)
• Mark of Chaos: Slaanesh
• 1x Aspiring Champion
• 1x Chaos Icon
1x Close combat weapon
1x Heavy melee weapon
1x Plasma pistol
• 4x Legionary
• 2x Astartes chainsword
4x Bolt pistol
4x Close combat weapon
1x Heavy melee weapon
1x Lascannon
DEDICATED TRANSPORTS
Chaos Rhino (75 points)
• Mark of Chaos: Slaanesh
• 1x Armoured tracks
1x Combi-bolter
1x Combi-weapon
1x Havoc launcher
Chaos Rhino (75 points)
• Mark of Chaos: Slaanesh
• 1x Armoured tracks
1x Combi-bolter
1x Combi-weapon
1x Havoc launcher
OTHER DATASHEETS
Chaos Bikers (70 points)
• Mark of Chaos: Nurgle
• 1x Biker Champion
• 1x Chaos Icon
1x Close combat weapon
1x Combi-bolter
1x Power fist
• 2x Chaos Biker
• 2x Astartes chainsword
2x Close combat weapon
2x Combi-bolter
2x Meltagun
Chaos Predator Destructor (140 points)
• Mark of Chaos: Nurgle
• 1x Armoured tracks
1x Combi-weapon
1x Havoc launcher
2x Lascannon
1x Predator autocannon
Chaos Predator Destructor (140 points)
• Mark of Chaos: Nurgle
• 1x Armoured tracks
1x Combi-weapon
1x Havoc launcher
2x Lascannon
1x Predator autocannon
Chaos Vindicator (185 points)
• Mark of Chaos: Nurgle
• 1x Armoured tracks
1x Combi-weapon
1x Demolisher cannon
1x Havoc launcher
Chaos Vindicator (185 points)
• Mark of Chaos: Nurgle
• 1x Armoured tracks
1x Combi-weapon
1x Demolisher cannon
1x Havoc launcher
Nemesis Claw (110 points)
• Mark of Chaos: Slaanesh
• 1x Visionary
• 1x Plasma pistol
1x Power fist
• 4x Legionary
• 1x Accursed weapon
1x Astartes chainsword
4x Bolt pistol
4x Close combat weapon
1x Nostraman chainglaive
1x Paired accursed weapons
1x Voice Eater
Possessed (240 points)
• Mark of Chaos: Chaos Undivided
• 1x Possessed Champion
• 1x Chaos Icon
1x Hideous mutations
• 9x Possessed
• 9x Hideous mutations
Possessed (240 points)
• Mark of Chaos: Chaos Undivided
• 1x Possessed Champion
• 1x Chaos Icon
1x Hideous mutations
• 9x Possessed
• 9x Hideous mutations
Warp Talons (125 points)
• Mark of Chaos: Slaanesh
• 1x Warp Talon Champion
• 1x Warp claws
• 4x Warp Talon
• 4x Warp claws
So no changes since my last list - I'd experimented with a few things, both tweaks to the list and a few other CSM variants (notably Noise Marines in Raiders which were awesome but I couldn't lock down what else I wanted in the list.) So I went back to my tried and true list - my role in the team was one of two 'hammer' lists that could go get big scores in favourable match ups which was another reason I wanted 20 Possessed in PBZ rather than a more trade heavy Raiders list (which might be better in singles but I felt would be worse at pushing scores.)
Speaking of team roles to roughly go over the rest of my team mate s- Byron (Captain) - Big Daemons (Hammer role), Hristo on Gunline Nids with lots of Guants (Defender/Pairings Guru) Denis on Starshatter Necrons - (Defender) and Adam on Biosantic GSC (Confuse anyone that doesn't know what GSC does.)
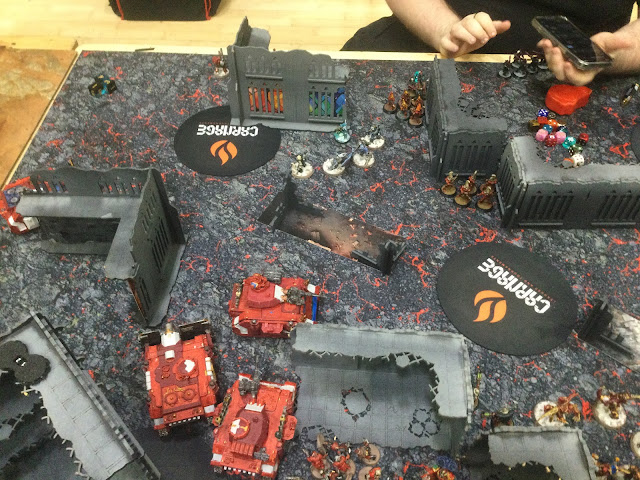
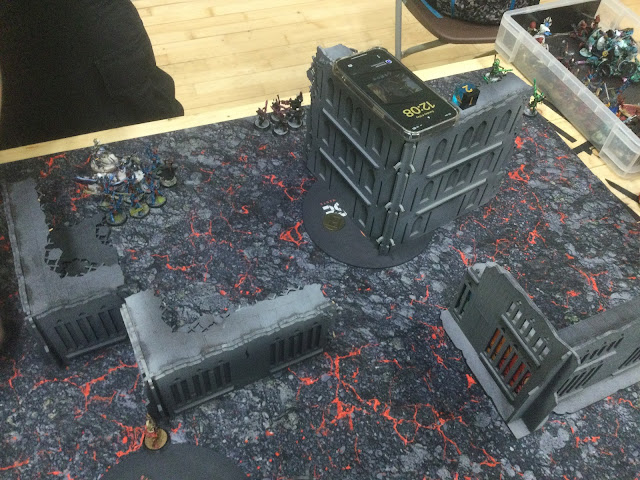
As a slight aside I forgot my normal tablet to take pictures for day one, so there's a few less than normal in less quality image for first 3 games. If it this angers you and makes you scream for blood A - Scroll down to game 4, B - Your probably excited/distraught about the new World Eater book.
Round 1 - v The Morehamster's. Opponent was Andy Hough's CSM.
Mission - Sweeping Engagment, Swift Action, Terraform.
Pills and Coke. (1990 Points)
Chaos Space Marines
Creations of Bile
Strike Force (2000 Points)
CHARACTERS
Chaos Lord (125 Points)
• 1x Daemon hammer
• 1x Plasma pistol
• Enhancements: Prime Test Subject
Cypher (90 Points)
• 1x Cypher’s bolt pistol
• 1x Cypher’s plasma pistol
Fabius Bile (85 Points)
• 1x Fabius Bile
◦ 1x Chirurgeon
◦ 1x Rod of Torment
◦ 1x Xyclos Needler
• 1x Surgeon Acolyte
◦ 1x Surgeon Acolyte’s tools
BATTLELINE
Cultist Mob (50 Points)
• 1x Cultist Champion
◦ 1x Bolt pistol
◦ 1x Brutal assault weapon
• 9x Chaos Cultist
◦ 9x Autopistol
◦ 9x Brutal assault weapon
Legionaries (90 Points)
• 1x Aspiring Champion
◦ 1x Chaos Icon
◦ 1x Close combat weapon
◦ 1x Heavy melee weapon
◦ 1x Plasma pistol
• 4x Legionary
◦ 2x Astartes chainsword
◦ 4x Bolt pistol
◦ 4x Close combat weapon
◦ 1x Heavy melee weapon
◦ 1x Lascannon
Legionaries (90 Points)
• 1x Aspiring Champion
◦ 1x Chaos Icon
◦ 1x Close combat weapon
◦ 1x Heavy melee weapon
◦ 1x Plasma pistol
• 4x Legionary
◦ 2x Astartes chainsword
◦ 4x Bolt pistol
◦ 4x Close combat weapon
◦ 1x Heavy melee weapon
◦ 1x Lascannon
Legionaries (90 Points)
• 1x Aspiring Champion
◦ 1x Chaos Icon
◦ 1x Close combat weapon
◦ 1x Heavy melee weapon
◦ 1x Plasma pistol
• 4x Legionary
◦ 2x Astartes chainsword
◦ 4x Bolt pistol
◦ 4x Close combat weapon
◦ 1x Heavy melee weapon
◦ 1x Lascannon
Legionaries (90 Points)
• 1x Aspiring Champion
◦ 1x Chaos Icon
◦ 1x Close combat weapon
◦ 1x Heavy melee weapon
◦ 1x Plasma pistol
• 4x Legionary
◦ 2x Astartes chainsword
◦ 4x Bolt pistol
◦ 4x Close combat weapon
◦ 1x Heavy melee weapon
◦ 1x Lascannon
DEDICATED TRANSPORTS
Chaos Rhino (75 Points)
• 1x Armoured tracks
• 1x Combi-bolter
• 1x Combi-weapon
• 1x Havoc launcher
Chaos Rhino (75 Points)
• 1x Armoured tracks
• 1x Combi-bolter
• 1x Combi-weapon
• 1x Havoc launcher
Chaos Rhino (75 Points)
• 1x Armoured tracks
• 1x Combi-bolter
• 1x Combi-weapon
• 1x Havoc launcher
OTHER DATASHEETS
Chaos Bikers (70 Points)
• 1x Biker Champion
◦ 1x Chaos Icon
◦ 1x Close combat weapon
◦ 1x Combi-bolter
◦ 1x Power fist
• 2x Chaos Biker
◦ 2x Astartes chainsword
◦ 2x Close combat weapon
◦ 2x Combi-bolter
◦ 2x Plasma gun
Chaos Predator Destructor (140 Points)
• 1x Armoured tracks
• 1x Combi-weapon
• 1x Havoc launcher
• 2x Lascannon
• 1x Predator autocannon
Chaos Predator Destructor (140 Points)
• 1x Armoured tracks
• 1x Combi-weapon
• 1x Havoc launcher
• 2x Lascannon
• 1x Predator autocannon
Chosen (250 Points)
• 1x Chosen Champion
◦ 1x Bolt pistol
◦ 1x Combi-weapon
◦ 1x Power fist
• 9x Chosen
◦ 8x Accursed weapon
◦ 7x Bolt pistol
◦ 6x Boltgun
◦ 3x Combi-weapon
◦ 2x Plasma pistol
◦ 1x Power fist
Possessed (240 Points)
• 1x Possessed Champion
◦ 1x Hideous mutations
Chaos icon
• 9x Possessed
◦ 9x Hideous mutations
Warp Talons (125 Points)
• 1x Warp Talon Champion
◦ 1x Warp claws
• 4x Warp Talon
◦ 4x Warp claws
ALLIED UNITS
Nurglings (35 Points)
• 3x Nurgling Swarm
◦ 3x Diseased claws and teeth
Poxbringer (55 Points)
• 1x Foul balesword
Pregame thoughts - So I had put this down as favoured on our matrix despite it being a similar mirror match. Having rejected Creation of Bile as a option personally - I couldn't then say its a better list! On a more important note - both of us have 2 big murder blocks (Possessed/Chosen) but I outshoot having two Vindicators (and better support for Predators) whilst not being outpunched (infact without any characters in my units my Possessed hit considerably harder on their go turn than my opponents.) Whilst CoB has a few more trading pieces and characters I felt confident that I could use my superior ranged firepower to make sure I won the trade war and force his big units to commit first, counter attack with my Possessed and then push to take the win.
 |
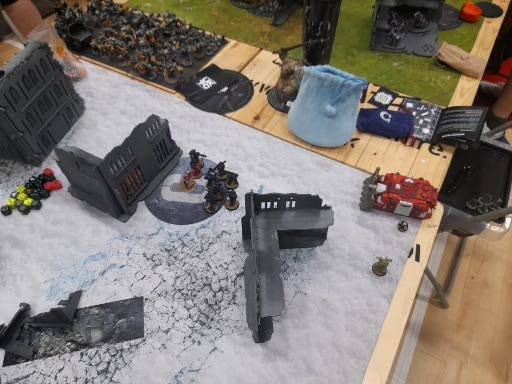
| PBZ deployment after little bit of movement - 1 Vindicator in reserve (which is very standard.) Rhino with Legionnaires moves up to take objective. |
 |
| I don't think I can hold the right objective yet so a Rhino moves around to better contest it whilst not putting any bodies on the point - I'm not too worries about my tanks getting taken out at range so Predator moves up to get some pot-shots into opponents lines. |
 |
| Creations of Bile deployment - they lost two Bikes to my shooting T1, I'd hoped to kill all 3 to deny them an asset to contest but alas not to be. |
 |
| Was without normal device to take pictures so bit lax on day 1 - Bile had an equally cagey T1, getting a few shots at my Rhino with a Predator and moving up to deny primary on left objective. My turn 2 I move up to start trading war properly putting bodies on all 3 objectives. |
 |
| Some early luck on the left flank as opponents Legionnaires can't kill my bikers and take a few out making the job killing back much easier. |
 |
| Some early plays on the right flank - I send my Warp Talons at the last Biker and Rhino after its been shot to a single wound by the Predator. The Talons take out both and return to reserve but not before they stop the Legionnaires disembarking onto the objective. I park my Rhino and Predator just short of the objective - Legionnaires hold it by walking on and I stop them getting re-roll wounds onto the tanks. If they kill the Rhino in combat I might be able to steal the objective with my disembark, if not I can get the charge. |
 |
| With both sides having 2 large kill units both of us are content to sit and wait for opponent to make first move. I'm feeling some pressure from team environment to push, but I do have to wait for the Possessed/Chosen on the other side to show themselves. |
 |
| Warp Talons come into the middle to fight my Legionnaires whilst opponents Legionnaires come forward to fight my armour. Warp Talons Rapid Ingress back on my right flank in response to keep the pressure up. I'm a bit low on units that can take the objective when opponent has Bile's Chosen close by but I need to keep the pressure on as long as possible. |
 |
| Situation is reversed on the other flank - opponent is down to their last Legionnaire unit and Rhino. |
 |
| A bit of early luck as opponents Warp Talons low roll into my Legionnaires - I end up with the objective to hold primary and stop the Talons from teleporting away. |
 |
| On the right flank the two Legionnaires scratch up my Predator/Rhino but both survive. I move my tanks and Talons up to Respond as end up destroying both Legionnaires and the Lord - sadly I kill the Lords squad in shooting rather needlessly and avoidably and the Talons can't charge and are left vulnerable. Still overkill is a good problem to have. |
 |
| It does mean that Bile has to take the fray with trading pieces gone and with CoB down on the score slightly. |
 |
| Similarly on my left flank opponents Possessed have to commit to stop the bleeding from trading, they take the point, kill the Nemesis claw but leave the Predator on a single wound. |
 |
| I don't need to commit both squads of Possessed to win from here - but I do. The Blue squad on the left goes to kill the CoB Possessed, detonating the squad in a barrage of Dev wounds. The Red squad commit to ensure Bile can't take the Centre without committing, well Bile's chosen squad but.... |
 |
| With the battle still raging on the Right flank Bile can't abandon the objective without surrendering the objective to my tanks (that back up so they can't be charged without Bile leaving the objective.) |
 |
| Bile wins the right flank, but my Vindicator backs up - Bile's Chosen can either hold the objective, charge the Vindicator or try and kill my Possessed in the middle and watch my Vindicator walk onto the objective. |
 |
| Bile ends up holding the right flank - My Possessed make a play for CoB home objective to push the differential and last turn is a scrap for points with the game already won for PBZ. |
Final Score - 79-59 win for Pactbound Zealots (13-7)
Team Score - 71-29 Win (4 Wins and a draw.)
Postgame thoughts - So if this was a singles game this would have been perfect. Largely controlled the tempo of the game and was able to ensure the result was going my way early. That said in teams I was a bit disappointed I couldn't push this up another point or two - it didn't make a material difference in the round, we won more than comfortably enough but I felt this was a better match up. What probably made the difference was the mistake in overkilling the Lord on the right flank in shooting - I wanted to be sure it didn't spike saves and Grenaded him down to a wound and then shot him with a plasma pistol - thinking he had 2 wounds rather than one. Not killing him means Warp Talons charge, kill him and Rapid Ingress next turn to take CoB home objective and push the differential. Not a big mistake in the grand scheme of things, but a learning to take away none the less. Otherwise there weren't any realistic chances to push the score - neither of us want to commit our Possessed/Chosen first for fear of getting blown out. Happy with the win and great to start tournament with a solid performance from everyone.
Round 2 v What a Sad Little Life, Jane. Opponent was Christoph Green's GSC.
Mission - Crucible of Battle, Smoke and Mirrors, Purge the Foe.
"Because you have all the grace of a reversing dump truck without any tyres on."
+++++++++++++++++++++++++++++++++++++++++++++++
+ FACTION KEYWORD: Xenos - Genestealer Cults
+ DETACHMENT: Biosanctic Broodsurge
+ TOTAL ARMY POINTS: 2000pts
+
+ WARLORD: Char6: Patriarch
+ ENHANCEMENT: Predatory Instincts (on Char1: Abominant)
& Biomorph Adaption (on Char6: Patriarch)
+ NUMBER OF UNITS: 22
+ SECONDARY: - Bring It Down: (3x2) - Assassination: 7 Characters
+++++++++++++++++++++++++++++++++++++++++++++++
Char1: 1x Abominant (115 pts): Power sledgehammer
Enhancement: Predatory Instincts (+20 pts)
Char2: 1x Abominant (95 pts): Power sledgehammer
Char3: 1x Abominant (95 pts): Power sledgehammer
Char4: 1x Biophagus (50 pts): Alchemicus familiar, Autopistol, Chemical vials, Injector goad
Char5: 1x Kelermorph (60 pts): Close combat weapon, Liberator autostubs
Char6: 1x Patriarch (100 pts): Warlord, Patriarch's claws
Enhancement: Biomorph Adaption (+25 pts)
Char7: 1x Reductus Saboteur (65 pts): Autopistol, Close combat weapon, Demolition charges, Remote explosives
5x Acolyte Hybrids with Autopistols (65 pts)
• 4x Acolyte Hybrid
1 with Cult icon, Acolyte Hybrid, Cult claws and knife
3 with Acolyte Hybrid, Heavy Mining Tool
• 1x Acolyte Leader: Autopistol, Leader's Bio-weapons
5x Acolyte Hybrids with Hand Flamers (70 pts)
• 1x Acolyte Leader: Hand flamer, Leader's bio-weapons
• 4x Acolyte Hybrid: 4 with Cult claws and knife, Hand flamer
5x Acolyte Hybrids with Hand Flamers (70 pts)
• 1x Acolyte Leader: Hand flamer, Leader's bio-weapons
• 4x Acolyte Hybrid: 4 with Cult claws and knife, Hand flamer
5x Acolyte Hybrids with Hand Flamers (70 pts)
• 1x Acolyte Leader: Hand flamer, Leader's bio-weapons
• 4x Acolyte Hybrid: 4 with Cult claws and knife, Hand flamer
10x Neophyte Hybrids (65 pts)
• 9x Neophyte Hybrid
1 with Neophyte Hybrid, Autopistol, Close combat weapon, Seismic Cannon
1 with Neophyte Hybrid, Autopistol, Close combat weapon, Heavy stubber
4 with Neophyte Hybrid, Autopistol, Close combat weapon, Hybrid firearm
1 with Cult Icon, Neophyte Hybrid, Autopistol, Close combat weapon, Hybrid firearm
1 with Neophyte Hybrid, Autopistol, Close combat weapon, Webber
1 with Neophyte Hybrid, Autopistol, Close combat weapon, Flamer
• 1x Neophyte Leader: Autopistol, Close combat weapon, Hybrid firearm
5x Aberrants (135 pts)
• 1x Aberrant Hypermorph: Aberrant weapons
• 4x Aberrant: 4 with Aberrant weapons
5x Aberrants (135 pts)
• 1x Aberrant Hypermorph: Aberrant weapons
• 4x Aberrant: 4 with Aberrant weapons
5x Aberrants (135 pts)
• 1x Aberrant Hypermorph: Aberrant weapons
• 4x Aberrant: 4 with Aberrant weapons
10x Hybrid Metamorphs (160 pts)
• 9x Hybrid Metamorph
1 with Cult icon, Hybrid Metamorph, Metamorph mutations
8 with Hybrid Metamorph, Hand flamer, Metamorph mutations
• 1x Metamorph Leader: Leader's Bio-weapons, Hand flamer
5x Purestrain Genestealers (75 pts): 5 with Cult claws and talons
5x Purestrain Genestealers (75 pts): 5 with Cult claws and talons
5x Purestrain Genestealers (75 pts): 5 with Cult claws and talons
1x Achilles Ridgerunners (85 pts): Spotter, Armoured hull, Twin heavy stubber, Heavy mortar
1x Goliath Rockgrinder (120 pts): Demolition charge cache, Drilldozer blade, Heavy stubber, Clearance incinerator
1x Goliath Truck (85 pts): Demolition charge cache, Goliath wheels, Heavy stubber, Twin autocannon
Pregame thoughts - So put this as mild favourable match up - most missions I wouldn't fancy GSC and put it as a draw but Purge the Foe obviously helps that out with its kill more element. The other big favour I had in this was ranged firepower - GSC have lots of ways to take out infantry with their flamers and AP buffs but Twin Autocannon being the extent of things that could take out my tanks meant I could deploy them aggressively right off the back. I 'lost' the roll off to go first which was excellent as well - I could take things slow, grind out points - stay even on hold/hold more and slowly go ahead on kill/kill more whilst aggressively discarding secondaries for better draws.
 |
| Bottom right flank - GSC line up trade pieces opposite the objective. |
 |
| Main GSC deployment hiding behind the centre L. They win first turn draw Marked for Death/Assassinate, discard them both, and end the turn with no shots or movement. |
 |
| CSM turn one - I was able to deploy my tanks aggressively given the lack of GSC shooting so I move forward a Rhino onto the objective to force some units forward and pass the turn pretty much straight back to GSC. |
 |
| End of GSC turn two as the bold decision is taken to actually fight in 40k. You can see a bit of my deployment and how I pushed a few tanks up to threaten overwatch if needed (which I took to kill two Genestealers from a Predator.) I leave objection 1 at the top without anything on in my turn thinking I won't hold more anyway, but as it happens GSC blow up my rhino on the south right and I have to emergency disembark onto the objective meaning I control it in my turn but don't get control more. |
 |
| Two turn - Tanks move around, trying to balance screening and pushing forward. I'm aware its opening up multi-charge from reserve shenanigans which GSC can abuse to get up to +4 charge from DS but my infantry are safe. |
 |
| Bit of a mistake here - I move up a Legionnaire squad to charge, before getting spooked by HI Genestealers and leaving them their (another squad behind the right wall.) However GSC can't HI and interrupt (with other combats going on) so I could have charged the truck and still hit before any HI unit. Bikers in the middle clear the centre objective for CSM and GSC start to hit back in their turn. |
 |
| At the back a mortar unit sends out extra AP on demand. |
 |
| Biker expertly dodges and weaves it survive against the Goliath trucks nasty combat, only to fail its battle shock and die in the fall back. |
 |
| GSC have relatively limited shooting so I Rapid Ingress my Warp Talons aggressively to threaten GSC home objective and potentially nil their primary but a couple of stubbers and indirect ends up taking out 3 |
 |
| Overview going into CSM shooting turn 3. Warp Talon move up take GSC home objective and GSC have to Rapid Ingress a Aberrant unit to defend it meaning they can't pressure anything on my side of the table. I start to move up Possessed to try and up the Pressure on GSC who are slightly behind on primary already - they feel behind on attrition but they resurrect 10 Aberrant to stay in the fight. |
 |
| Having already been killed once the Abominant just clings to life - GSC resource on their flank are stretched and they don't hold the objective. |
 |
| Possessed charge in the middle to clear it and tag units. Out of shot Warp Talons are killed by the HI from the Abberants that Rapid Ingress's in to stop a nil primary. |
 |
| Abberants come back and make a 9 DS charge to take out my rhino on south Right flank as Cypher moves up to take out the Abominant and a lone Acolyte to keep CSM ticking over kill more. |
 |
| GSC commit metamorphs to the Possessed and manage to take them out, before they are killed by the CSM counter attack and the next Possessed unit move up to again threaten GSC home objective. CSM are well ahead on primary, leading on secondary and have end of game scoring in their favour. |
 |
| A lone Genestealer on the bottom right hides to ensure it can't give up any easy kills for CSM but GSC are pretty much out of punch. |
 |
| GSC make one last foray into the middle, Cypher just about survives the Abberants before CSM max their score in turn 5. |
Final Score - CSM win 100 - 61 (17-3)
Team Score - 66 - 34 win (3 wins, 1 loss, 1 draw.)
Postgame thoughts - Very happy with this, 17-3 was more than I was expecting, pushed by going second and GSC effectively having to give up a turn to avoid giving up some easy kills. Otherwise play was solid and was able to stop GSC putting any pressure on my half of the table, the mission did mean they didn't need to but they had models on 3/5 objectives over the game whilst I managed to be on all 5 which felt like a good barometer of how the game went (and also GSC of all armies failed to get engage.) As a team we had played before and had lost to them previously so reversing our fortune to end up with a solid win (boosted by Byron smashing Aeldair 19-1 in particular) was really nice.
Round 3 v Bad Moon Brawlers. Opponent Charlie Bullock's Death Guard
Mission - Search and Destroy, Hidden Supplies, Take and Hold.
Death Guard
> Plague Company
> Strike Force (2000 Points)
>
> CHARACTERS
>
> Biologus Putrifier (75 Points)
> • 1x Hyper blight grenades
> • 1x Injector pistol
> • 1x Plague knives
> • Enhancements: Shamblerot
>
> Foul Blightspawn (60 Points)
> • 1x Close combat weapon
> • 1x Plague sprayer
>
> Lord of Contagion (95 Points)
> • 1x Plagueblade
> • Enhancements: Deadly Pathogen
>
> Mortarion (300 Points)
> • Warlord
> • 1x Rotwind
> • 1x Silence
> • 1x The Lantern
>
> Typhus (80 Points)
> • 1x Master-crafted manreaper
>
> BATTLELINE
>
> Plague Marines (180 Points)
> • 1x Plague Champion
> ◦ 1x Heavy plague weapon
> ◦ 1x Plasma gun
> • 9x Plague Marine
> ◦ 1x Blight launcher
> ◦ 4x Heavy plague weapon
> ◦ 2x Meltagun
> ◦ 9x Plague knives
> ◦ 2x Plague spewer
>
> DEDICATED TRANSPORTS
>
> Death Guard Rhino (75 Points)
> • 1x Armoured tracks
> • 1x Havoc launcher
> • 1x Plague combi-bolter
> • 1x Plague combi-bolter
>
> OTHER DATASHEETS
>
> Death Guard Cultists (50 Points)
> • 1x Death Guard Cultist Champion
> ◦ 1x Brutal assault weapon
> ◦ 1x Cultist firearm
> • 9x Death Guard Cultist
> ◦ 9x Brutal assault weapon
> ◦ 9x Cultist firearm
>
> Death Guard Predator Destructor (140 Points)
> • 1x Armoured tracks
> • 1x Havoc launcher
> • 2x Lascannon
> • 1x Plague combi-bolter
> • 1x Predator autocannon
>
> Death Guard Predator Destructor (140 Points)
> • 1x Armoured tracks
> • 1x Havoc launcher
> • 2x Lascannon
> • 1x Plague combi-bolter
> • 1x Predator autocannon
>
> Death Guard Predator Destructor (140 Points)
> • 1x Armoured tracks
> • 1x Havoc launcher
> • 2x Lascannon
> • 1x Plague combi-bolter
> • 1x Predator autocannon
>
> Deathshroud Terminators (110 Points)
> • 1x Deathshroud Champion
> ◦ 1x Manreaper
> ◦ 2x Plaguespurt gauntlet
> • 2x Deathshroud Terminator
> ◦ 2x Manreaper
> ◦ 2x Plaguespurt gauntlet
>
> Foetid Bloat-Drone (90 Points)
> • 1x Fleshmower
> • 1x Plague probe
>
> Foetid Bloat-Drone (90 Points)
> • 1x Plague probe
> • 2x Plaguespitter
>
> Foetid Bloat-Drone (90 Points)
> • 1x Plague probe
> • 2x Plaguespitter
>
> ALLIED UNITS
Rotigus ****
Nurglings ****
**** As a minor note - On BCP ATOW opponents list shows with allied units as 2 Karnivores. At the time we played opponent had Rotigus and a Nurglings squad (I think the rest of the list was unchanged.) As this became illegal due the FAQ from the new but unreleased DG codex banning demons from the Index DG despite the new book not being out yet opponents list was not technically valid at time we played. A judge had a chat with Byron as team captain who confirmed it was ok to play with the Rotigus list as it was without any penalties and I presume the list was changed for day 2 with Karnivores replacing the Demon allies.
Pregame thoughts - So having being on both sides of CSM and DG match ups I was confident about this and put it as favoured (despite having often put CSM as favoured in DG match ups in previous event.) Reason for this was simple - Nemesis claw and Cypher. DG had the firepower to at least compete in ranged match's but their ability to push was going to limited as the Possessed could detonate any unit DG put out and Cypher/Nemesis claw could prevent interrupts and -1 damage allowing me to set up a bit swing turn much easier than DG. Combined that with the extra speed I had and marginal ranged advantage I had (particularly against tanks) meant I felt confident about the match up despite some real nasty threats. Standard game plan applied - use Legionnaires to set up trades, draw out the big stuff and crush it with Possessed.
 |
| CSM deployment - Bikers and a Rhino on opposite flanks to contest objectives (one Vindicator in reserve as natural.) Nemesis claw Rhino in the middle near Cypher to help counter DG pushes. |
 |
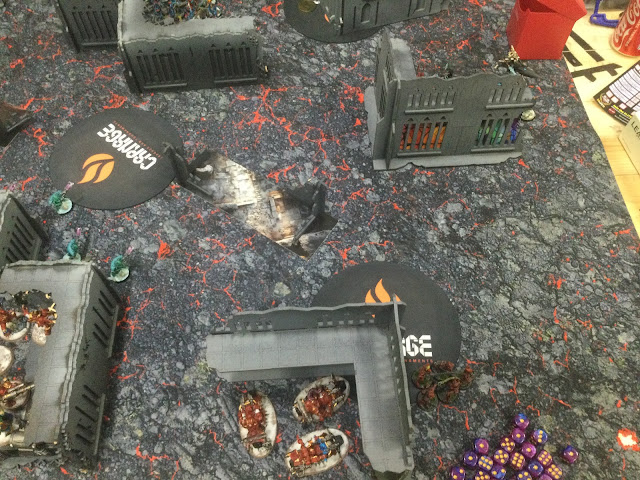
| Ghostly Death Guard line up with Morty and Rotigus in the middle, Drones Predators on the flanks and Fights first PM in the Rhino on right of shot. |
 |
| DG Reserve a Predator and Lord of Contagion, all my powered armour bodies in the Rhino carefully dumped on the side-line as well. |
 |
| DG won first turn and moved up aggressively. I decide to respond immediately with maximum violence. I soften up both Rotigus and the Plague Drone in the middle with some shooting before sending in the Possessed and a Legionnaires squad at the pair (both under Cyphers aura to stop any DG shenanigans) |
 |
| I can't stop Morty from HI but I don't mind - Possessed still get to swing first into Rotigus and it means Morties tied up for at least 3 rounds of combat unable to move. Possessed tear Rotigus into a million pieces (I think it was 24 dev wounds) and Legionnaires take out the Drone as well. The only downside is Warp Talons fail to deal 5 wounds to softened up Nurglings and have to stay in the open. |
 |
| Bikers hid from DG guns but it allows DG to take the objective driving on with a Predator. |
 |
| A drone hides from my guns - I had wanted to try and target the Predators early but the amount of high toughness bodies in the middle meant I could never prioritise them as a target and had to let them blast away for most of the battle. |
 |
| I was about to delete this picture as it only showed that left flank hadn't been up to much, but I accidently selected all and briefly deleted everything on this which was a heart in mouth moment to see if Ctrl + Z worked. |
 |
| CSM had hit early incredibly hard but DG hit back - blasting away the Warp Talons allowing Typhus and Deathshroud to charge Cypher and take him out before consolidating back onto objective. I fall back Possessed from Morty who deal a bonus 8-10 damage to him without any buffs in DG's turn! |
 |
| After Possessed softened up Morty I move my tanks upfield and they manage to blast both Morty and Typhus off the table - anything on the middle two objectives just getting obliterated by both sides. |
 |
| The flanks are much scrappier, I'm just able to beat DG's control to stop them scoring but don't deal any damage as Predators are free to search for targets. |
 |
| DG are almost out of units to put on objectives - I pin a Predator with a Rhino after leaving its cargo on the objective. The Predator can't shoot the Legionnaires to allow me to wrack up primary. The Possessed commit to the middle to try and overwhelm Predators. |
 |
| CSM Predator tank shocks its DG counterpart to hold the right as the armour collides head on. |
 |
| Possessed moving up was a mistake - I was trying to push the differential at this stage and they could have waited out the Plague Marine squad - instead they get charged and only 1 survives the charge. |
 |
| Tanks keep charging into each other - this time DG to take the objective. My firepower unleashes on the Plague Marines leaving just the two characters as I still can't free myself to target the Predators. |
 |
| Still primary is starting to roll in from the left side - the DG Predator keeps picking up units but can't help on the scoreboard. |
 |
| Its not the most enthralling combat ever, but the fact its going on is very important! |
 |
| DG run out of units to contest at last as CSM take two turns of max primary to end the game. DG keep scrapping away at points though to stop CSM running away with the margin. |
Final Result - CSM win 94 - 73 (14 -6)
Team Result - We Win 69 -31 (4 Wins and a Draw)
Postgame thoughts - Little bit similar to game 1 - In Singles would have been very happy with the result, but in the context of teams there was some mild frustration, which I think mostly has to be credited to Charlie. I dealt what felt like hammer blow after hammer blow at DG - taking out Rotigus and Morty by end of my turn 2 shooting phase felt like I should be on for a big blowout but DG ended up hyper focusing on what they could accomplice to stop the bleeding in points, denying me primary over and again and not getting focused on trying to stop everything and managing to tread water rather than getting completely overwhelmed. I can't recall any big mistakes I made - the second Possessed squad were wasted but it did draw out the Plague marine squad. I could have done the same thing with the Nemesis claw who ended up being 'saved just in case' for a occasion that never arose, but it only realistically made a 2 VP difference and if Plague Marines commit to the battle for the right flank then my Possessed can go after DG home objective - more upside, same downside in the way I played even if it didn't feel great and does give a potential problem if my shooting low rolls into the Plague marines. Still 3-0 was a great way to end the day.
Round 4 v Carnage, opponent was Jacob Whitehouse's Aeldari.
Mission - Search and Destroy, Prepared Positions, Linchpin.
Devoted of Ynnead
Strike Force (2000 Points)
CHARACTERS
Autarch (75 Points)
• 1x Dragon fusion gun
• 1x Star glaive
The Visarch (90 Points)
• 1x Asu-var
Ynnari Archon (85 Points)
• 1x Blast pistol
• 1x Huskblade
• 1x Shadow Field
• Enhancements: Borrowed Vigour
Yvraine (100 Points)
• Warlord
• 1x Kha-vir
• 1x Storm of Whispers
BATTLELINE
Storm Guardians (100 Points)
• 10x Storm Guardian
◦ 8x Close combat weapon
◦ 2x Flamer
◦ 2x Fusion gun
◦ 2x Power sword
◦ 6x Shuriken pistol
• 1x Serpent’s Scale Platform
◦ 1x Close combat weapon
◦ 1x Serpent shield
Ynnari Kabalite Warriors (110 Points)
• 1x Sybarite
◦ 1x Blast pistol
◦ 1x Phantasm grenade launcher
◦ 1x Sybarite weapon
• 9x Kabalite Warrior
◦ 1x Blaster
◦ 9x Close combat weapon
◦ 1x Dark lance
◦ 1x Shredder
◦ 1x Splinter cannon
◦ 5x Splinter rifle
DEDICATED TRANSPORTS
Ynnari Venom (70 Points)
• 1x Bladevanes
• 1x Splinter cannon
• 1x Splinter cannon
OTHER DATASHEETS
Dark Reapers (90 Points)
• 1x Aspect Shrine Token
• 1x Dark Reaper Exarch
◦ 1x Close combat weapon
◦ 1x Missile launcher
• 4x Dark Reaper
◦ 4x Close combat weapon
◦ 4x Reaper launcher
Dark Reapers (90 Points)
• 1x Aspect Shrine Token
• 1x Dark Reaper Exarch
◦ 1x Close combat weapon
◦ 1x Missile launcher
• 4x Dark Reaper
◦ 4x Close combat weapon
◦ 4x Reaper launcher
Dark Reapers (90 Points)
• 1x Aspect Shrine Token
• 1x Dark Reaper Exarch
◦ 1x Close combat weapon
◦ 1x Missile launcher
• 4x Dark Reaper
◦ 4x Close combat weapon
◦ 4x Reaper launcher
Fire Dragons (110 Points)
• 1x Aspect Shrine Token
• 1x Fire Dragon Exarch
◦ 1x Close combat weapon
◦ 1x Exarch’s Dragon fusion gun
• 4x Fire Dragon
◦ 4x Close combat weapon
◦ 4x Dragon fusion gun
Fire Dragons (110 Points)
• 1x Aspect Shrine Token
• 1x Fire Dragon Exarch
◦ 1x Close combat weapon
◦ 1x Exarch’s Dragon fusion gun
• 4x Fire Dragon
◦ 4x Close combat weapon
◦ 4x Dragon fusion gun
Fire Dragons (110 Points)
• 1x Aspect Shrine Token
• 1x Fire Dragon Exarch
◦ 1x Close combat weapon
◦ 1x Exarch’s Dragon fusion gun
• 4x Fire Dragon
◦ 4x Close combat weapon
◦ 4x Dragon fusion gun
Howling Banshees (90 Points)
• 1x Aspect Shrine Token
• 1x Howling Banshee Exarch
◦ 1x Mirrorswords
• 4x Howling Banshee
◦ 4x Banshee blade
◦ 4x Shuriken pistol
Rangers (55 Points)
• 5x Ranger
◦ 5x Close combat weapon
◦ 5x Long rifle
◦ 5x Shuriken pistol
Rangers (55 Points)
• 5x Ranger
◦ 5x Close combat weapon
◦ 5x Long rifle
◦ 5x Shuriken pistol
Striking Scorpions (85 Points)
• 1x Aspect Shrine Token
• 1x Striking Scorpion Exarch
◦ 1x Scorpion chainsword
◦ 1x Scorpion’s claw
◦ 1x Shuriken pistol
• 4x Striking Scorpion
◦ 4x Scorpion chainsword
◦ 4x Shuriken pistol
Warlock Skyrunners (45 Points)
• 1x Destructor
• 1x Shuriken pistol
• 1x Twin shuriken catapult
• 1x Witchblade
Warp Spiders (95 Points)
• 1x Aspect Shrine Token
• 1x Warp Spider Exarch
◦ 1x Close combat weapon
◦ 1x Death weavers
◦ 1x Spinneret rifle
• 4x Warp Spider
◦ 4x Close combat weapon
◦ 4x Death spinner
Warp Spiders (95 Points)
• 1x Aspect Shrine Token
• 1x Warp Spider Exarch
◦ 1x Close combat weapon
◦ 1x Death weavers
◦ 1x Spinneret rifle
• 4x Warp Spider
◦ 4x Close combat weapon
◦ 4x Death spinner
Warp Spiders (95 Points)
• 1x Aspect Shrine Token
• 1x Warp Spider Exarch
◦ 1x Close combat weapon
◦ 1x Death weavers
◦ 1x Spinneret rifle
• 4x Warp Spider
◦ 4x Close combat weapon
◦ 4x Death spinner
Ynnari Incubi (150 Points)
• 1x Klaivex
◦ 1x Demiklaives
• 9x Incubi
◦ 9x Klaive
Pregame thoughts - So I had this down as unfavoured - Pushing into Possessed into Incubi, Fire Dragons and particularly Fire Dragons is a recipe for disaster and Ynnari are so MSU that baiting things out with Legionnaires wasn't an option. That said 20 Possessed still requires alot of effort, so I can have one big go turn if needed. That said the gameplan here was mostly decided by the team - I ended up having to take the hit of an unfavoured so we got a much better pairings overall - I think the exact trade was we got to put our Chaos Daemons into Chaos Knights which we felt very confident about and I was hopeful that I could keep the Ynnari down to a less margin. With that in mind this was about being ultra conservative, giving Ynnari as few chances to pull of their various degrees of craziness which meant avoiding shooting at all costs unless I was prepare to accept something stupid would happen and keeping things tight at all times. Warp Talons were my ace in the whole here - pretty much a tailor made profile and datasheet for taking out Eldar so I wanted to keep them as safe as possible and use them as often as possible.
 |
| Mostly standard CSM deployment but few minor things I made sure off - one as many Cultists on the objective as possible (rather than screening out) and two tanks to stop any crazy Aeldari long moves onto my objective. Second Warp Talons positions around a sea of bodies and Possessed to protect them (and close to Cypher in case Warp Spiders teleport the threat of shoot back might at least make them think twice.) |
 |
| My usual camera back and a typically blurry shot of Eldar deployment - Striking Scorpions in middle to stop Possessed from charging upfield (not that I intended to) whilst a million MSU units hide behind walls. |
 |
| A rather less blurry side on shot of Eldar deployment. |
 |
| As was becoming typical T1 was very uneventful - Eldar went first, scored 2 secondaries whilst hiding and passed the turn. I did the same back the only exception of charging the Scorpions in the middle with my Talons who disappeared back into the Warp after. |
 |
| Rhino moves up on the left - partly to do Containment, partly to threaten Eldar objective and try and draw out some of their big guns. |
 |
| Turn 2 and its another very cagey one. Warp Spiders move up to hem Possessed behind the wall. |
 |
| Kabalites disembark from a hidden Venom and move up to deny CSM primary. |
 |
| Turn 2 for CSM - we almost finished this turn entirely before the table next to us had finished deploying. I disembark a Legionnaires squad to take out Rangers behind the wall. |
 |
| Warp Talons Rapid ingress at end of Eldar turn and move up to the Wall so Spiders can't overwatch them. Bikers as my most disposable move up to the middle to do Locus whilst Legionnaires disembark to right of shot to go kill the Kabalites. |
 |
| Bikers and tanks have the chance to shoot - I elect not to in order to avoid the potential of (deep breathe) reactive move away, bloodsurge, end of phase move, shoot back, sticky objective if I kill them and probably some other stuff I'm forgetting. |
 |
| Legionaries kill their respective targets and Eldar prepare the next wave of threats to come out. |
 |
| Warp Talons kill their targets and disappear back into reserve for the second time. |
 |
| Sure would be fun to use my tanks. Betters keep them rigidly in my deployment and make sure they can't shoot. I do poke them out the walls to try and limit Eldar rapid ingress and present overwatch threats (which aren't great profile into Aeldari bodies and can be ignored by at least force decisions.) |
 |
| A couple of units taken out by CSM but still double digit number of units for Aeldari to play with. |
 |
| Blurry pic as Banshees and Fire Dragons prepare to destroy the Rhino and charge the contents. |
 |
| Empty venom moves into the middle to force a CSM response. It shoots my Bikers with all of its shots getting sustained hits! |
 |
| Warp Spiders teleport across to fill my Legionnaires with a torrent of shuriken. |
 |
| There's a near moment of disaster for Aeldari when Fire Dragons leave the Rhino on two wounds. The Autarch ends up taking out the tank but it does force a couple of Aspect tokens. |
 |
| I rapid Ingress the Warp Talons to threaten a HI for when the Rhino died and disembark my squad as far away as possible, Aeldari end up just failing the charge to keep my squad alive. |
 |
| Warp Spiders kill enough Legionaries to take the objective although one survives to cleanse the objective whilst Cypher and last Biker charge the Venom. This might have been my go turn in singles but in teams I just want to keep this tight so keep trying to squeeze value from every asset for as long as possible to keep things close. Just about every CP has gone to redraw secondaries/Rapid Ingress Talons so far. |
 |
| I weigh up my options on the left. I can easily shoot both squads with my tanks designed to kill heavy armour and decide against it, much to Khorne's annoyance. I reason I can kill all Eldar squads visible in combat and not risk Ynnari shenanigans so for the third turn in a row I skip my shooting phase - pausing only to Grenade the banshees so make it a bit less painful for the Possessed (who have enough wounds to tank the fights first) |
 |
| Cypher and Biker take ou the Venom, Warp Talons kill the Fire Dragons that were next to the Banshees and disappear back to the Warp whilst Possessed roll well on their saves v the Banshees and kill them easily. |
 |
| Nemesis claw take out the Warp Spiders - I'm trading down a bit here (especially with Possessed) but I've been able to kill all the Aeldari units without shooting and letting them squeeze any primary in the middle or move a key unit away. |
 |
| Aeldari turn 4 and they have a few targets to kill. |
 |
| Storm Guardians led by Visarch/Yvraine move up to take out my Nemesis claw (Yvraine repositions and ends up killing Cypher in shooting.) |
 |
| Sure would be fun to shoot those fragile Eldar bodies wouldn't it boss? No you just have to provide OC on that objective in case Warp Talons fly across the table and kill the Cultists. Oh that sounds like fun boss. |
 |
| So far primary excluding home objective at Eldar's turn four is 5 points to them, 0 to me. Eldar are slightly ahead on secondaries as well but have bled more units thanks to Warp Talons. |
 |
| All Aeldari life is precious to them apparently, unless your Rangers or Warp Spiders sent out to slow CSM down. Fire Dragons and Reapers kill the majority of the Possessed unit but CSM retain control of the objective. |
 |
| Aeldari just fails to kill all the Nemesis claw and it means they can't move away with the Yvraine/Storm Guardian unit. I sent the Possessed after them - using their natural toughness to tank the fights first and using the Rhino to pin the Visarch so he can't add his damage to them. |
 |
| Ok fine - you can shoot! Too many Eldar bodies for my combat to deal with so I accept Ynnari will do some amount of bullshit in exchange for damage. |
 |
| Warp Talons don't have any great targets for a change - they move midfield for last turn (and potentially charge some Warp Spiders that end up getting cut down by the Vindicator.) CSM shooting isn't great leaving a few stragglers but its nice to have a shooting phase! |
 |
| Ynnari Incubi move up onto the objective at end of shooting phase, what a fun, fun mechanic. Possessed ignore them to charge the Yvraine blob. |
 |
| I have a choice to re-roll wounds here or in a Possessed combat with 3 reapers - and I elect not to here. I use their dev wounds and Ynnari are sent to Slaanesh (or have Ynnari souls escaped Slaanesh?) |
 |
| I use my re-roll wounds in the much less cinematic fight between 3 Possessed and a few Dark Reapers - it allows the Possessed to Pile into the next Reaper squad to stop them shooting and the extra movement allows some BEL lines to keep my comparatively struggling secondaries ticking over. |
 |
| Turn 5 is here is no time - Aeldari score their second non-home objective primary and take their revenge on my forward Possessed squad. |
 |
| CSM turn 5 is over equally quick with barley a dice rolled, thanks to end game scoring giving me a 15 and make it a 10-10 draw - I'm just behind on VP's and with nothing to lose I redraw Engage (which gives me a 1 point loss in singles and draw Area Denial - with 4 battle tanks pointing their guns at a lone fire dragon and Aeldari out of objective range with any move I get a technical second shooting phase! |
Final Score - CSM winning draw - 74-72 (10-10)
Team Score - 56-44 win (two wins, one loss two draws with Byron's 16-4 win over Chaos Knights the push we needed on the score to win an otherwise exactly mirrored scorecard.)
Postgame thoughts - Thrilled, pumped delighted. I'll start with the teams result as this was a huge win for us - it was clear with about half hour to ago it was going to be so tight to see if we could get to the 55 points we needed to secure the win. Having got 3-1-1 a few times at events fourth win was a real target for all of us we were all circling the last game (Custodes v Denis's Necrons) to see if Necrons could pick up enough points for the win - 7 would do it but it was clear Custodes were in control of the game and whenever I walked past the game was always 15-5ish. Eventually with time on the round called and judges starting to circle Denis played his last turn in about 20 seconds, getting his last turn scoring and moving some Tomb Blades almost the width of the board for some critical last last seconds points to to secure us just enough points to push a winning draw into a win and a celebratory lunch break. This was one were we got our pairings right (thanks to Hristo's matrix/pairing skills) and everyone played a big role in what was a big win for us as a team.
On a personal level - so many thoughts on the game. Was very happy to take the draw (and sneak the win in singles) in what was a bad match up. It wasn't an easy game to play - I've gotten much better over past 18 months or so at playing a patient slow game but still this a real test of patience, especially with Aeldari ahead at every point until the very last card draw. I really wanted a go turn earlier - especially with some justifiable pent up frustration and only having one actual shooting phase in the game, resulting in about 650 points of tanks collecting dust for most of the game and playing the sort of MSU trading game Ynnari excel in, especially as their secondary game is so much stronger than mine. Warp Talons was such a game changer in that - they've always been a unit for which their potential has been stronger than their impact on the game for me and this was the game they came good allowing me to chip away freely. So, so happy at the end of this, both personally and particularly as a team.
Round 5 v Team Sigil, opponent was Mickey Baird-Parker's Votann
Mission - Crucible of Battle, Inspired Leadership, Scorched Earth
Snow White and the 77 Dwarves (2000 Points)
Leagues of Votann
Oathband
Strike Force (2000 Points)
CHARACTERS
Einhyr Champion (80 Points)
• Warlord
• 1x Autoch-pattern combi-bolter
• 1x Mass hammer
• 1x Weavefield Crest
• Enhancements: Grim Demeanour
Einhyr Champion (80 Points)
• 1x Autoch-pattern combi-bolter
• 1x Darkstar axe
• 1x Weavefield Crest
• Enhancements: Appraising Glare
BATTLELINE
Hearthkyn Warriors (100 Points)
• 1x Theyn
◦ 1x Close combat weapon
◦ 1x EtaCarn plasma pistol
◦ 1x Kin melee weapon
◦ 1x Weavefield Crest
• 9x Hearthkyn Warrior
◦ 9x Autoch-pattern bolt pistol
◦ 7x Autoch-pattern bolter
◦ 9x Close combat weapon
◦ 1x Comms Array
◦ 1x HYLas auto rifle
◦ 1x HYLas rotary cannon
◦ 1x Medipack
◦ 1x Pan Spectral Scanner
DEDICATED TRANSPORTS
Sagitaur (115 Points)
• 1x Armoured wheels
• 1x HYLas beam cannon
• 1x Twin bolt cannon
Sagitaur (115 Points)
• 1x Armoured wheels
• 1x HYLas beam cannon
• 1x Twin bolt cannon
Sagitaur (115 Points)
• 1x Armoured wheels
• 1x HYLas beam cannon
• 1x Twin bolt cannon
OTHER DATASHEETS
Cthonian Beserks (200 Points)
• 10x Cthonian Beserk
◦ 10x Concussion maul
◦ 2x Mole grenade launcher
Cthonian Beserks (100 Points)
• 5x Cthonian Beserk
◦ 5x Concussion maul
◦ 1x Mole grenade launcher
Einhyr Hearthguard (320 Points)
• 1x Hesyr
◦ 1x Concussion hammer
◦ 1x Exo-armour grenade launcher
◦ 1x Teleport Crest
◦ 1x Volkanite disintegrator
• 9x Einhyr Hearthguard
◦ 9x Concussion gauntlet
◦ 9x Exo-armour grenade launcher
◦ 9x Volkanite disintegrator
Hekaton Land Fortress (225 Points)
• 1x Armoured wheels
• 1x MATR autocannon
• 1x Pan Spectral Scanner
• 1x SP heavy conversion beamer
• 2x Twin bolt cannon
Hernkyn Pioneers (180 Points)
• 6x Hernkyn Pioneer
◦ 6x Bolt revolver
◦ 6x Bolt shotgun
◦ 1x Comms Array
◦ 2x HYLas rotary cannon
◦ 6x Magna-coil autocannon
◦ 1x Pan Spectral Scanner
◦ 6x Plasma knife
◦ 1x Rollbar Searchlight
Hernkyn Pioneers (90 Points)
• 3x Hernkyn Pioneer
◦ 3x Bolt revolver
◦ 3x Bolt shotgun
◦ 1x HYLas rotary cannon
◦ 3x Magna-coil autocannon
◦ 1x Pan Spectral Scanner
◦ 3x Plasma knife
◦ 1x Rollbar Searchlight
Hernkyn Pioneers (90 Points)
• 3x Hernkyn Pioneer
◦ 3x Bolt revolver
◦ 3x Bolt shotgun
◦ 1x HYLas rotary cannon
◦ 3x Magna-coil autocannon
◦ 1x Pan Spectral Scanner
◦ 3x Plasma knife
◦ 1x Rollbar Searchlight
Hernkyn Yaegirs (90 Points)
• 1x Yaegir Theyn
◦ 1x Bolt revolver
◦ 1x Close combat weapon
◦ 1x Plasma knife
• 9x Hernkyn Yaegir
◦ 1x APM launcher
◦ 7x Bolt revolver
◦ 9x Close combat weapon
◦ 1x Magna-coil rifle
◦ 7x Plasma knife
Pregame thoughts: Ugh. So my matrix for this round was bleak and I had this as unfavourable/draw...which was possibly still my best. I've always struggled v Votann and on this mission which rather trivialises primary which means for second mission in a row its mostly a battle of secondaries and end of game scoring rather than fight in the middle. Even if that break out, Votann have excellent tools at detonating my Possessed as my primary pushing tools and very powerful, if unreliable anti-tank.
On top of those problems, there was another - my matrix was shocking, our teams was bad. As a hammer with a not double red match up I was given license/orders to go for it. We weren't favoured in our matrix so it was case of trying to go big somewhere for us to have a chance to win. So plan was to try and set up for a turn or two, then go big.
 |
| CSM deployment - way to Votann expansion objective is very open so Bikers start upfield without cover with lone opp strat to protect them. |
 |
| Warp Talons join Vindicator in reserve - Votann don't have great targets for them so rather them as a reactive threat rather than having to rely on a kill to get them back in reserve. |
 |
| Votann deployment - not that it matters much with all the scout. |
 |
| Votann go first - force me to Lone op the bikes that I want to keep as a piece to pressure Votann's objective in south right, and pass the turn. |
 |
| I forget about the reactive move though and can only get a charge into the Sagitaur instead of the Yaegirs - meaning the bikes play is pretty meaningless. |
 |
| Berserkers come to take out Legionnaires on the top - who had failed to take out a Warrior squad. |
 |
| Votann backfield after during their turn 2 movement phase. |
 |
| Votann take top objective - I've made a misplay at the top, although I hate why it is but its not the first time i've done it. What I should have done is line the wall with Rhino/Legionnaires , cover it in OC and make sure I'm effectively unchargable by being inch away. But I don't and its second tournament in a row I should have done this (see game 5 in last report although didn't realise it.) Its so gamey and I hate inch from the wall and I don't think people realise how uninteractive it makes games (and trivialises proper screening, keeps very samey play patterns), but its the right thing to do. |
 |
| I disembark a Legionnaires squad on bottom right and advance them 6 allowing them to charge the Yaegirs. |
 |
| Legionnaires up top again have to disembark into the open to take out Warriors and Berserkers - I meant to grenade the Berserkers to soften them up but forget to - I end up needing lots of CP later and their profile isn't great to be grenaded so its not a mistake per say, but its annoying to forget. |
 |
| Yaegirs get the chance to interrupt the Legionnaires but thanks to some truly heroic saves I take basically no damage and kill the squad back. |
 |
| They don't last long as Votann unleash their firepower (including bikers from top of shot) to take them out. |
 |
| Votann keeping the game slow and grindy, I'm ok with this in singles (although I'm behind on secondaries thanks to a real horror draw T1) but I need to push. I'm struggling to find a way to engage with the big Berserker unit A - Slowing my Possessed down and B - stopping my advance into the middle with their fight on death. |
 |
| I Rapid Ingress my Talons to threaten Votann's bottom right objective and the Berserks make a unexpected and long charge - whilst I'm sad to lose the Talons its a chance for me to press the accelerator and I take it as my time to go. |
 |
| Blue Possessed are slowed so they go for the closest target whilst red aim for the further Sagitar. Hearthguard rapid ingress in - safe baring a 11ish inch charge. |
 |
| I don't fancy dealing with Fights on death, and my Vindicators have no other targets so they combine with a Predator to blow away the Bezerkers whilst Nemesis claw go after some Warriors - I need to kill 3 to ensure I get the objective so I pact, fail it and lose one and really low roll into killing only 1 so Votann hold it. Very frustrating. |
 |
| Possessed both kill their Sagittars but a wall of Yellow guns lines them up. When the dust settles only one survives. |
 |
| Its the same story in the middle - Hearthguard line up what I think was infinite shots into the Possessed and charge them, leaving only one and taking the centre objective. My big push has failed, now its about ensuring I don't get bodied. |
 |
| I'm low on bodies, but I still have tanks. They charge upfield to retake the centre. I have my second frustrating incident on the bottom right objective as a Rhino tank shock low rolls (only slightly) leaving it tied with the Warrior on a stickied objective so can't take it back - it forces a save for glory (even pacting with it in combat) but again I can't stop Votann getting a 'bonus' 5 primary for the second time. |
 |
| Still my tanks stop the bleeding - whilst Votann have a large amount of points left, they can't use them for much other than secondaries and killing. I max my turn 5 primary and its time to count points. |
Votann win 77-70 (11-9)
Team loses the round 55-45.
Postgame thoughts - Aaaaaaaaaaaaaaaaaaaagh frustration on so many things. It became obvious quickly during the game this wasn't a round we could win - AM battered our GSC player 19-1 but Hristo managed a YOLO push in a double negative matchup against Necrons to win 14-6 to give us a shot at a draw. All 3 remaining games were tight (mission helping with that) and we ended up just losing. One more point across the games and we draw and finish third overall! In my game alone there were several big moments - 5 Warriors holding the objective for 2 turns against Nemesis and Rhino tank shocking /shooting combat was gut wrenching. One more mortal, one more failed save and both the game ends as a draw (and if Nemesis claw do their job first time a narrow win in singles.) Still I had my luck earlier, most notably when Legionnaires managed a 6 advance, into a 1 reactive move from Yaegirs and passing something like 9/10 5+ armour saves so whilst I'll keep the frustration at later, its at least tempered by knowledge that dice games do dice things. Still we gave it a real good crack against a very strong team in a matrix we hated so whilst we couldn't sneak a draw we kept our pride (and somewhat evened out against the 2 point win we had previous round.)
 |
| Didn't leave with a trophy but traditional post tournament cheap pizza and ice cream after making the long journey back home. |
So as a team we finished 10th out of 76 and no I didn't spend the journey back going over and over again thinking we were a point of third and a trophy/medal. At least I didn't feel compelled to go and write up about it after right? As induvial players Byron finished 25th out of 371 going unbeaten with 4 big wins and a draw, Hristo was 66th with 4 wins and a loss (and given he was our punching bag doubly impressive) I came 81st, Denis 96th with 3 Wins, draw and loss and came 207 with a rather impressive 1 win, 1 loss and 3 draws.
So I had mixed feelings about the list for teams. For singles - Love it, it plays really well on the front foot, has game on the back and has huge amount of damage and tech/tricks to really help solidify games. That said I was probably the week link in the teams - not in results per say but given the context of my role and the list for it. My list had two problems - it was too well rounded and its the wrong meta for it.
To take the second issue first - meta. Most of the origins of the lists dates back to lots of Necrons being around and dialling up damage to smash into big tough units to kill - Wraithes, Thunderwolfs, Eightbound and the like. Whilst they all exist in the meta to a certain extent Ynnari in particular as well as Guard don't care if your combat units damage and can obliterate my big units at range - the last two games were great examples, being essentially decided on secondary/meta team game plans rather than any battle over durable units on objectives which my list must prefers. Whilst World Eaters and in particular Death guard might change that (the later being a meta threat probably is a real boon to this list) the list feels a little outdated for current top threats - its ok into them and can hold its own but its not favoured.
Secondly too well rounded. Whilst that mean I could battle to close defeats, it meant my role as a hammer to push differentials was blunted. Whilst I won 3 games comfortably (and would have snuck a second in teams) they weren't complete blow outs. For comparison Byron our other Hammer Scored 20, 19, 18 and 16 in his wins and I needed to aim bigger. It didn't cost us day one, but having a match up in round 4/5 were I could go - cool, one big win for me in matrix meant we could have paired differently even if it meant throwing someone under the bus to scrap for a draw/close loss (similar to my role in round 4.) Bile is the easy answer - I still feel PBZ does Bile's list better but dropping a couple of tanks for more pressure feels like the answer I should have aimed for.
Still overall it was a really good event. We got our aim as a team and whilst there's a few what if's around we still have a very solid finish above some very good teams and its a good sign we are getting deeper into events - hopefully results keep continues to improve next time.
No event lined up for immediate future but super eager to try out the new DG and WE book (which I love the design of, even if RIP Angron.)
Thanks for reading!


Comments
Post a Comment