Death Guard are one of those armies that I don’t feel get enough credit for their form of tactical play. When people tend to talk about high-skill armies, they tend to mention fast, glass-cannon-type forces that focus on hiding and alpha-striking key targets. There’s nothing wrong with that approach in the slightest, but it feels like the play pattern is pretty much always the same to a large extent. If you make a mistake, you might lose a unit for sure, but you’re normally fast enough and have enough damage to recover anyway. In comparison, a mistake in deployment with Death Guard can be game-losing, as that unit might never be in a position to impact the game. The result is that you constantly have to think about the game far more in advance, weighing up the risk and reward of taking a direct route versus hiding as opposed to going a rather linear route of hiding and staying “inch from the wall” on repeat. Most of the time, when I played Death Guard, I informed my opponent that my units were right up against the wall, as I typically wasn’t afraid of combat with my beefy units and needed all the movement I could get!
 |
| Things heat up on table one in final round as Shalaxi and Mortarion duel with Belakor and Keeper of Secrets tangling with various Death Guard forces. Also looking back I'm almost impressed how many times I managed to get pics of Mortarion facing away from camera regardless of the angle of shot. |
So, as for why Death Guard, beyond an interesting set of tactical considerations? Well, there’s a team tournament next weekend, and I wanted to give them a spin. Also, Deathshroud—already one of the best DG units—went down in points for some reason? Why GW decided to lower their points over some of the others in DG, I don’t know, but here we are. It was an easy place to start the list—18 of them went straight in (finally giving me a reason to use some of my old Heresy miniatures that I haven’t played since 8th dropped) and three characters to lead them. Typhus was an obvious inclusion, and in the end, the -1 damage potential from the Sorcerer Lord and random spike damage from them won out over the Lord of Virulence’s re-rolls, although both are great options.
With the bulky part of the list sorted, I needed two things to compensate for the 4 inches of movement the Deathshroud have—two Foetid Bloat-Drones for speed and trading potential with Marine-type bodies, two Predators for long-ranged firepower to discourage opponents from turtling at the back, and two Brigands for a mix of both roles. The final piece of the puzzle was either to have more units for actions/trading or go with Mortarion, and I went with the latter in the end. Initially, I was leaning toward more units, but after playing against Mortarion in a local game and realizing he could boss a flank, I settled on him. A single Cultist squad rounded out the list, resulting in the following:
Shrouded (2000 points)
Death Guard
Strike Force (2000 points)
Plague Company
CHARACTERS
OTHER DATASHEETS
Death Guard Cultists (50 points)
- 1x Death Guard Cultist Champion
- 1x Brutal assault weapon
- 1x Cultist firearm
- 9x Death Guard Cultist
- 9x Brutal assault weapon
- 6x Cultist firearm
- 1x Flamer
- 1x Grenade launcher
- 1x Heavy stubber
Death Guard Predator Destructor (130 points)
- 1x Armoured tracks
- 1x Combi-weapon
- 1x Havoc launcher
- 2x Lascannon
- 1x Predator autocannon
Death Guard Predator Destructor (130 points)
- 1x Armoured tracks
- 1x Combi-weapon
- 1x Havoc launcher
- 2x Lascannon
- 1x Predator autocannon
Deathshroud Terminators (220 points)
- 1x Deathshroud Champion
- 1x Manreaper
- 2x Plaguespurt gauntlet
- 5x Deathshroud Terminator
- 5x Manreaper
- 5x Plaguespurt gauntlet
Deathshroud Terminators (220 points)
- 1x Deathshroud Champion
- 1x Manreaper
- 2x Plaguespurt gauntlet
- 5x Deathshroud Terminator
- 5x Manreaper
- 5x Plaguespurt gauntlet
Deathshroud Terminators (220 points)
- 1x Deathshroud Champion
- 1x Manreaper
- 2x Plaguespurt gauntlet
- 5x Deathshroud Terminator
- 5x Manreaper
- 5x Plaguespurt gauntlet
Foetid Bloat-Drone (90 points)
- 1x Fleshmower
- 1x Plague probe
Foetid Bloat-Drone (90 points)
- 1x Fleshmower
- 1x Plague probe
ALLIED UNITS
Round 1 - Mission L from GW Pack vs. Jamie Wates using a trade-heavy Renegade Raiders list with a big Warptalon brick. Full list for all opponents at the end of pack.
Pregame thoughts - Fun fact, Jamie and I have never played before, but we’re due to play each other this upcoming week in a local league game. First, the problems—CSM are much more mobile, have better OC for denying, and have some solid shooting units. The mission is good though—lots of mid-table objectives on take-and-hold play to DG’s advantage in creating a brawl, which is absolutely the kind of game I need to create to win. While Renegade Raiders have a speed advantage, I should have a shooting advantage and want to leverage that as best as possible. Predators will chew through Deathshroud at a good rate, but if they’re not on an objective or I’m in cover (potentially using Morty’s aura), they’re much less scary if I need to advance upfield. Basic gameplan: use Cultists on the line to possibly sticky some objectives if I go first, use Drones to get into position and trade, and bring in Deathshroud to clear anything left while Predators and Knights handle armor. CSM without Vindicators shouldn’t handle Morty well, so be aggressive with him, as it will take CSM a considerable amount of time to chew through him. The Warptalon brick was a scary element, but I mostly planned to ignore it (especially as it ended up in reserve) and threaten Flamer overwatch. I went heavy on reserves with two Deathshroud bricks and both Knights for counterattacks, and although I don’t love the amount of screening Jamie can do with his Rhinos, a 9-inch charge into a screen from Deathshroud deep strike is probably better than moving forward. Chose the -1 Save contagion.
 |
| DG deployment Morty poised to go to right flank whilst Cultists up front so they can scout up onto middle objectives early. List looks very small compared to when ran lots of Accursed Cultists! |
 |
| To be fair, lots of points in reserve - plan to Rapid Ingress one Deathshroud unit and use other to reinforce an ailing flank/threaten overwatch whilst hoping to get Knights into Melta range from reserve. |
 |
| Overview of battlefield - CSM don't have a big footprint either with most of infantry either in Rhino or Reserve. |
 |
| Side on shot of CSM deployment, Predators on the flanks to get some angles. At least I'm familiar with opponents army! |
 |
| Cultists for the first, and only time in the entire weekend kill something! Kind of. DG get first turn and Cultists scout forward, sticky centre objectives and decide to yolo charge two Rhinos to try and pin them in and stop CSM having access to middle. They do no damage but one Rhino tries to fall back through the Cultists (using Raiders strat to do it in my turn) to get to the middle but fails its desperate breakout. |
 |
| Otherwise DG turn one was very uneventful and CSM begin their turn moving a Legionnaire squad upfield. |
 |
| Not too worries about Morty getting shot by Predators so he had advanced upfield, sadly he couldn't finish on objective so he prowls nearby menacingly. |
 |
| Cultists do a good job slowing CSM down in the middle and CSM can't get onto any objectives easily. Legionnaires charge the Deathshroud up against the wall but Deathshroud take the charge well, kill the Legionnaires (Chaos Lord lives) to keep control of the objective. |
 |
| Right of battlefield - Legionnaires charged my cultists and manage to consolidate onto objective 2. I respond by throwing up Morty so he can try and charge either them/Rhino and both Brigands arrive from reserve to try and expose the Rhino's contents. |
 |
| I had initially sent the drone toward objective 3 but secondaries resulted in it having to go out to the left flank. I deep strike Deathshrouds onto objective 3, it secure the objective and gives me a yolo charge. Given what's happening on right flank with Morty/Knights not expecting a great deal of Firepower thrown this way so can have them in the open. |
 |
| Side on view from CSM deployment before the guns start shooting. |
 |
| Warp Talons rapid ingress into my backfield - with my limited screening its hard to play around. Given the size of the unit (and awkward backpacks) they can hide from Predator but not both. I'd have rather screened them out entirely but felt I'd have had to give up too much to screen them out entirely. |
 |
| DG's shooting is near dice perfect - the First Brigands melta kills the rhino, the second goes to soften up the Predator and rolls near max damage to kill it outside of Melta range and the Chaincannons take a toll of the infantry. |
 |
| Predators autocannons soften up Warp Talons a little. |
 |
| DG Predator lascannons take out their CSM counterpart - with 2 Predators town CSM have lost the ranged war comprehensively and Deathshroud are going to make a brawl very difficult for them. Deathshroud in combat with the Chaos Lord introduce him to Plaguespurt Gauntlets |
 |
| Its been a brutal turn for CSM as they rally and push forwards. |
 |
| View from CSM deployment. |
 |
| Cypher and Morty face off...one is more favoured than the other in this fight. |
 |
| Side on view of left flank - DG are in total control as CSM not having firepower or bodies to spare for it. |
 |
| View from DG deployment - Warp Talons are a pain but they don't have any ideal targets. |
 |
| Deathshroud Rapid Ingress at end of CSM movement - they secure the objective and threaten a nasty overwatch to anyone that wants to charge. |
 |
| CSM focus on Morty, after he takes a few Lascannons to soften him up the Chaos Lord charges in. The Chaos Lord gets very angry and manages to take out the Primarch. |
 |
| CSM have done good damage, taking out one of the Brigands in addition to Morty, but are behind on score and attrition. |
 |
| Left flank is very secure so start pushing up on the right to try and end the contest. Deathshrouds flamers clear away the units around objective 5 and charge the last Chaos Lords squad. |
 |
| The Chaos Lord doesn't last long against the Deathshroud as only a Rubric, Rhino and Cultist squad stand between Deathshroud and CSM's home objective. |
 |
| Middle of table is secure as Deathshroud move around, trying to get positions for future turns. |
 |
| 30k/Baby Morty (Terminator Sorcerer) looks on as Talons are slowly chipped away. They took my home objective briefly and almost kill the Predator but it clings to life. |
 |
| DG unchallenged now on the right flank. |
 |
| Rhino and Rubrics make some last plays for points, but game is well and truly over as DG romp to bit win. |
Final Score DG win 94-38
Postgame thoughts - Brutal second turn from Death Guard, meltas rolled so hot and game pretty much ended their and then. Brigands were incredible in this game, and with their only real ranged predators the Predators taken can of CSM didn't really have any good answers for DG which could (slowly) move around at will. The early damage also allowed the Deathshroud to Rapid Ingress into positions were they could impact the game rather than getting screened out by Rhino's which had been a concern. From their DG could just roll on over the rest of CSM for comfortable win. Jamie did recover from the loss however, winning their next four games to finish fourth.
Round 2 - Mission K from GW Pack vs. Jacob Black's War Horde Orks - 2 Kill Rigs, lots of Mechanised Orks led by Ghaz. List at end of page.
Pregame thoughts - Jacob and I are repeat opponents, as we played in round one at LGT in a CSM vs. WE game that I narrowly managed to win (also covered on this site if you fancy a read.) It was slightly concerning that Jacob came off the back of a win against DG in the previous round. I faced similar obstacles as in the first round—Orks were much more mobile, had decent anti-tank shooting, and great OC. The bigger issue this time around was the mission. Regular readers are probably tired of hearing me dislike missions where primary objectives aren’t the main focus—being capped at holding two objectives with burning at the end means it’s much nicer going second in this mission, as it's so hard to push primary objectives meaningfully. Given the Orks’ saves, I opted for -1 WS/BS contagion, hoping to reduce their damage rather than needing the damage boost myself. I ended up going first, which made the mission a bit more challenging since last-turn scoring would work against me and my army is slow. I felt I needed to be much more aggressive instead of just picking apart the Orks from range, as I might have done if I’d gone second. My general plan was to try and pick apart the Kill Rigs as they posed a major threat to my tanks, then use the Deathshroud to burn their way through anything not named Ghaz. The idea was to soften Ghaz up so Makari couldn’t use his 2+ invul.
 |
| DG deployment - trying to hide the Predators/tanks from Kill Rig firing lines but have easy access to shoot whatever goes on objectives. |
 |
| 2 Deathshroud and a Knight in reserve for DG |
 |
| Ork deployment - kill Rigs cover a flank each as Ghaz threatens the middle. |
 |
| Cultists scout forward, then advance trying to pin Orks back, Morty moves up behind to try and threaten anything that deals with Cultists. Going first I feel the need to be aggressive. Predators poke their noses out to try and take some pot-shots into Killrig just above Cultists. |
 |
| Orks survive the shooting without significant damage and prepare to move up. |
 |
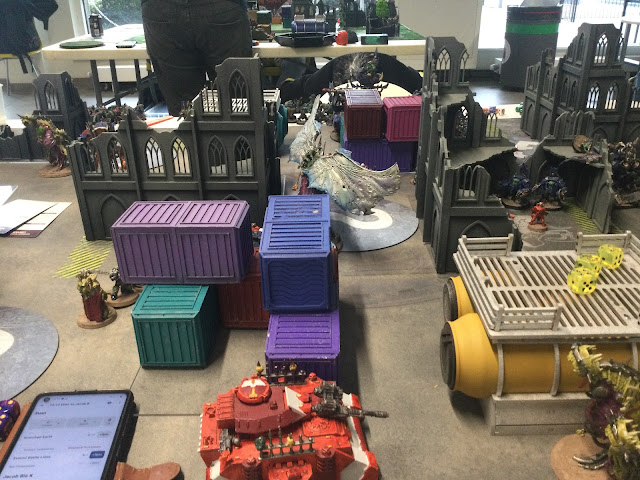
| Drone cowers behind terrain as Killrig takes the right objective. |
 |
| Side on shot down the middle |
 |
| Cultists get in the way of Orks, slowing them down in the middle. |
 |
| Just enough space for Orks Beast Snaggers to get past the cultists - should have screened better here or not at all. See postgame thoughts! |
 |
| Not too upset at the charge they need to make (8/9ish) but a long charge into my Knight results in a shame after Killrig softens it up. |
 |
| Drone Heroically intervenes into combat to A - help kill Orcs and B - take up space so they can't pile into objective. |
 |
| Ghaz and his Meganobz charge cultists but a few live and its results in some early primary for DG. |
 |
| DG turn 2 - Cultists pin the Meganobz and tanks from coming around the corner whilst Deathshroud flame the Meganobz then charge them - I don't want to engage them but they are strung back in such a way that if I kill the one Meganob that's already injured, none can swing back. As it happens I only do 2 damage into them in combat and just kill the one. |
 |
| Orks call Waagh and I try and shoot the Killrig. My shooting is disappointing - melta, Lascannons and Morty shoot to the Kill Rig to minimal effect and in fact when Kill rig overwatches a injured Predator and kills it I end up with more damage to me than the Orks. I had put the drone on the point and kept Morty back but with the Killrig still up and holding the point both charge in. |
 |
| Similar disappointment on this flank. The Knights chaincannon does well into the Beast Snaggas but doesn't finish them due to some excellent FNP's and meltas wiff. The Drone has to come back to deal with the Snagga instead of going into the Kill Rig and pinning it in place with objective already stickeied. |
 |
| Deathshroud really missed their extra ap this turn as Ghaz looks on ominously. |
 |
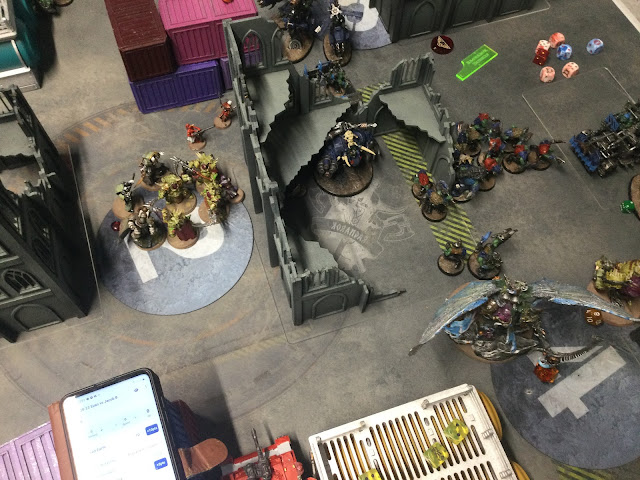
| After a very disappointing shooting phase Morty and the Drone at least stop a disaster. Morty takes out the Kill Rig leaving the Drone above to pile into the Kopta's and take out 2, leaving the last on 2 wounds. |
 |
| DG had their go turn and its time for Ork's attempt back. |
 |
| Side on view of battlefield. |
 |
| Ork Nobz charge Morty - I think he can tank them so instead of saving CP for interrupt or -1 damage I Heroic with the Drone instead whose 2 damage swings are much more effective into the Nobz. |
 |
| Ghaz gets into Deathshroud and more Beastsnaggas charge into Predator lead by character. Warboss low rolls into the Predator and things look up - only for it to fail every save from the Boyz and die anyway. |
 |
| Blurry shot - Kill Rig is free to move up and take objective and I Rapid Ingress Typhus over here to make sure I can take objective. I'd much rather this squad went into Ghaz (-1 damage doesn't matter, Typhus's mortal excellent etc) but I need to control this flank. Kill Rig takes out the Drone and the Knight as DG take a battering. |
 |
| DG turn 3 - Deathshroud on left flank move in to take out the Killrig and secure the flank. |
 |
| Feeling stretched but still have play. Deathshroud move up on the right flank to burn take out the Nobz who fight on death to keep chipping away at Morty. I should have sent the drone up to the Kopta's at top of shot and forget about it - it would have failed the charge and ends up taking out a truck instead but its the wrong play. |
 |
| I'm edging primary but secondaries are a real struggle at moment. Scores are roughly level but Orks have end of game scoring on their side. |
 |
| Knight fails to damage Ghaz but Morkai does die to melta blast at least so I feel more confident engaging him in future. Ghaz charges Morty and with rolls sextuple 6's and kills Morty. Deathshroud HI into Ghaz and leave him on a single wound. |
 |
| Wierdboy teleports over to my home objective - I've run out of screening units and rather had to let this happen to keep the fight up in the middle. |
 |
| Top left flank is secure but Deathshroud are too far away to influence rest of table. Knight moves up to take the middle back from Deathkoptas. |
 |
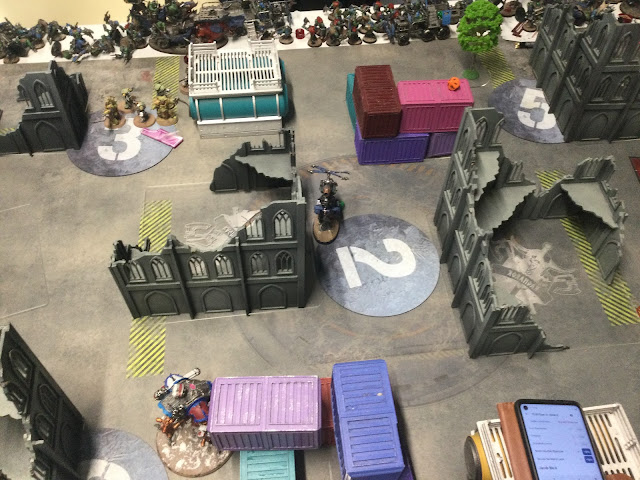
| Skipped a turn here at into DG 5 - Ghaz on one wound tanks a flamer volley from the Deathshroud and kills most of them. The last one and sorcerer manage to kill him and a truck pinning them down, charge some stormboyz and pile onto 4 to retake the objective. |
 |
| Last turn - Orks are spent as a force but DG have been struggling to make it count on scoreboard. Orks are behind just and have one play at the end to take the game - move on objective 2 which gets them both primary area denial and burning objective. The Knight overwatches and just, just doesn't kill it (leave it one wound I think.) Orks do have a plan b with a teleport but don't need it as they sneak the win at the death. |
Final score - Orks win 89-75
Aaagh! Without question my most gutting loss in 10th for a couple of reasons and felt like doing on the honourable thing of sulking and blaming dice, missions and secondary draw for the loss. To address those in order - took a second to compose myself, the dice on turn 2 weren't great but they were in game one, mission helps me plenty of time in other games. Secondaries were just bad though, scoring only 11 points over first 4 turns - even with last turn scoring in Orks favour giving them a big swing I lead the primary but secondaries just hurt me throughout.
 |
| Wrong GW game, but this was me after the round. |
So, looking back, what did I do wrong?
Cultists' early play was a mistake. I used them essentially to screen a truck and make it awkward for a Kill Rig to move into the middle, screening Morty from some Burna Boyz and a Kill Rig charge—neither of which he should be scared of. I should have either:
- A. Moved them as I did but slightly more to the left so the Kill Rig’s Beastsnaggas couldn’t reach my knight, or
- B. Moved them back after the scout move and used them either to screen the Waagh! turn (which I could have anticipated from the timing) or to screen my backfield from a teleporting Weirdboy.
As mentioned above, not sending the Drone after the Deffkoptas was a misplay. It worked out, but it would have put more pressure on the Ork home objective and reduced their shooting options.
I’m not sure if this is a mistake per se, but I missed the -1 save contagion. The -1 WS/BS did come up, but it never felt significant. Being able to Overwatch Ghaz with AP-1 flamers to take out Makari would have been huge in several instances. As it happened, Jacob played around the Overwatch threat very well (I don’t think I ended up using it other than with Knights).
I was probably a bit too aggressive. Not excessively so, but I should outshoot the Orks, and softening up a few more units before forcing engagements would have been ideal. I felt panicked after my turn 2 shooting whiffed, but if I had been more cautious, I could have shrugged it off and set up a better round of shooting next time.
It was an annoying loss to take, though it came with some lessons. Mostly because I almost tabled the Orks and still lost, which is a terrible feeling. I love it when I lose the attrition war but cling on for a win, so having the reverse happen to me is very rare.
Round 3 - Mission D from GW Pack vs. Nicolai Dienemann's Blood Angels - Character/Jump Pack-heavy Blood Angels supported by 2 Ballistus Dreadnoughts.
Pregame thoughts - Another familiar face, Nicolai was actually my first opponent in 9th Edition, and we play regularly at our local club. We were due to play on Tuesday before illness struck, and the two Knights I used to own were traded back and forth between us over time. As for the list, I wasn’t too worried about BA shooting; Morty could be aggressive comfortably, and while the two Knights/Predator didn’t want to expose themselves for no reason, the split Dreads weren’t likely to take out a tank in a single volley. Blood Angels’ combat was more concerning, though, and it would be harder to get the first strike without solid screens. After the last game, I really wanted Cultists screening the back instead of pushing upfield! The -1 Save contagion was an easy choice, and the Overwatch threat would force Nicolai to play around it. Mephiston was also likely to be a challenge—it’s become a bit of a meme at our local group how incredibly efficient he is for his points. I’d have to hope the flamers would handle him. In general, I wanted a less aggressive approach: using the Predators and Knights to soften up the Blood Angels and, once they closed in, hitting them with Deathshroud. Not the most complicated plan, but it felt solid.
 |
| BA win first turn and start moving upfield. |
 |
| Rest of BA deployment with reserves off the matt at top of shot. |
 |
| View from BA deployment - table layout meant long open firing lines between the two sides. |
 |
| DG deployment - tipping point deployment meant just about everything crammed into one half with Predators ready to cover firing lanes. Don't mind exposing Morty to one Dread, and deploying him here means only one can see. |
 |
| BA turn one is pretty simple - move up, Dread shoots at Morty to little effect, turn ends. |
 |
| Mephiston, who I can only assume has their current points printed in the MFM as a typo moves upfield. |
 |
| Death Guard turn one - scared of all the BA stuff in reserve but not so much on the table. Morty moves forward and starts chipping away at Mephiston with his pistol. |
 |
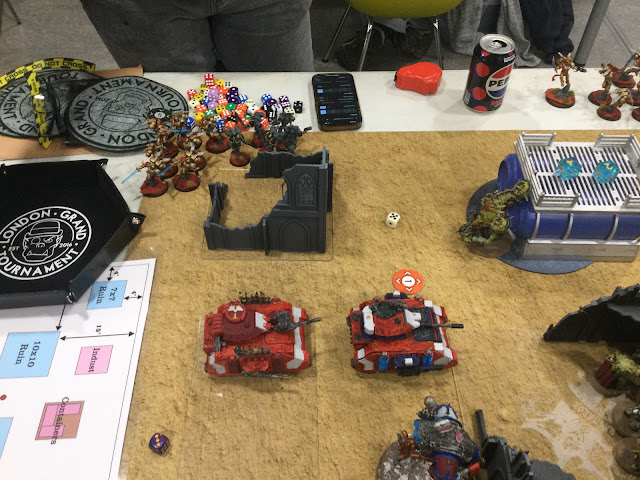
| Knights aren't in range so stay hiding whilst Predators send some shots downfield to little effect. Slow start in damage for both players. |
 |
| BA find a spot in my backfield and send in the first Sanguinary guard squad with some support. |
 |
BA pick Morty as their Oath target and move up to remove him from the centre.
|
 |
| Rather than worry about my backfield, I take a more aggressive line and Typhus rapid ingress's in behind BA to threaten their home objective. |
 |
| Mephison and Assault Intercessors charge Morty but do minimal damage and Morty removes Mephiston before he can truly be a pain. Lemartes leading the Death Company move up but can't get into the Deathshroud for a Death off. |
 |
| Sanguinary Guard make the charge into my Predator but don't kill it, and Jump Pack Intercessors charge the drone. I interrupt and the Drone kills all the intercessors. |
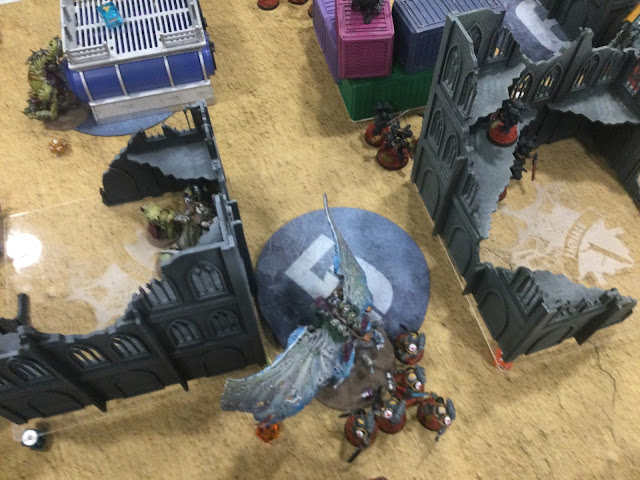 |
| BA gave committed hard, yet I'd done more damage to them on their turn and I'm in position to inflict more hurt in my turn. |
 |
| In BA's backline Deathshroud move up, start burning the Death company in midfield and charge onto BA's home objective clearing it with relative ease. |
 |
| Lemartes Death Company are very annoying to kill in combat...but 2 Deathshroud squads burning at them soften them up and even with -1 damage (which Morty should allow DS to ignore but I forgot about) they still get butchered. |
 |
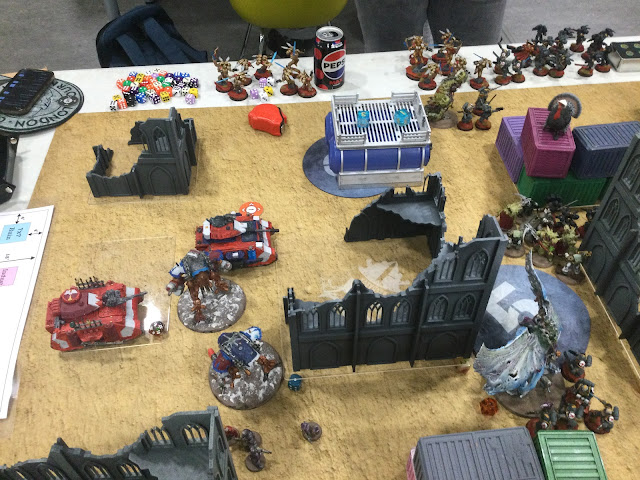
| Morty tangles with assault intercessors whilst holding the middle and drones go hunting 5 man squads. Neither kills much but BA are much less scary when charged. |
 |
| 2 Knights and a Predator unleash their guns into Sanguinary Guard and just blow them away. Its brutal turn overall from Death Guard. |
 |
| This is probably the best combat in the game for context for BA - I take 3 wounds and kill a Jump intercessor. |
 |
| One lone BA in foreground and Captain in background hold on in the middle for BA. |
 |
| View from BA deployment zone going into turn with DG in near full control of battlefield and very far ahead on attrition. |
 |
| Things don't get much better for BA - Dreads shoot up the Drone but it survives and takes out the Jump Intercessors. |
 |
| Second Sanguinary guard unit teleport in to DG backfield but fail to charge. DG move up the heavy guns to shoot them. |
 |
| DG turn 3 as they move up to take out the last remnants of Blood Angels in BA deployment zone. |
 |
| One Dreadnaught all that's left in BA deployment zone or middle by end of charge phase. |
 |
| After shooting phase this is how the BA dead pile looked. |
 |
| For comparison this was the only dead DG model. Fair to say didn't take long to finish up. |
 |
| Photo of Nicolai taken around turn 3. Note the magnificent beard. |
 |
| Picture of Nicolai next morning, loss had a drastic effect on his facial hair. |
DG win - 100 - 37
Postgame thoughts - Brutal only way to describe this. BA couldn't land a solid punch and DG just kept putting in haymakers. Not sure I can add much to this in terms of commentary - BA came in probably too fast pressured by mission and attrition, missed and DG capitalised hard. Always important to get win over a clubmate though for bragging rights.
Round 4 - GW Mission F vs. James Seager's CSM - Trade-focused Veterans List with Obliterators and a Bile-Chosen blob.
Pregame thoughts - Ah, Veterans have arguably DG’s biggest concern: reactive moves, both from the strat and in a 5-man Chosen squad led by Huron. It’s frustrating, as CSM can retreat faster than my Deathshroud can advance, potentially even if I use an Advance. I had genuinely thought back in round one, "At least it’s not Veterans I have to deal with." The main challenge was that it would be tough to engage on my terms in combat—if James didn’t want a unit charged, it likely wouldn’t happen unless I was willing to risk a 9-inch charge. I had two approaches: ignore kills and sit on points, or focus on winning the range war. Losing the ranged attrition fight would spell defeat, so I had to prioritize taking down the Predators first, then the Obliterators, if I wanted to win. After that, I’d need to decide whether to rely on guaranteed Deathshroud flamer damage from a distance or try moving within range of two units so that not both could make reactive moves (or, if it’s Huron’s unit, he’d have to roll low on his one-per-game D6). Burden of Trust helps a bit by drawing more units to the center, although I’d have preferred not to have Hidden Supplies and just one center objective to fight over.
 |
| So priority is trying to win ranged war to set what I hope is a trap - Morty in the open near a firing lane. Two Predators of mine can cover and shoot downfield at CSM Predator if they choose to engage into Morty. If they don't take it - Morty is in position to contest objective 4 early on. |
 |
| Side on view of DG deployment - Knights in reserve with 1 Deathshroud. |
 |
| Otherwise deployment from we was hide the Deathshroud from Predators, boat drone on flanks to try and contest centre as early as possible. |
 |
| CSM deployment - Chosen brick in the middle, Predator have a firing lane each with Rhino's ready to act as forward units. |
 |
| CSM win first turn and start moving upfield, Chosen with Bile are a scary profile into Deathshroud and a threat I have to respect - I don't want to get charged by them and its very difficult to charge. |
 |
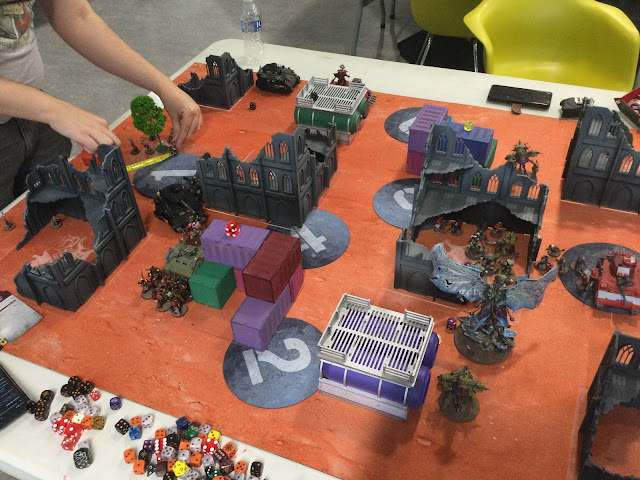
| With lack of targets on display Predator and Rhino line up shots into Morty. They chip of a couple of wounds and I heal Morty up a bit in my turn. |
 |
| Mostly uneventful turn from CSM but one Predator is able to be shot now. |
 |
| Right flank has early action when Drone makes a decent charge into Rhino to start softening it up and put pressure on objective. |
 |
| DG Predators trade fire with CSM counterpart - I keep Morty back so both of mine can benefit from his auras but they don't deal a great deal of damage and might have been better pushing Morty forwards. |
 |
| CSM turn 2 - not much damage on either side, Cultists screen out backfield at expense of guarding objective one. |
 |
| Near objective 6 Legionnaires lead by a Lord disembark from the Rhino. I Rapid ingress my Deathshroud and threaten overwatch. |
 |
| CSM have bring it down secondary and deep strike both Obliterator squads on the top side of the table with aim of taking out the drone. They both low roll into the drone and it ends up alive. I had tried to set a trap for the Chosen hoping they would charge the Deathshroud (who were an inch from wall for a change) and hope they would end up close to Morty who could Heroic in but CSM didn't take the bait. |
 |
| Blow some early CP here but its worth it - the Deathshroud that rapid ingressing firstly overwatch then Heroic into the Chaos Lord's squad that charged the drone, giving me not only some extra damage but slingshotting the unit upfield. |
 |
| DG turn 2 - early primary boost is lovely and I bring a Knight over here into Melta range from reserve. Its a change of plan from focussing on the Predator but if the Knight can kill it my Deathshroud can potentially flame the contents to death and charge the Predator. Its a high greed play that doesn't work but I like the idea as the payoff means I win the flank outright in a single play and worst case isn't that bad. |
 |
| Deathshroud take a defensive stance, wary of Chosen grouping up to support each other. |
 |
| I bring all my firepower to bare on one Obliterator squad and charge the other with Morty killing both and having enough Firepower to almost take out one of the Predators. Its a nice early swing in the range war and puts both scoreboard and attrition pressure on CSM even if Morty is out of position for awhile. |
 |
| On south flank Deathshroud have to make do with taking out the Rhino. Both Knights are throwing their indirect at Cultists, normally not worth a mention but if I can take them out it makes guarding home objective on burden of trust more tricky for CSM. |
 |
| DG backfield secure and there isn't a realistic threat to Morty on the table now. |
 |
| DG have put early pressure on CSM scoring and Fabius feels the need to response, advancing towards the Deathshroud. Legionnaires don't move, fearing overwatch and waiting to see if Chosen can make the charge first before going in. |
 |
| DG look over the middle - Cypher is guarding objective 4 and its hard for DG to get to him. |
 |
| Overview of battlefield from CSM perspective. I've got an early blow in but worried I'm not going to be able to do much next turn without a lot of stuff either out of position or needing a long charge even before reactive moves. |
 |
| First big moment of a key turn - Predator 1 goes to open fire into the Deathshroud and kill itself in a dark pact! |
 |
| Big moment 2 - although ramifications are realised yet. Chosen charge Deathshroud but even with CP re -roll Legionaires fail 5 inch charge. |
 |
| Its a big charge from the Chosen and they start to take out the Deathshroud who fail their -1 damage from the sorcerer (I think at this point I had failed the 2+ roll 5/6 times I had tried it.) |
 |
| However it all ends well - the Sorcerer just clings to life leaving the Chosen in combat. It means A - I have the objective but crucially the Chosen can't move away from the Deathshroud. |
 |
| Legionnaires look on with thought of what could have been - making the charge or the Predator not killing itself probably means dead Sorcerer, CSM objective and Chosen in a much safer position. |
 |
| DG turn - Knight moves up to try and take out Predator and 2 Deathshroud move up in midfield to try and deliver killer blow. If Chosen could have reactive move I would have decent shooting into them (potentially staying 9 away to shoot and long charge without reactive move.) |
 |
| CSM have been playing coy on the top/centre of battlefield, with ranged superiority to back me up now I push forwards. |
 |
| Overview as DG start their push upfield. Whilst I wouldn't say its a priority target being able to shoot Cultists now is nice to help stop CSM guarding and keeping to apply pressure. |
 |
| Deathshroud make their charge in the Chosen taking all but one and Bile out removing the last obstacle that can clear DG quickly out of the game. |
 |
| Overview of CSM position going into their turn, behind on scoreboard, behind further on attrition its fighting for points/a miracle now. |
 |
| Fabius falls back, and in combination with Predator does manage to take out my knight. I tried over watching but 7 Deathshroud flamers only manage 2 wounds, one of which got ignored! |
 |
| With Assassinate drawn Lucius senses his moment of destiny and goes after Typhus. |
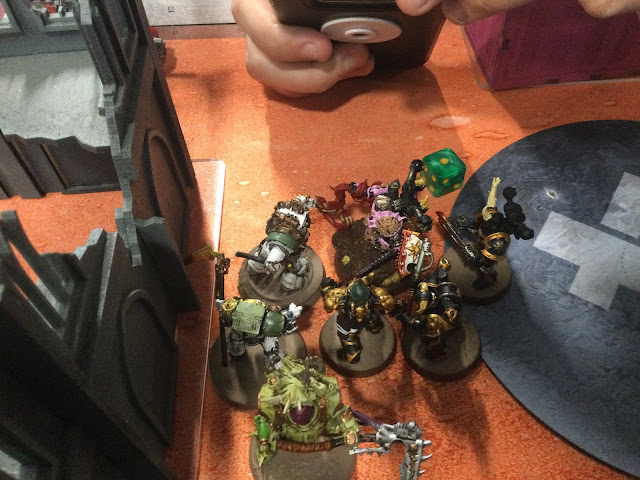 |
| Typhus takes Lucius challenge losing a few wounds. Deathshroud slaughter Lucius and his friends in return. |
 |
| DG own the centre now and right, so its only the left that's standing. Morty moves up in combination with Predators to start dealing with the last pockets of CSM and push the score. By end of DG turn only Predator and Huron are alive |
Final score - DG win 84-49.
Postgame thoughts big win on a hard to score mission was excellent. Whilst there was some luck to close out a right flank given how the middle/left ended up it felt like it cascaded a win rather than causing it. Broadly happy with overall plan though on what's a potentially a awkward match up.
Round 5 - GW Mission A vs. "True Daemon Lord" Franco McDonnell’s Daemons - 4 Big Daemons and Fiends with support.
Pregame thoughts - Having fought my way back to table one, it’s the second time in two weeks that I’m in the final round against Daemons with the tournament on the line—against a very similar Daemon list to Byron's (which, given that Franco and Byron are friends and have a podcast together, isn’t surprising). Franco is also part of the reason this blog continues; when the old hosting platform wasn’t feasible anymore, it was Franco who recommended this site to me. We’d previously played back in the pre-COVID days, where I think I just managed to hold on for the win. As for his list—it’s a classic scary Daemon list. Two of the Big Daemons, Belakor and the GUO, I wanted to ignore, focusing instead on the two Slaanesh ones. I faced a bit of a dilemma: I wanted to set up screens to block their advance, but I also needed to screen the backfield, and I couldn’t do both effectively. In the end, I decided to send the Cultists upfield with Scout, having them run back if any survived, and then swapping them out with another unit, though I wasn’t yet sure which one. The deployment left several big firing lanes, which worked to my advantage, as did going second for last-turn scoring. My plan was to be patient, try to wear down the Daemons, and counter-attack with the Deathshroud. I also felt that secondary points would be important here. With Shalaxi around and its rerolls against character units, I decided to deploy Typhus independently instead of with the Deathshroud, giving me an extra unit for secondaries and hoping that the Deathshroud’s resilience wouldn’t matter if they were getting a charge via Rapid Ingress.
 |
| Another wonky deployment so almost all of DG on south of shot so they are rather upfield. Given Daemons lack of shooting, happy to deploy on the line with Deathshroud. Also weird that objective at top of shot is about 80% covered by terrain - not an issue per say but means greater Deamons are going to have an easier time to control it given I can only get limited models on. |
 |
| Daemons deployment - anything in the open is close to Belakor so I can't shoot them. |
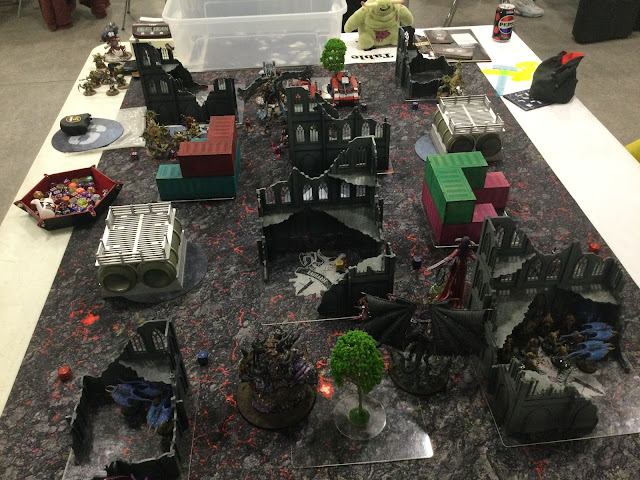 |
| View of battlefield from Daemons deployment (my reserves top left of shot.) I lose first turn roll off and Daemons prepare to move. |
 |
| To be honest neither of us do much first turn! Deamons move up a bit and chill, I move up back and score some secondaries, no one fires a shot (outside of Havoc from Knight.) I'm aware Daemons can teleport but want to put some pressure upfield - I do end up not screening my own objective which isn't deliberate but kind of a trade off. Cultists have moved up to touch objective 2, and along with the Drone on the right limited the spaces for the big Daemons to get to my Deathshroud. |
 |
| Reserves again - also I've learnt by now hydrate often at tournaments so bring a water bottle. |
 |
| Shot from Daemons side - Keeper of Secrets moves up and fiends take my back left objective as the other two move up. |
 |
| Whilst Belakor can shoot the Cultists, 12 shots into 10 wounds gives me a chance of surviving with a single Cultist which is huge for primary, especially as it means I don't have to trade for it next turn. If the Fiends don't move up, I use cloud of flies to try and keep a cultist alive and force fiends to charge (potentially allowing a HI from Deathshroud.) As it is Belakor kills them all with shooting. |
 |
| Whilst the Cultists have created problems in the middle.. this is the flip side. Plaguebears come in from DS and enough can get onto my objective that they control it and nil me on primary. |
 |
| So primary is going badly, but I'd been drawing well on secondaries whilst Daemons are struggling which is odd. Daemons going first has forced an aggressive push from them and Deathshroud smash their way back and forward onto fiends to give DG early edge on attrition. |
 |
| DG have a good turn, and nearly a great one. Flamers take out a fiend squad just in front of Morty and Predators take Keeper of Secrets at top of shot down to 7 wounds. Screen cleared Morty goes for a 7ish charge into keeper to try and take it out (and start to threaten Daemon backline) but fails the charge even with re-roll. |
 |
| Kill the Keeper here and possible the entire flank folds. Still its a really good turn and secondaries have been rather silly good to me - to quote Franco "I've nilled you on primary, how am I only one point up." |
 |
| GUO at bottom of shot looks on. I'd like to stop it scoring but realistically can't so just have to ignore it. |
 |
| Daemons are ahead but feeling pressure of endgame scoring decide its go time. Last Fiend squad moves up. For once my Flamers overwatch isn't really a scary threat for people to play around. |
 |
| Overview from Daemon deployment - screamers hanging around the back stopping my Deathshroud pressuring Daemon home objective. Keeper moves forward trying to take the objective by charging my Drone and makes space for Shalaxi to charge Morty. |
 |
| 3 big daemon crash into DG lines supported by Fiends. |
 |
| Most of this turn went - Oh this makes you -1 attack or -1 to hit, oh wait Morty stops that doesn't he. |
 |
| Shalaxi barrels into Morty, hoping to stop his aura, Morty clings to life on a single wound. Beleakor and Fiends can't chew through the Deathshroud on the objective quickly and the Fiends are destroyed. |
 |
| DG have taken a hit, but tanked it well and Daemons are exposed. Morty auto-passes battleshock and heals up (to avoid shadow of chaos damage and overwatch) and Deathshroud move in to take their primarchs place. |
 |
| I draw area denial and not fancying fighting Belakor Deathshroud fall back and take up as much space as possible to try and block Belakor's path. |
 |
| DG get in a hammer blow 1-2 punch. Firstly my shooting manages to take out the injured Keeper, then the Deathshroud charge Shalaxi - its been slightly softened up by Predators but Deathshroud roll hot on lethal hits and butcher the Greater Daemon. |
 |
| With Belakor suddenly alone and with my home objective properly screened Daemons find themselves running out of ways to push forward and deny primary. |
 |
| GUO abandonees his post and moves in. Despite fly and 12 move, Beleakor is blocked from moving up and just has to charge head on in. |
 |
| Both Daemons charge the same Deathshroud squad but can't clear them. |
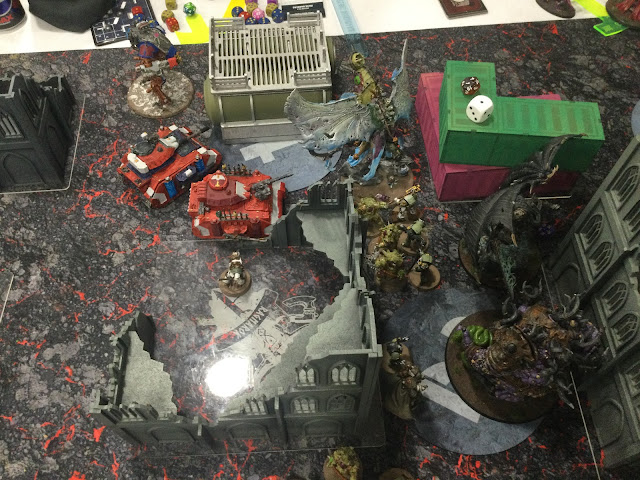 |
| Deathguard ability to tank charges has slowed Daemon advance to a crawl and scores are evenish with end game scoring in my favour. I fall back and move up my other Deathshroud and start unleashing my firepower into Belakor. |
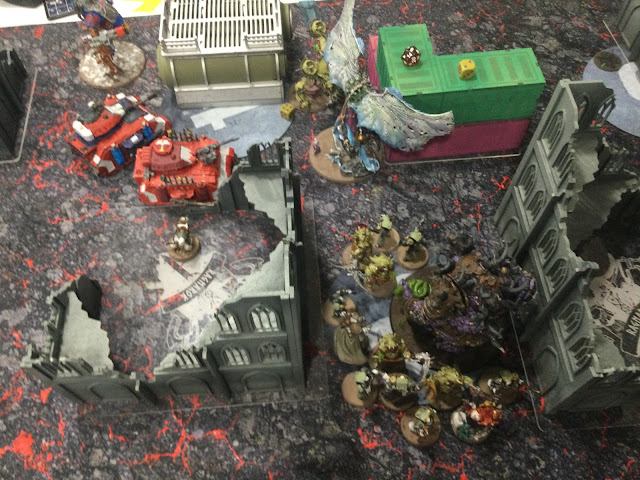 |
| Belakor falls to DG Firepower and 10 Deathshroud charge into the GUO. |
 |
| Knight and Drone stay back to protect against Daemon DS shenanigans. |
 |
| The Great Unclean one tanks the charge, but is trapped, wounded and can't fight its way out. |
 |
| Next turn Deathshroud finish up the Great Unclean One, and outside of some Daemon teleporting for secondaries game is a wrap. |
DG Win 90 - 77
Postgame thoughts - Delighted with the win. Franco's been on a tear with his daemons and on his way to World next week and always nice to pick up a big scalp. He was also the only undefeated player left prior to this round so kept the final standings interesting.
As for the game itself - going second was huge, it put the pressure on Franco to make first move and allowed me to come back despite losing some early primarily rather needlessly. I moaned about my luck/mission after round 2, but came back here. I was very happy to remain patient here and not overcommit early waiting for Daemons to come and counter attack. I can get a bit 'lets go all in' and always feel very smart (rightly or wrongly) whenever I win a game showing a modicum of patience. Otherwise most of the rest of the game was taking my chances and trying to slow daemons down enough for my guns to take their toll, now always easy with their invuls and fnp but had enough shots that some would get through.
So at end of round 5 no one was undefeated and 4 players had gone 4-1, myself, Franco (round 5 opponent) Jamie (round one opponent) and Alex Neale (who I'd played before at a teams GT and was using Necrons.) Of the 5 I had the most battle points...but sadly placings were organised on battle points Strength of schedule and I have no idea how that's worked out (not the same as Wins Strength of Schedule either). Sadly for me this meant I came third, which did feel a bit weird having won on table one in final game but thems the breaks - any tiebreaker is going to feel sad for someone (outside of the clearly perfect boundary countback option, I'd personally do average margin of victory but there we are.) Franco came top with Alex second. Of my other opponents, James and Jacob finish 5th/6th with Nicolai in 13th so ended up playing almost exclusively players that made the top cut.
 |
| 3rd place trophy and picked an undefeated mug...although that was because Ragnarok was rebranding their events to Warzone, had a spare mug and I'd gone undefeated at their last GT. |
As for the list - I mostly loved it. I really want to find a way to squeeze in an extra unit but everything had at least one game were it performed well. I think I've just got be braver on occasion and take Typhus out of the Deathshroud in games were I think secondaries are key, or rule Sorcerers solo in ranged match ups so they can both act as action monkeys and try and avoid the situation I had in game were were I have lots of stuff that can't get across the map. If I had to change something I'd look at swapping Morty for extra units (another Knight, Drone and Cultists potentially) for some extra units.
Other than that what would I change? Well technically everything. As I mentioned at start I find DG a very engaging challenge but I missed the speed of CSM (especially Raiders) so jumping back to them for team events. Partly on back of second game loss, partly I felt whilst I put up some good scores, they were on the back of cascading pressure and in teams if someone in a bad match up decided to sit back and settle for 12-8 I'd struggle to push for more which may not be good enough (and struggle to do same in bad potentially.) I really enjoyed the extra possibilities DG open up - most used strat I'm pretty sure was Rapid ingress, followed closely by Heroic Intervention (then overwatch probably, used almost none of the DG ones) and it makes for really interesting play for me and counterplay from opponent.
Thanks for reading! Next time - probably a report from Teams tournament. Full lists for all opponents below.
Jamie Wates List (R1)
CSM Wates 2.3 5-2 Warptalons (1995 Points)
Chaos Space Marines
Renegade Raiders
Strike Force (2000 Points)
CHARACTERS
Chaos Lord (90 Points)
• Warlord
• 1x Daemon hammer
• 1x Plasma pistol
Chaos Lord (90 Points)
• 1x Daemon hammer
• 1x Plasma pistol
Chaos Lord (90 Points)
• 1x Daemon hammer
• 1x Plasma pistol
Cypher (90 Points)
• 1x Cypher’s bolt pistol
• 1x Cypher’s plasma pistol
BATTLELINE
Cultist Mob (50 Points)
• 1x Cultist Champion
◦ 1x Autopistol
◦ 1x Brutal assault weapon
• 9x Chaos Cultist
◦ 9x Autopistol
◦ 9x Brutal assault weapon
Legionaries (90 Points)
• 1x Aspiring Champion
◦ 1x Chaos Icon
◦ 1x Close combat weapon
◦ 1x Heavy melee weapon
◦ 1x Plasma pistol
• 4x Legionary
◦ 2x Astartes chainsword
◦ 4x Bolt pistol
◦ 4x Close combat weapon
◦ 1x Heavy melee weapon
◦ 1x Lascannon
Legionaries (90 Points)
• 1x Aspiring Champion
◦ 1x Chaos Icon
◦ 1x Close combat weapon
◦ 1x Heavy melee weapon
◦ 1x Plasma pistol
• 4x Legionary
◦ 2x Astartes chainsword
◦ 4x Bolt pistol
◦ 4x Close combat weapon
◦ 1x Heavy melee weapon
◦ 1x Lascannon
Legionaries (90 Points)
• 1x Aspiring Champion
◦ 1x Chaos Icon
◦ 1x Close combat weapon
◦ 1x Heavy melee weapon
◦ 1x Plasma pistol
• 4x Legionary
◦ 2x Astartes chainsword
◦ 4x Bolt pistol
◦ 4x Close combat weapon
◦ 1x Heavy melee weapon
◦ 1x Lascannon
Legionaries (90 Points)
• 1x Aspiring Champion
◦ 1x Chaos Icon
◦ 1x Close combat weapon
◦ 1x Heavy melee weapon
◦ 1x Plasma pistol
• 4x Legionary
◦ 2x Astartes chainsword
◦ 4x Bolt pistol
◦ 4x Close combat weapon
◦ 1x Heavy melee weapon
◦ 1x Lascannon
Legionaries (90 Points)
• 1x Aspiring Champion
◦ 1x Chaos Icon
◦ 1x Close combat weapon
◦ 1x Heavy melee weapon
◦ 1x Plasma pistol
• 4x Legionary
◦ 2x Astartes chainsword
◦ 4x Bolt pistol
◦ 4x Close combat weapon
◦ 1x Heavy melee weapon
◦ 1x Lascannon
DEDICATED TRANSPORTS
Chaos Rhino (75 Points)
• 1x Armoured tracks
• 1x Combi-bolter
• 1x Combi-bolter
• 1x Havoc launcher
Chaos Rhino (75 Points)
• 1x Armoured tracks
• 1x Combi-bolter
• 1x Combi-bolter
• 1x Havoc launcher
Chaos Rhino (75 Points)
• 1x Armoured tracks
• 1x Combi-bolter
• 1x Combi-bolter
• 1x Havoc launcher
OTHER DATASHEETS
Chaos Predator Destructor (140 Points)
• 1x Armoured tracks
• 1x Combi-weapon
• 1x Havoc launcher
• 2x Lascannon
• 1x Predator autocannon
Chaos Predator Destructor (140 Points)
• 1x Armoured tracks
• 1x Combi-weapon
• 1x Havoc launcher
• 2x Lascannon
• 1x Predator autocannon
Chaos Predator Destructor (140 Points)
• 1x Armoured tracks
• 1x Combi-weapon
• 1x Havoc launcher
• 2x Lascannon
• 1x Predator autocannon
Warp Talons (270 Points)
• 1x Warp Talon Champion
◦ 1x Warp claws
• 9x Warp Talon
◦ 9x Warp claws
ALLIED UNITS
Rubric Marines (110 Points)
• 1x Aspiring Sorcerer
◦ 1x Force weapon
◦ 1x Warpflame pistol
◦ 1x Warpsmite
• 4x Rubric Marine
◦ 4x Close combat weapon
◦ 1x Icon of Flame
◦ 4x Warpflamer
Rubric Marines (110 Points)
• 1x Aspiring Sorcerer
◦ 1x Force weapon
◦ 1x Warpflame pistol
◦ 1x Warpsmite
• 4x Rubric Marine
◦ 4x Close combat weapon
◦ 1x Icon of Flame
◦ 4x Warpflamer
Jacob Blacks Orks list
RagnaORK GT (1995 points)
Orks
Strike Force (2000 points)
War Horde
CHARACTERS
Beastboss (80 points)
• 1x Beast Snagga klaw
1x Beastchoppa
1x Shoota
Ghazghkull Thraka (235 points)
• 1x Ghazghkull Thraka
• Warlord
• 1x Gork’s Klaw
1x Mork’s Roar
• 1x Makari
• 1x Makari’s stabba
Warboss (90 points)
• 1x Attack squig
1x Kombi-weapon
1x Power klaw
1x Twin sluggas
• Enhancement: Follow Me Ladz
Warboss (65 points)
• 1x Kombi-weapon
1x Power klaw
1x Twin sluggas
Weirdboy (65 points)
• 1x Weirdboy staff
1x ’Eadbanger
BATTLELINE
Beast Snagga Boyz (95 points)
• 9x Beast Snagga Boy
• 9x Choppa
9x Slugga
• 1x Beast Snagga Nob
• 1x Power snappa
1x Slugga
Beast Snagga Boyz (95 points)
• 9x Beast Snagga Boy
• 9x Choppa
9x Slugga
• 1x Beast Snagga Nob
• 1x Power snappa
1x Slugga
Boyz (80 points)
• 9x Boy
• 9x Choppa
9x Slugga
• 1x Boss Nob
• 1x Power klaw
1x Slugga
DEDICATED TRANSPORTS
Trukk (65 points)
• 1x Big shoota
1x Spiked wheels
1x Wreckin’ ball
Trukk (65 points)
• 1x Big shoota
1x Spiked wheels
1x Wreckin’ ball
OTHER DATASHEETS
Burna Boyz (120 points)
• 2x Spanner
• 2x Close combat weapon
2x Kustom mega-blasta
• 8x Burna Boy
• 8x Burna
8x Cuttin’ flames
Deffkoptas (90 points)
• 3x Deffkopta
• 3x Kopta rokkits
3x Slugga
3x Spinnin’ blades
Deffkoptas (90 points)
• 3x Deffkopta
• 3x Kopta rokkits
3x Slugga
3x Spinnin’ blades
Gretchin (40 points)
• 10x Gretchin
• 10x Close combat weapon
10x Grot blasta
• 1x Runtherd
• 1x Runtherd tools
1x Slugga
Kill Rig (155 points)
• 1x Butcha boyz
1x Savage horns and hooves
1x Saw blades
1x Stikka kannon
1x Wurrtower
1x ’Eavy lobba
Kill Rig (155 points)
• 1x Butcha boyz
1x Savage horns and hooves
1x Saw blades
1x Stikka kannon
1x Wurrtower
1x ’Eavy lobba
Meganobz (70 points)
• 2x Meganob
• 2x Twin killsaws
Nobz (210 points)
• 1x Boss Nob
• 1x Big choppa
1x Slugga
• 9x Nob
• 9x Power klaw
9x Slugga
Stormboyz (65 points)
• 4x Stormboy
• 4x Choppa
4x Slugga
• 1x Boss Nob
• 1x Power klaw
1x Slugga
Stormboyz (65 points)
• 4x Stormboy
• 4x Choppa
4x Slugga
• 1x Boss Nob
• 1x Power klaw
1x Slugga
Nicolai's List (Round 3)
Come at me bro (2000 Points)
Space Marines
Blood Angels
Liberator Assault Group
Strike Force (2000 Points)
CHARACTERS
Blood Angels Captain (80 Points)
• 1x Inferno pistol
• 1x Power fist
Captain with Jump Pack (110 Points)
• 1x Plasma pistol
• 1x Power fist
• Enhancements: Speed of the Primarch
Chief Librarian Mephiston (125 Points)
• 1x Fury of the Ancients
• 1x Plasma pistol
• 1x Vitarus
Commander Dante (130 Points)
• Warlord
• 1x Perdition Pistol
• 1x The Axe Mortalis
Lemartes (110 Points)
• 1x Absolvor bolt pistol
• 1x The Blood Crozius
BATTLELINE
Assault Intercessor Squad (75 Points)
• 1x Assault Intercessor Sergeant
◦ 1x Plasma pistol
◦ 1x Power fist
• 4x Assault Intercessor
◦ 4x Astartes chainsword
◦ 4x Heavy bolt pistol
Assault Intercessor Squad (75 Points)
• 1x Assault Intercessor Sergeant
◦ 1x Plasma pistol
◦ 1x Power fist
• 4x Assault Intercessor
◦ 4x Astartes chainsword
◦ 4x Heavy bolt pistol
Assault Intercessor Squad (75 Points)
• 1x Assault Intercessor Sergeant
◦ 1x Plasma pistol
◦ 1x Power fist
• 4x Assault Intercessor
◦ 4x Astartes chainsword
◦ 4x Heavy bolt pistol
OTHER DATASHEETS
Assault Intercessors with Jump Packs (90 Points)
• 1x Assault Intercessor Sergeant with Jump Pack
◦ 1x Plasma pistol
◦ 1x Power fist
• 4x Assault Intercessors with Jump Packs
◦ 4x Astartes chainsword
◦ 3x Heavy bolt pistol
◦ 1x Plasma pistol
Assault Intercessors with Jump Packs (90 Points)
• 1x Assault Intercessor Sergeant with Jump Pack
◦ 1x Plasma pistol
◦ 1x Power fist
• 4x Assault Intercessors with Jump Packs
◦ 4x Astartes chainsword
◦ 3x Heavy bolt pistol
◦ 1x Plasma pistol
Ballistus Dreadnought (130 Points)
• 1x Armoured feet
• 1x Ballistus lascannon
• 1x Ballistus missile launcher
• 1x Twin storm bolter
Ballistus Dreadnought (130 Points)
• 1x Armoured feet
• 1x Ballistus lascannon
• 1x Ballistus missile launcher
• 1x Twin storm bolter
Death Company Marines with Jump Packs (240 Points)
• 10x Death Company Marine with Jump Packs
◦ 5x Astartes chainsword
◦ 2x Eviscerator
◦ 8x Heavy bolt pistol
◦ 2x Plasma pistol
◦ 3x Power fist
Sanguinary Guard (270 Points)
• 6x Sanguinary Guard
◦ 4x Angelus boltgun
◦ 5x Encarmine blade
◦ 1x Encarmine spear
◦ 2x Inferno pistol
◦ 1x Sanguinary Banner
Sanguinary Guard (270 Points)
• 6x Sanguinary Guard
◦ 4x Angelus boltgun
◦ 5x Encarmine blade
◦ 1x Encarmine spear
◦ 2x Inferno pistol
◦ 1x Sanguinary Banner
James Seagler's CSM (Round 4)
Ragnarok GT Idea 2 (Vets) (1990 points)
Chaos Space Marines
Emperor’s Children
Strike Force (2000 points)
Veterans of the Long War
CHARACTERS
Chaos Lord (105 points)
• 1x Daemon hammer
1x Plasma pistol
• Enhancement: Warmaster’s Gift
Cypher (90 points)
• 1x Cypher’s bolt pistol
1x Cypher’s plasma pistol
Fabius Bile (85 points)
• 1x Fabius Bile
• 1x Chirurgeon
1x Rod of Torment
1x Xyclos Needler
• 1x Surgeon Acolyte
• 1x Surgeon Acolyte’s tools
Huron Blackheart (80 points)
• 1x Exalted weapon
1x Tyrant’s Claw
Lucius the Eternal (95 points)
• Warlord
• 1x Doom siren
1x Duellist’s sword and Lash of Torment
BATTLELINE
Cultist Mob (50 points)
• 1x Cultist Champion
• 1x Autopistol
1x Brutal assault weapon
• 9x Chaos Cultist
• 9x Autopistol
9x Brutal assault weapon
Legionaries (90 points)
• 1x Aspiring Champion
• 1x Chaos Icon
1x Close combat weapon
1x Heavy melee weapon
1x Plasma pistol
• 4x Legionary
• 2x Astartes chainsword
4x Bolt pistol
4x Close combat weapon
1x Heavy melee weapon
1x Lascannon
Legionaries (90 points)
• 1x Aspiring Champion
• 1x Chaos Icon
1x Close combat weapon
1x Heavy melee weapon
1x Plasma pistol
• 4x Legionary
• 2x Astartes chainsword
4x Bolt pistol
4x Close combat weapon
1x Heavy melee weapon
1x Lascannon
Legionaries (90 points)
• 1x Aspiring Champion
• 1x Chaos Icon
1x Close combat weapon
1x Heavy melee weapon
1x Plasma pistol
• 4x Legionary
• 2x Astartes chainsword
4x Bolt pistol
4x Close combat weapon
1x Heavy melee weapon
1x Lascannon
Legionaries (90 points)
• 1x Aspiring Champion
• 1x Chaos Icon
1x Close combat weapon
1x Heavy melee weapon
1x Plasma pistol
• 4x Legionary
• 2x Astartes chainsword
4x Bolt pistol
4x Close combat weapon
1x Heavy melee weapon
1x Lascannon
DEDICATED TRANSPORTS
Chaos Rhino (75 points)
• 1x Armoured tracks
1x Combi-bolter
1x Combi-weapon
1x Havoc launcher
Chaos Rhino (75 points)
• 1x Armoured tracks
1x Combi-bolter
1x Combi-weapon
1x Havoc launcher
OTHER DATASHEETS
Chaos Predator Destructor (140 points)
• 1x Armoured tracks
1x Combi-weapon
1x Havoc launcher
2x Lascannon
1x Predator autocannon
Chaos Predator Destructor (140 points)
• 1x Armoured tracks
1x Combi-weapon
1x Havoc launcher
2x Lascannon
1x Predator autocannon
Chosen (125 points)
• 1x Chosen Champion
• 1x Boltgun
1x Chaos Icon
1x Plasma pistol
1x Power fist
• 4x Chosen
• 3x Accursed weapon
3x Bolt pistol
1x Boltgun
2x Combi-weapon
1x Paired accursed weapons
1x Plasma pistol
Chosen (250 points)
• 1x Chosen Champion
• 1x Boltgun
1x Chaos Icon
1x Plasma pistol
1x Power fist
• 9x Chosen
• 6x Accursed weapon
6x Bolt pistol
3x Boltgun
4x Combi-weapon
2x Paired accursed weapons
3x Plasma pistol
1x Power fist
Obliterators (160 points)
• 2x Obliterator
• 2x Crushing fists
2x Fleshmetal guns
Obliterators (160 points)
• 2x Obliterator
• 2x Crushing fists
2x Fleshmetal guns
Round 5 List v Franco -
World Champs test (2000 points)
Chaos Daemons
Strike Force (2000 points)
Daemonic Incursion
CHARACTERS
Be’lakor (325 points)
• Warlord
• 1x Betraying Shades
1x The Blade of Shadows
Great Unclean One (260 points)
• 1x Bilesword
1x Plague flail
1x Putrid vomit
• Enhancement: The Endless Gift
Keeper of Secrets (305 points)
• 1x Phantasmagoria
1x Shining Aegis
1x Snapping claws
1x Witstealer sword
• Enhancement: Soulstealer
Shalaxi Helbane (425 points)
• 1x Lash of Slaanesh
1x Pavane of Slaanesh
1x Snapping claws
1x Soulpiercer
BATTLELINE
Plaguebearers (110 points)
• 1x Plagueridden
• 1x Plaguesword
• 9x Plaguebearer
• 1x Daemonic Icon
1x Instrument of Chaos
9x Plaguesword
Plaguebearers (110 points)
• 1x Plagueridden
• 1x Plaguesword
• 9x Plaguebearer
• 1x Daemonic Icon
1x Instrument of Chaos
9x Plaguesword
OTHER DATASHEETS
Fiends (105 points)
• 1x Blissbringer
• 1x Barbed tail and dissecting claws
• 2x Fiend
• 2x Barbed tail and dissecting claws
Fiends (105 points)
• 1x Blissbringer
• 1x Barbed tail and dissecting claws
• 2x Fiend
• 2x Barbed tail and dissecting claws
Fiends (105 points)
• 1x Blissbringer
• 1x Barbed tail and dissecting claws
• 2x Fiend
• 2x Barbed tail and dissecting claws
Screamers (75 points)
• 3x Screamer
• 3x Lamprey bite
Screamers (75 points)
• 3x Screamer
• 3x Lamprey bite


Comments
Post a Comment