Daemon Engines are cool right? Through all the ups and down of CSM over the past few editions they've always been at least interesting as option for us. Partly as they aren't a powered armoured unit overshadowed by loyalist options, and they normally end up reasonably cheap - Venomcrawlers since their release in particular have always been a favourite of mine being a fun little skirmish machine that really works well in a lot of lists.
Woking Wargames RTT's are always such a blast. I don't need much convincing to go, but my brother (Hal) was able to attend a tournament for the first time at the July one and it felt like the perfect sort of event to be able to attend with a new tournament player.
 |
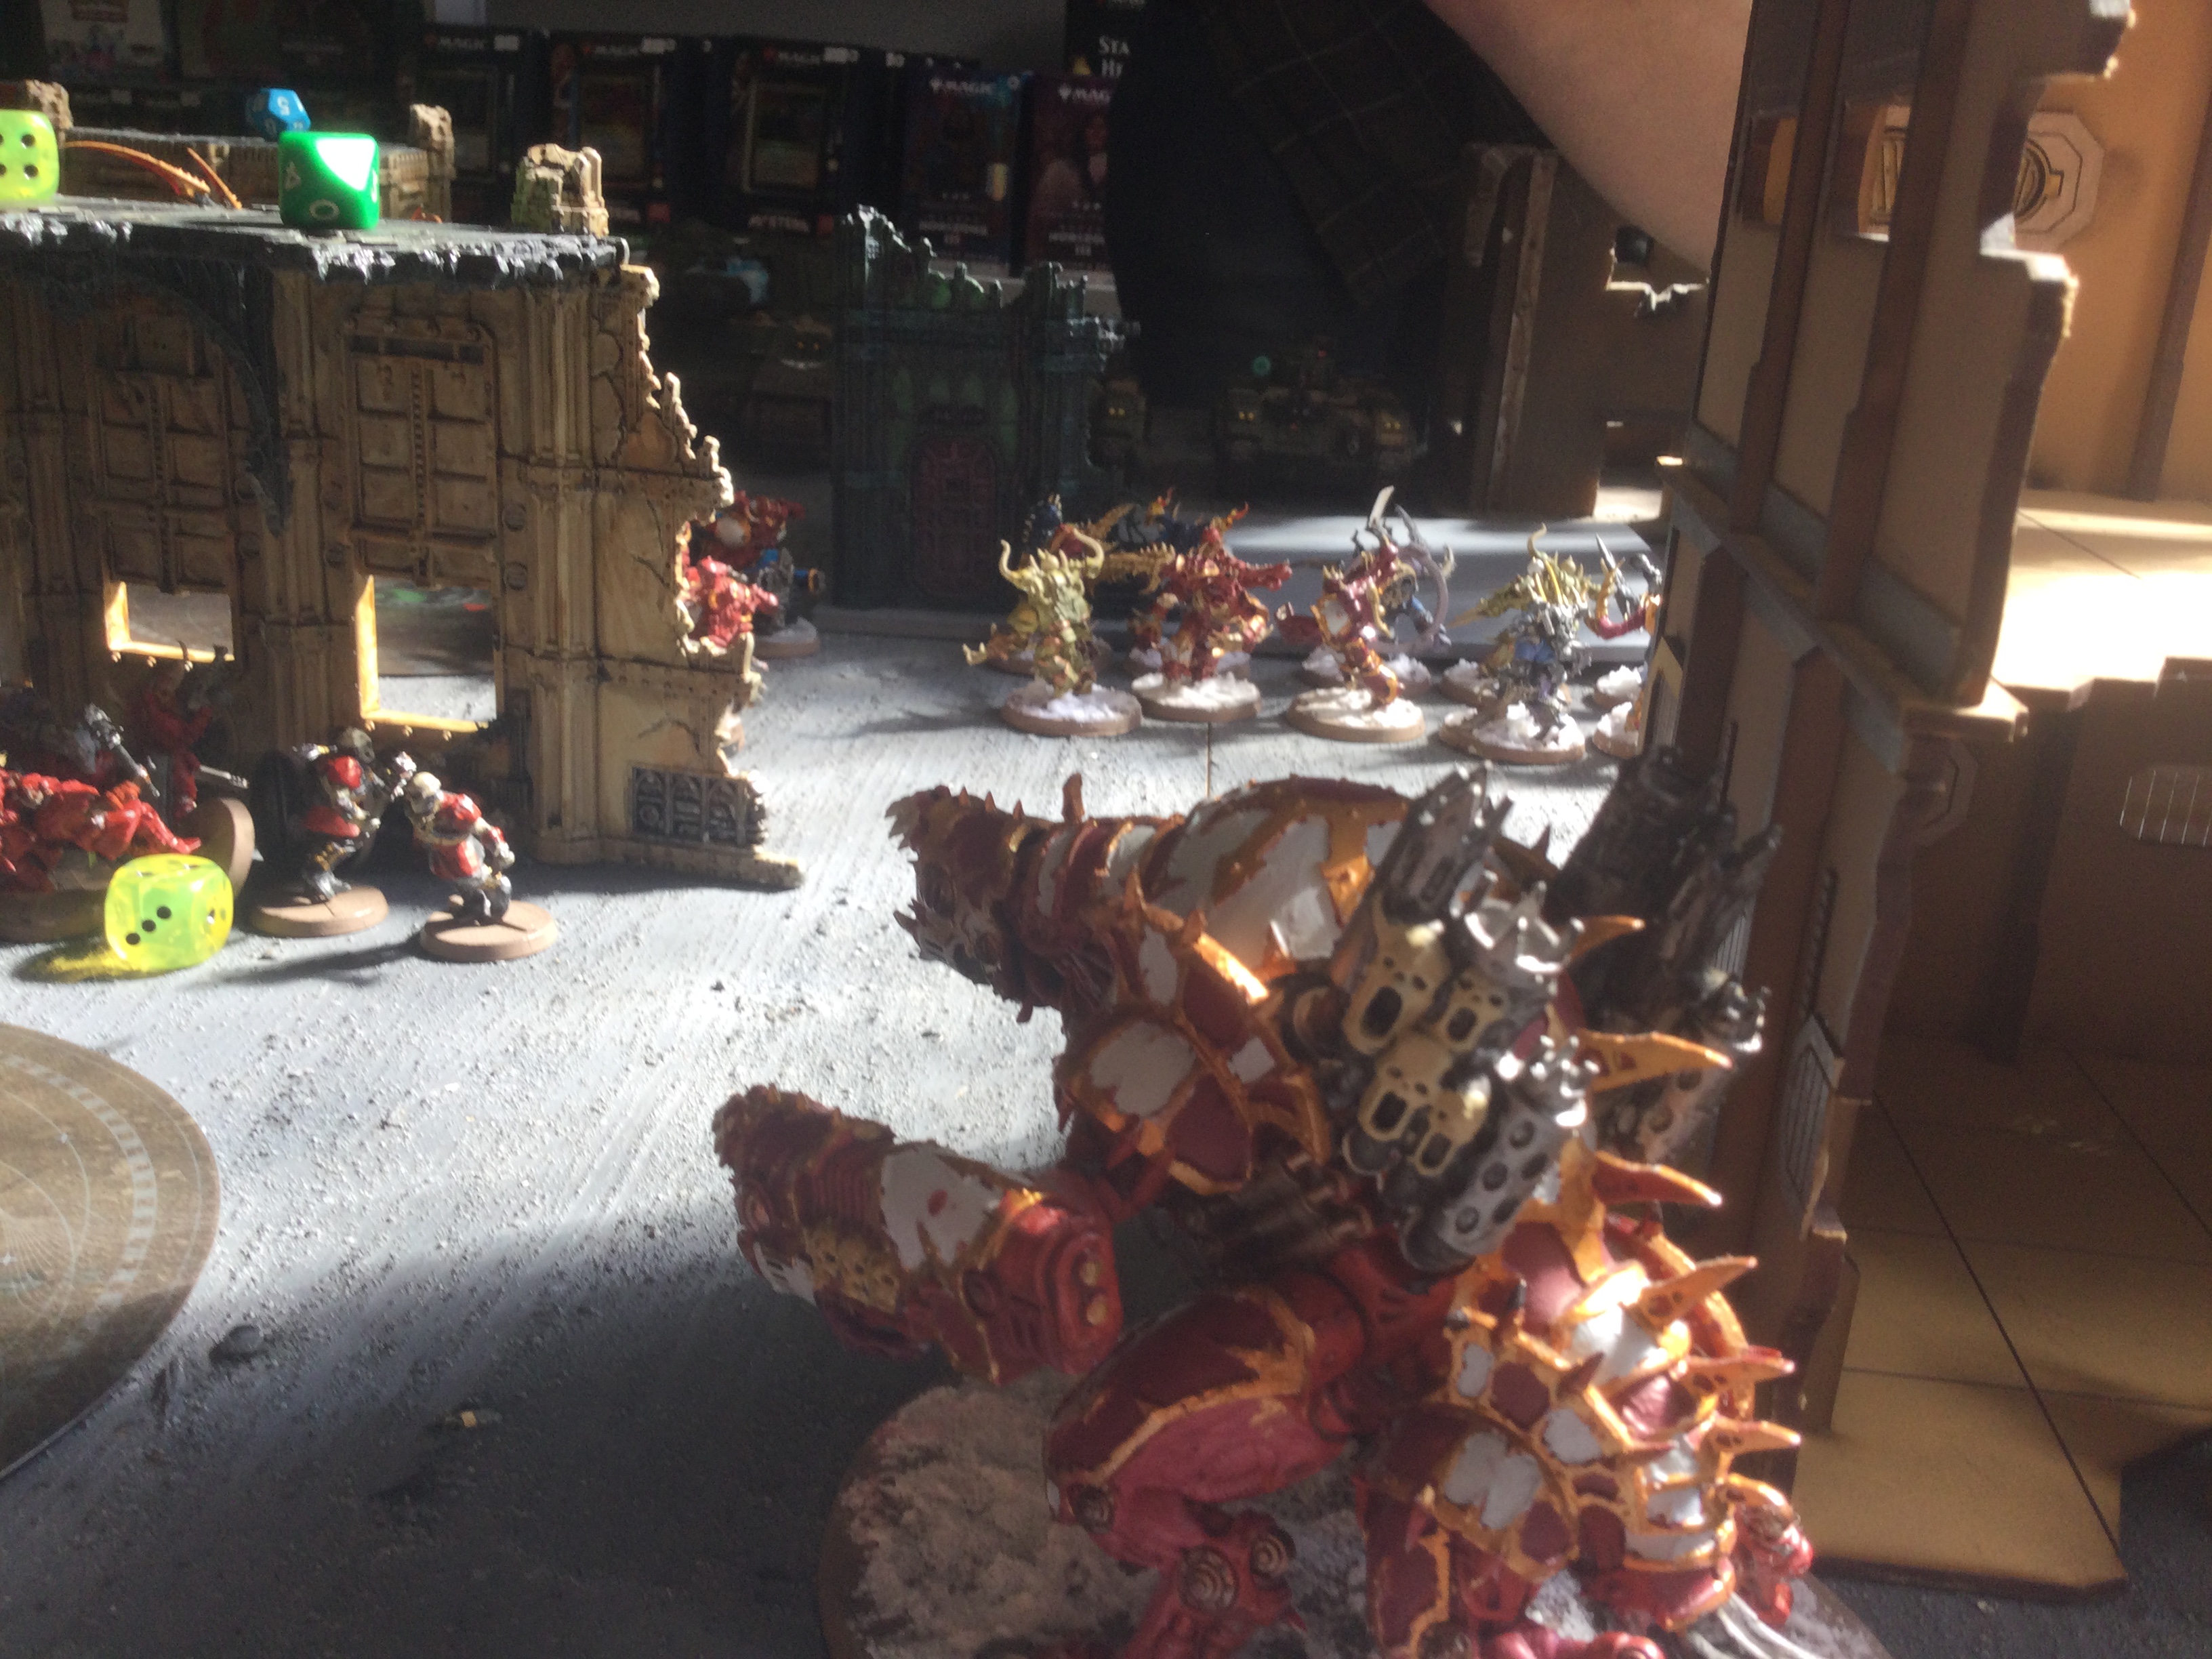
| Daemon Engines lead by Vashtorr move up to challenge Magnus and his legion head on. |
As for my list as I alluded to two paragraphs ago I wanted to give Soulforged Warpack a go - I'd enjoyed them in casual games and this felt like a chance to test them out - especially given RTT had a pretty open terrain pack so skewing Daemon Engine Heavy > Infantry felt apt. Also the last balance dataslate had rather skewed my interest away from CSM - I'll avoid saying much more otherwise I'll just rant about the dataslate points - no I'm not bitter that the CSM list I was running went up 160 points and didn't even have any Warptalons).
So Warpack - there aren't many Daemon Engines to choose from (especially when I realised the Disco lord wasn't an option which slightly surprised me initially) so it was more a case of ruling things out - Deflier I tried and felt over costed, Lord of Skulls felt fun, but slow (and possibly better in Renegades) and whilst it wasn't bad, I wanted more assets and given you can get 3 other Daemon Engines for the same price, that felt the better option. So that left Venomcrawlers, Forgefiends and Maulerfiends, and I ended up with a 3/2/3 split of them. I'd have loved to have tried out Blood Slaughterer and Decimator those iconic 40k CSM vehicles but...yeah. Oh also I guess I should mention the Helldrake for completeness - look I'm more than fine with flyers being bad for gameplay reasons but can we make it a big skimmer again with a nasty combat profile?
Anyone back to the list - Vashtorr and Warpsmith were lock ins - the Smith with Tempting Addendum for re-rolls. I initially ran 2 smiths whilst testing but didn't feel the need for a second. Some cultists for backfield objective and 2 Biker units for chaff/forward screens - with the increase to Raptors I've really enjoyed these Bikers as cheap forward operatives that aren't trivial to remove, can spike damage and just be annoying. The last question I wanted to answer with the list was "What if they hide behind a wall" and whilst Warpack have ways around it, running through them felt needed and I fell back on my old faithful Possessed - they felt like they helped with the toughness skew more than Chosen for the same point and I didn't fancy Legionnaires for the role (wanted something that could push into tough to reach spots, rather than being reliant on objective units for damage.) A predator, ready to get possessed by a daemon as early as possible rounded out the list nicely.
Vashtorrs buddies (1995 points)
Chaos Space Marines
Strike Force (2000 points)
Soulforged Warpack
CHARACTERS
Vashtorr the Arkifane (190 points)
• Warlord
• 1x Vashtorr’s claw
1x Vashtorr’s hammer
Warpsmith (95 points)
• 1x Flamer tendril
1x Forge weapon
1x Melta tendril
1x Plasma pistol
• Enhancement: Tempting Addendum
BATTLELINE
Cultist Mob (50 points)
• 1x Cultist Champion
• 1x Autopistol
1x Brutal assault weapon
• 9x Chaos Cultist
• 9x Autopistol
9x Brutal assault weapon
OTHER DATASHEETS
Chaos Bikers (70 points)
• 1x Biker Champion
• 1x Chaos Icon
1x Close combat weapon
1x Combi-bolter
1x Power fist
• 2x Chaos Biker
• 2x Astartes chainsword
2x Close combat weapon
2x Combi-bolter
2x Meltagun
Chaos Bikers (70 points)
• 1x Biker Champion
• 1x Chaos Icon
1x Close combat weapon
1x Combi-bolter
1x Power fist
• 2x Chaos Biker
• 2x Astartes chainsword
2x Close combat weapon
2x Combi-bolter
2x Meltagun
Chaos Predator Destructor (140 points)
• 1x Armoured tracks
1x Combi-weapon
1x Havoc launcher
2x Lascannon
1x Predator autocannon
Forgefiend (190 points)
• 1x Armoured limbs
2x Ectoplasma cannon
1x Ectoplasma cannon
Forgefiend (190 points)
• 1x Armoured limbs
2x Ectoplasma cannon
1x Ectoplasma cannon
Maulerfiend (130 points)
• 1x Lasher tendrils
1x Maulerfiend fists
Maulerfiend (130 points)
• 1x Lasher tendrils
1x Maulerfiend fists
Maulerfiend (130 points)
• 1x Lasher tendrils
1x Maulerfiend fists
Possessed (250 points)
• 1x Possessed Champion
• 1x Chaos Icon
1x Hideous mutations
• 9x Possessed
• 9x Hideous mutations
Venomcrawler (120 points)
• 2x Excruciator cannon
1x Soulflayer tendrils and claws
Venomcrawler (120 points)
• 2x Excruciator cannon
1x Soulflayer tendrils and claws
Venomcrawler (120 points)
• 2x Excruciator cannon
1x Soulflayer tendrils and claws
Round 1 - Dawn of War/Raise Banners/Linchpin v Liam Budd's Astra Militarum
 |
| Rogal Dorn surveys the battlefield |
++ Army Roster (Imperium - Astra Militarum) [1,995pts] ++
+ Configuration +
Battle Size: 2. Strike Force (2000 Point limit)
Detachment: Combined Regiment
Show/Hide Options
+ Epic Hero +
Ursula Creed [55pts]: Warlord
+ Character +
Commissar [30pts]: Bolt Pistol, Chainsword
Tank Commander [220pts]: Demolisher Battle Cannon, Grand Strategist, Heavy Stubber, Hunter-killer Missile, Lascannon
. Two Multi-meltas
+ Battleline +
Infantry Squad [60pts]
. 1 Sergeant, 7 Guardsmen and 1 Heavy Weapons Team
. . 6x Guardsman: 6x Close Combat Weapon, 6x Lasgun
. . Guardsman w/ Plasma Gun
. . Heavy Weapons Team: Lascannon
. . Sergeant: Chainsword, Laspistol
Infantry Squad [60pts]
. 1 Sergeant, 7 Guardsmen and 1 Heavy Weapons Team
. . 6x Guardsman: 6x Close Combat Weapon, 6x Lasgun
. . Guardsman w/ Plasma Gun
. . Heavy Weapons Team: Lascannon
. . Sergeant: Chainsword, Laspistol
Infantry Squad [60pts]
. 1 Sergeant, 7 Guardsmen and 1 Heavy Weapons Team
. . 6x Guardsman: 6x Close Combat Weapon, 6x Lasgun
. . Guardsman w/ Plasma Gun
. . Heavy Weapons Team: Lascannon
. . Sergeant: Chainsword, Laspistol
Infantry Squad [60pts]
. 1 Sergeant, 7 Guardsmen and 1 Heavy Weapons Team
. . 6x Guardsman: 6x Close Combat Weapon, 6x Lasgun
. . Guardsman w/ Plasma Gun
. . Heavy Weapons Team: Lascannon
. . Sergeant: Chainsword, Laspistol
Infantry Squad [60pts]
. 1 Sergeant, 7 Guardsmen and 1 Heavy Weapons Team
. . 6x Guardsman: 6x Close Combat Weapon, 6x Lasgun
. . Guardsman w/ Plasma Gun
. . Heavy Weapons Team: Lascannon
. . Sergeant: Chainsword, Laspistol
+ Infantry +
Tempestus Scions [50pts]
. Tempestor: Plasma Pistol, Power Fist
. 2x Tempestus Scion: 2x Close Combat Weapon, 2x Hot-shot Lasgun
. Tempestus Scion w/ Special Weapon: Meltagun
. Tempestus Scion w/ Special Weapon: Plasma Gun
+ Vehicle +
Armoured Sentinels [195pts]
. Armoured Sentinel: Hunter-killer Missile, Lascannon
. Armoured Sentinel: Hunter-killer Missile, Lascannon
. Armoured Sentinel: Hunter-killer Missile, Lascannon
Basilisk [140pts]: Heavy Bolter, Hunter-killer Missile
Rogal Dorn Battle Tank [240pts]: Pulveriser Cannon
. 2 Additional Heavy Stubbers
. 2 Multi-meltas
. Oppressor Cannon and Co-axial Autocannon
Stormblade [415pts]: Armoured Tracks, Heavy Stubber, Hunter-killer Missile, 2x Lascannon
. 2 Lascannons and 2 Twin Heavy Bolters
. 2 Twin Heavy Bolters
+ Dedicated Transport +
Chimera [70pts]: Chimera Heavy Bolter, Heavy Bolter, Heavy Stubber, Hunter-killer Missile
Chimera [70pts]: Chimera Heavy Bolter, Heavy Bolter, Heavy Stubber, Hunter-killer Missile
Chimera [70pts]: Chimera Heavy Bolter, Heavy Bolter, Heavy Stubber, Hunter-killer Missile
Chimera [70pts]: Chimera Heavy Flamer, Heavy Flamer, Heavy Stubber, Hunter-killer Missile
Chimera [70pts]: Chimera Heavy Flamer, Heavy Flamer, Heavy Stubber, Hunter-killer Missile
++ Total: [1,995pts] ++
 |
| Visual view of Liam's army - it went on to win best painted award. Pictures of this plus Dorn above courtesy of Rob Waller |
Pregame thoughts - Lots of scary tanks, and almost as worrying lots of of screens and OC potential. To save time - every game I went for a threat overload strategy, I had the list to try it and not enough space to hide (an issue with the list even on heavier terrain tables.) So the plan was more what to prioritise hiding before throwing this forward, which was much up dependant. Forgefiend got the premium spots, Crawlers go the medium to try and clear infantry once they disembarked and Maulerfiends had little space to got put on the line - if I can't hide I want to be able to threaten as much going first as possible. Otherwise the plan the ignore the Dorn (didn't want to deal with its heavy wound pool/blank a damage) focus the Tank Commander were possible and keep the Sentinels busy without killing them so they couldn't reinforce.
 |
| Predator and Forgefiend take the spot behind the building with the lesser Daemon engines in the open. |
 |
| Chaotic light pervades one side of the battle - Vashtorr can only partially hide but I'd rather him threaten a long bomb charge than hide at the back and do nothing at the start. |
 |
| Side on view of battlefield. |
 |
| AM deployment - tanks across the line, big one in the middle! |
 |
| Dorn and Tank commander on AM right (left from shots from my deployment) so my Daemon Engines that can't hide go on right. |
 |
| CSM get turn one and start to move upfield. |
 |
| Possessed hide behind the ruin, whilst I go full on aggression elsewhere. |
 |
| Apparently using a dice tray to block LoS isn't allowed, so Forgefiend lines up some pot-shots on a far Chimera. I don't really want to shoot it for fear of retaliation, but with enough threats upfield I feel its not going to be threatened. |
 |
| My other FF watches on and starts to chip away at AM tanks. |
 |
| Vashtorr tries to solo the super heavy tank. |
 |
CSM position at end of turn one - Vashtorr makes a long charge and starts hitting away at the Stormblade but otherwise very little damage is achieved - I don't roll a single 6+ to hit or wound first turn so its chipping paint here and their only.
|
 |
| AM start moving upfield in response. Vashtorrs charge has rather hemmed them in at the centre. |
 |
| Bit more freedom on the right, but the AM still struggle to move upfield and can't get onto objectives easily. Their opening salvo is mixed - a lot of the big guns don't do a great deal, but their Heavy Bolters seem to randomly spike and my Maulerfiends are destroyed. |
 |
| CSM turn 2 - taken a bit of an early bruising but its softened by tank commander doing 6 damage to itself for daring to shoot Vashtorr. It ends up at a marked for death target next round and bikers manage to spike their melta to pick it off. |
 |
| Possessed move across to potentially hit the tank commander before the melta takes it out. On the right two front Crawlers are done to 2/3 wounds each. I try and use them to clear the guard around the sentinels to keep them in place as I don't want them to respawn with fresh hunter killers. |
 |
| I don't think the Forgefiend on the right has been shot and its on 3 wounds. It hides from the Dorn and takes out a Chimera upfield, no longer pacting. |
 |
| Fantastic turn for CSM - bikers took some mortals damage but charge the Chimera to tie up the flank, whilst Vashtorr and Possessed take out the super heavy. 2 of the big guard damage dealers are down and CSM have control of Guard home objective. |
 |
| Venomcrawlers and Bikers clear the infantry and pin sentinels (and Chimera behind it) in place. |
 |
| Cultists move upfield for an action - CSM ahead on primary, secondary and attrition. |
 |
| Sentinels manage to shoot themselves free and prepare to charge onto the objective on the right. Not wanting to lose control I heroic in with the bikes and we end up with a bit of a slap fight. |
 |
| Cultists hold the middle as AM firepower had to be directed towards more urgent threats. |
 |
| Possessed take the brunt of AM firepower but Vashtorr emerges still healthy. |
 |
| No firepower goes into the Sentinels as CSM go hunting for new targets. |
 |
| Vashtorr moves over to take out a Chimera and keep pressure up on AM. |
 |
| The Chimera at the top has been stuck at the back and Possessed pop their dev wounds...and do nothing of note to it. |
 |
| Basilisk moves up for some rare direct line of sight shooting but Vashtorr is mostly untroubled. |
 |
| CSM turn 4 - a few units move up to action/join the fray to make sure I keep control. |
 |
| Vashtorr charges the Dorn who overwatch'sand kills itself. One of the few games were AM have dealt more damage to themselves, than I have to myself. |
 |
| Predator parts up on the objective, the sentinels die, respawn and unleash a final salvo into Vashtorr to take him out but its too little too late. |
CSM win - 100 - 33.
Postgame: So going first was pretty big here, it allowed me to stage nicely get in a bit of early damage and control the middle and the overall complex plan of 'lets rush them' worked well. I arguably got a bit carried away with worrying about the Stormblade when in reality the Dorn/Tank Commander were just as threatening and much less troublesome to deal with but I also didn't have many opportunities to go for them naturally so possible mistake in planning/placement but not major and worked well when game started. Was happy with my play around the Sentinels, keeping them alive and either boxed in/out OC'd on objectives to mitigate the threat. I've played some Guard in the last year and really like the list used in general (much more fun than here is all the artillery) and I hope mech transport guard get some love when their book comes out.
Round 2 - Search and Destroy, Hidden Supplies, Take and hold v Max Deeley's T'au Empire.
T’au Empire
Mont’ka
Strike Force (2000 Points)
CHARACTERS
Cadre Fireblade (50 Points)
• 1x Close combat weapon
1x Fireblade pulse rifle
Cadre Fireblade (50 Points)
• 1x Close combat weapon
1x Fireblade pulse rifle
Commander Shadowsun (100 Points)
• Warlord
• 1x Advanced Guardian Drone
1x Battlesuit fists
1x Command-link Drone (Aura)
1x Flechette launcher
2x High-energy fusion blaster
1x Light missile pod
1x Pulse pistol
Darkstrider (60 Points)
• 1x Close combat weapon
1x Shade
BATTLELINE
Breacher Team (100 Points)
• 1x Support turret
• 1x Breacher Fire Warrior Shas’ui
• 1x Close combat weapon
1x Guardian Drone
1x Gun Drone
1x Pulse blaster
1x Pulse pistol
• 9x Breacher Fire Warrior
• 9x Close combat weapon
9x Pulse blaster
9x Pulse pistol
Breacher Team (100 Points)
• 1x Support turret
• 1x Breacher Fire Warrior Shas’ui
• 1x Close combat weapon
1x Guardian Drone
1x Gun Drone
1x Pulse blaster
1x Pulse pistol
• 9x Breacher Fire Warrior
• 9x Close combat weapon
9x Pulse blaster
9x Pulse pistol
DEDICATED TRANSPORTS
Devilfish (85 Points)
• 1x Accelerator burst cannon
1x Armoured hull
2x Seeker missile
2x Smart missile system
Devilfish (85 Points)
• 1x Accelerator burst cannon
1x Armoured hull
2x Seeker missile
2x Smart missile system
OTHER DATASHEETS
Ghostkeel Battlesuit (160 Points)
• 1x Battlesuit Support System
1x Cyclic ion raker
1x Ghostkeel fists
1x Twin fusion blaster
Hammerhead Gunship (145 Points)
• 2x Accelerator burst cannon
1x Armoured hull
1x Ion cannon
2x Seeker missile
Hammerhead Gunship (145 Points)
• 2x Accelerator burst cannon
1x Armoured hull
1x Ion cannon
2x Seeker missile
Pathfinder Team (90 Points)
• 1x Pathfinder Shas’ui
• 1x Close combat weapon
2x Gun Drone
1x Pulse carbine
1x Pulse pistol
1x Recon Drone
• 9x Pathfinder
• 9x Close combat weapon
3x Ion rifle
6x Pulse carbine
9x Pulse pistol
1x Semi-automatic grenade launcher
Piranhas (55 Points)
• 1x Armoured hull
1x Piranha fusion blaster
2x Seeker missile
2x Twin pulse carbine
Piranhas (55 Points)
• 1x Armoured hull
1x Piranha fusion blaster
2x Seeker missile
2x Twin pulse carbine
Riptide Battlesuit (180 Points)
• 1x Ion accelerator
2x Missile Drone
1x Riptide fists
1x Twin fusion blaster
Riptide Battlesuit (180 Points)
• 1x Ion accelerator
2x Missile Drone
1x Riptide fists
1x Twin fusion blaster
Riptide Battlesuit (180 Points)
• 1x Ion accelerator
2x Missile Drone
1x Riptide fists
1x Twin fusion blaster
Stealth Battlesuits (60 Points)
• 1x Stealth Shas’vre
• 1x Battlesuit Support System
1x Battlesuit fists
1x Fusion blaster
1x Homing Beacon
1x Marker Drone
1x Shield Drone
• 2x Stealth Shas’ui
• 2x Battlesuit fists
2x Burst cannon
Stealth Battlesuits (60 Points)
• 1x Stealth Shas’vre
• 1x Battlesuit Support System
1x Battlesuit fists
1x Fusion blaster
1x Homing Beacon
1x Marker Drone
1x Shield Drone
• 2x Stealth Shas’ui
• 2x Battlesuit fists
2x Burst cannon
Stealth Battlesuits (60 Points)
• 1x Stealth Shas’vre
• 1x Battlesuit Support System
1x Battlesuit fists
1x Fusion blaster
1x Homing Beacon
1x Marker Drone
1x Shield Drone
• 2x Stealth Shas’ui
• 2x Battlesuit fists
2x Burst cannon
Pregame thoughts - I've played Max a few times, and I always struggle v his Tau, albeit the last time I think we played the Tau v CSM match up I was trying to outshoot him with a 9th Ed Creation of Bile gunline...which as you might guess didn't go well (although it was a surprisingly good list.) It was a very scary Tau list to fight, although I liked the mission - close on the diagonal and lots of objectives to fight over. Deployment was a case of trying to hug the big terrain piece in my terrain in the middle left with as much as possible - it would allow some shots into the Daemon Engines if Max went first but I should be able to return fire from my Forgefiends hiding back. Otherwise the middle right terrain piece kept the rest of my stuff that I was prepared to lose but felt I had to risk otherwise I wouldn't do anything if I went first.
 |
| CSM deployment - hiding behind central ruin with forward operatives and big guns hide at back to try and counter attack if Tau go first. |
 |
| Tau deployment with suits and tanks hidden from CSM's big shooting. |
 |
| Really wanted first turn, but selfishly Tau won the roll off and start moving up. |
 |
| Things get off to a bad start when Riptide unloads into Venomcrawler killing it to a wound, I contemplate a re-roll, decide against it with Tau having some more incidental shooting to take it out and regret it as it explodes dealing 15ish mortals to my army. |
 |
| Blurry pic - Its a horror start on the left, as all 3 Venomcrawlers are taken out and a sprinkling of mortals to the units around. |
 |
| Tau infantry block the way to the middle, before Bikers are taken out by various Tau shooting. |
 |
| After such a devastating blow, I go full in everywhere trying to deal Tau some hefty blows back. Thing start well when Forgefiends take out a Riptide and Hammerhead with help from a Maulerfiend. |
 |
| Vashtorr and Maulerfiend launch a desperate counter attack in the middle. Picture courtesy of Rob Waller |
 |
| Vashtorr charges the Ghostkeel but its ability to blank damage keeps it alive and its free to fall back and shoot. |
 |
| On the right flank Possessed fail their charge into the Devilfish and have to watch as Cultists charge in next to them and watch as Tau beat them up in combat. |
 |
| Advantage of not making the charge is Breachers don't get full re-rolls against them...unless they pay a CP. |
 |
| Possessed have proven incredibly able to tank damage for me in the past, but fail in the face of Tau firepower. |
 |
| I informed Max about Vashtorr's ability to cause Hazardous tests to shooting units "Ok, I'll just have to kill him quickly" was the response and it was so. CSM are brutally expelled from the middle. |
 |
| CSM position after Tau shooting phase - yeah its not good. The Cultists invoke their gods, roll an incredible amount of 6's and butcher there way free surprisingly! It turns the turn from a disaster, to a disaster were I have some cultists. |
 |
| Situation is beyond saving - I have nothing that can see, never mind reach the right flank. Its time to salvage what's possible and scrap for any points. At best I can deny Tau 2, which still means they are going to at worst match me ....if they miss every shot next turn (and have a lead already.) |
 |
| Firebase is intact but in a position were it can't impact the battlefield much. I take out Tau units on the left flank and the Maulerfiend tries to take out the last 6 wounds on the Ghostkeel and consolidate into some breachers to deny firepower, but manages to fail all 7 wound rolls...I CP re-roll in desperation and get a wound by roll a 1 on damage. |
 |
| Cultists can either make themselves a pain consolidating into Tau guns, but I end up going for a locus, trying to scrap any points. |
 |
| Tau have the option to potentially go after my big guns, but elect to play cautiously in the middle and ensure the overkill of the Maulerfiend/Cultists. |
 |
| Hammerhead pops around to take out bikers and only primary I'm getting is homefield objective again (thanks to Cultists sticking it at start of battle.) |
 |
| The minor upside of not being able to able to see all the scary Tau guns is I'm not tempted to shoot anything and can spent my turn getting minor versions of Containment/Cleanse. |
 |
| Tau position going into turn 4. |
 |
| I try over watching Tau as they move up, but don't manage any hits. With full re-rolls and sustained 6's i'm hoping for a high roll but only damage myself. |
 |
| Tau leave me with two models, my CP is going all in on re-drawing secondaries and No Prisoners/Defend Stronghold is about as good as it gets. My Forgefiend charges the Devilfish out of desperation as the other on the objective overwatch's the moment Tau move a model...and kills itself from 6 wounds. |
 |
| Tau table CSM in turn 5, I still get 8 points in my turn thanks to Defend stronghold/sticky objectives |
Final Score - 90-50 to Tau
Postgame - Brutal from Max, turn one was big (as it was for me against Guard in previous game tbf.) I don't hate my gambit of lining up to the left and hoping for turn one - Montka's mobility meant denying angles would have been pretty near impossible and the amount of stuff I'd had to reserve to hide enough of note. I considered the reserve plan at the time and after but I feel I end up in a similar situation - Tau will be able to shoot something, I'm vulnerable to screening and don't have much play until turn 2 when I'm behind on primary and probably don't have the quality of shooting/charges to disrupt Tau.
So outside of get lucky and go first didn't have much to suggest that could change the outcome of this, sometimes just have to tip your hat. If I'm being hyper critical, perhaps I could have make a secret mission play which didn't even cross my mind (I don't think I could have scored any realistically but a YOLO play turn 5 might have been the technically correct play.) Max played well, took early dominance and ensured I couldn't get back into the middle. I scrapped ok to get to 50 points to keep score line semi-respectable but it didn't ever realistically threaten to disrupt Tau's hold of the game.
Game 3 - Crucible of Battle, Stalwards, Terraform v Tom Forstners Thousand Sons.
Detachment Choice: Cult of Magic
Ahriman [130pts, 3Cabal Points]
Magnus the Red [440pts, 4Cabal Points]
+ Character +
Exalted Sorcerer on Disc of Tzeentch [125pts, 2Cabal Points]: Prosperine khopesh, Umbralefic Crystal, Warpflame pistol
Exalted Sorcerer on Disc of Tzeentch [105pts, 2Cabal Points]: Prosperine khopesh, Warpflame pistol
Infernal Master [115pts, 2Cabal Points]: Arcane Vortex
Thousand Sons Daemon Prince with wings [215pts, 2Cabal Points]: Lord of Forbidden Lore
Tzaangor Shaman [60pts, 1Cabal Points]
+ Battleline +
Rubric Marines [105pts, 1Cabal Points]: Icon of Flame
. Aspiring Sorcerer: Warpflame pistol
. Rubric Marine w/ soulreaper cannon
. 3x Rubric Marine w/ warpflamer: 3x Close combat weapon, 3x Warpflamer
Rubric Marines [105pts, 1Cabal Points]: Icon of Flame
. Aspiring Sorcerer: Warpflame pistol
. Rubric Marine w/ soulreaper cannon
. 3x Rubric Marine w/ warpflamer: 3x Close combat weapon, 3x Warpflamer
Rubric Marines [210pts, 1Cabal Points]: Icon of Flame
. Aspiring Sorcerer: Warpflame pistol
. Rubric Marine w/ soulreaper cannon
. 8x Rubric Marine w/ warpflamer: 8x Close combat weapon, 8x Warpflamer
+ Mounted +
Tzaangor Enlightened [45pts]
. 3x Fatecaster greatbow Enlightened: 3x Close combat weapon, 3x Fatecaster greatbow
Tzaangor Enlightened [45pts]
. 3x Fatecaster greatbow Enlightened: 3x Close combat weapon, 3x Fatecaster greatbow
+ Monster +
Mutalith Vortex Beast [150pts]
Mutalith Vortex Beast [150pts]
Pregame thoughts - TS is a match up I still have no idea how to play against really - last time I played them at a tournament I scored 19 points....including the 10 for painting. Yeah, not great! I've played them myself since and spoken to a couple of players and had two basic plans -
1 - Kill Magnus if he ever presents himself, but don't go looking for it.
2 - Assume Magnus won't ever give me a chance to kill him, kill everything else and force Magnus to come out to play, then go to plan one. If too much is dead, then ignore him, try and smash the primary and let him do his thing and try and ensure I have my own objective covered well enough to deny the Warlord Secret Mission at the end if its relevant.
As for hiding - the Maulerfiends were better into Magnus, and the Crawlers into Rubrics...so I assumed Magnus won't let me charge him so I hid the Crawlers and Forgefiends as best as possible and played around the Vortext beasts as bit with the Maulerfiends placement. Magnus I probably couldn't play around, so ignore him in deployment - if he wanted to see something he could.
 |
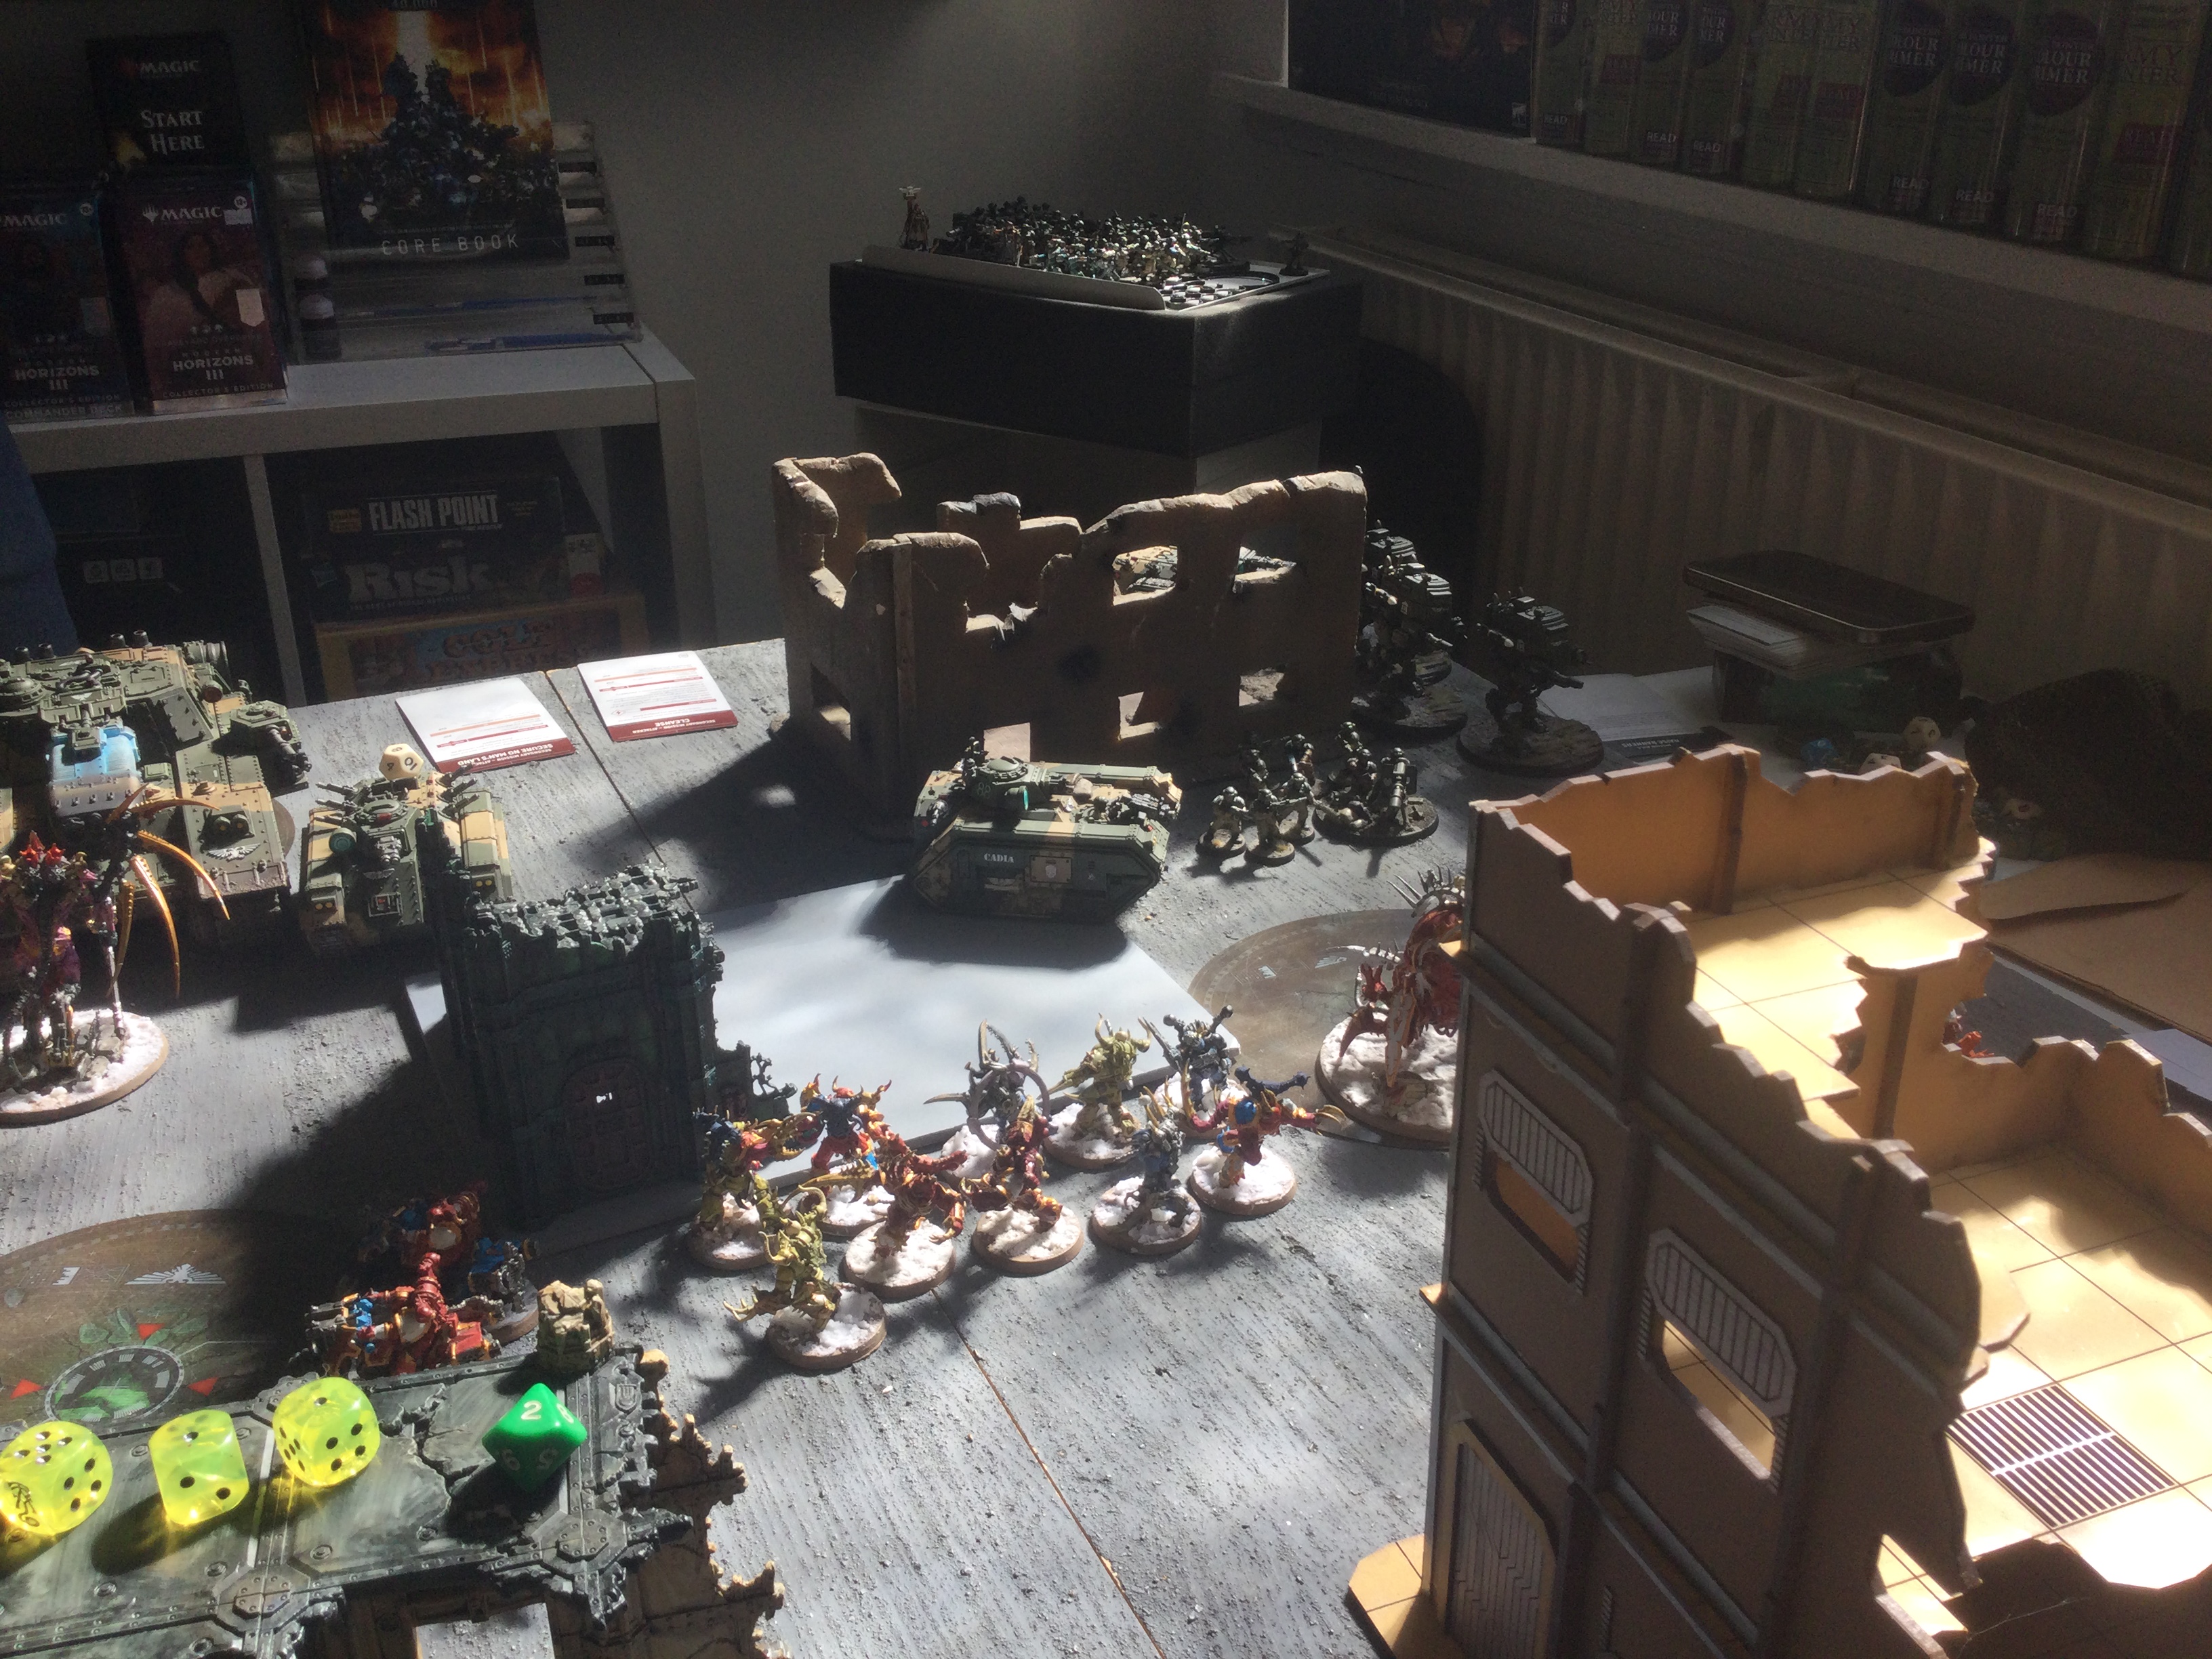
| CSM deployment - again hiding mostly around the big ruin with Maulerfiends hiding back from Vortex beasts shots. I can't hide from Magnus if he really wants to shoot me so only try and hide from the beasts. |
 |
| TS deployment - Rubrics hiding in the big ruin at the back. |
 |
| TS get first turn and Magnus moves upfield - assassinate means them at the Daemon Prince (represented by Hellbrute model due to missing model) send Doombolts at Vashtorr who's takes 10ish mortals. |
 |
| Despite full re-rolls Magnus does no damage to a Maulerfiend due to some horrible rolls and great saves and CSM are in a good spot going into their turn. |
 |
| So decision time - do I unleash hell at Magnus, or ignore him and take out the much easier to kill Vortex beasts. |
 |
| Either way - its full aggression. I decide to start with Predator (just out of shot at back) into Magnus and see how it goes, and give Forgefiend options. Predator manages to get a big Lascannon shot through Magnus's defences and Forgefiends commit to shooting him. |
 |
| Forgefiends leave Magnus on 4 wounds and the 3 Venomcrawlers combine to finish it off even through -1 damage. Early hammer blow for TS |
 |
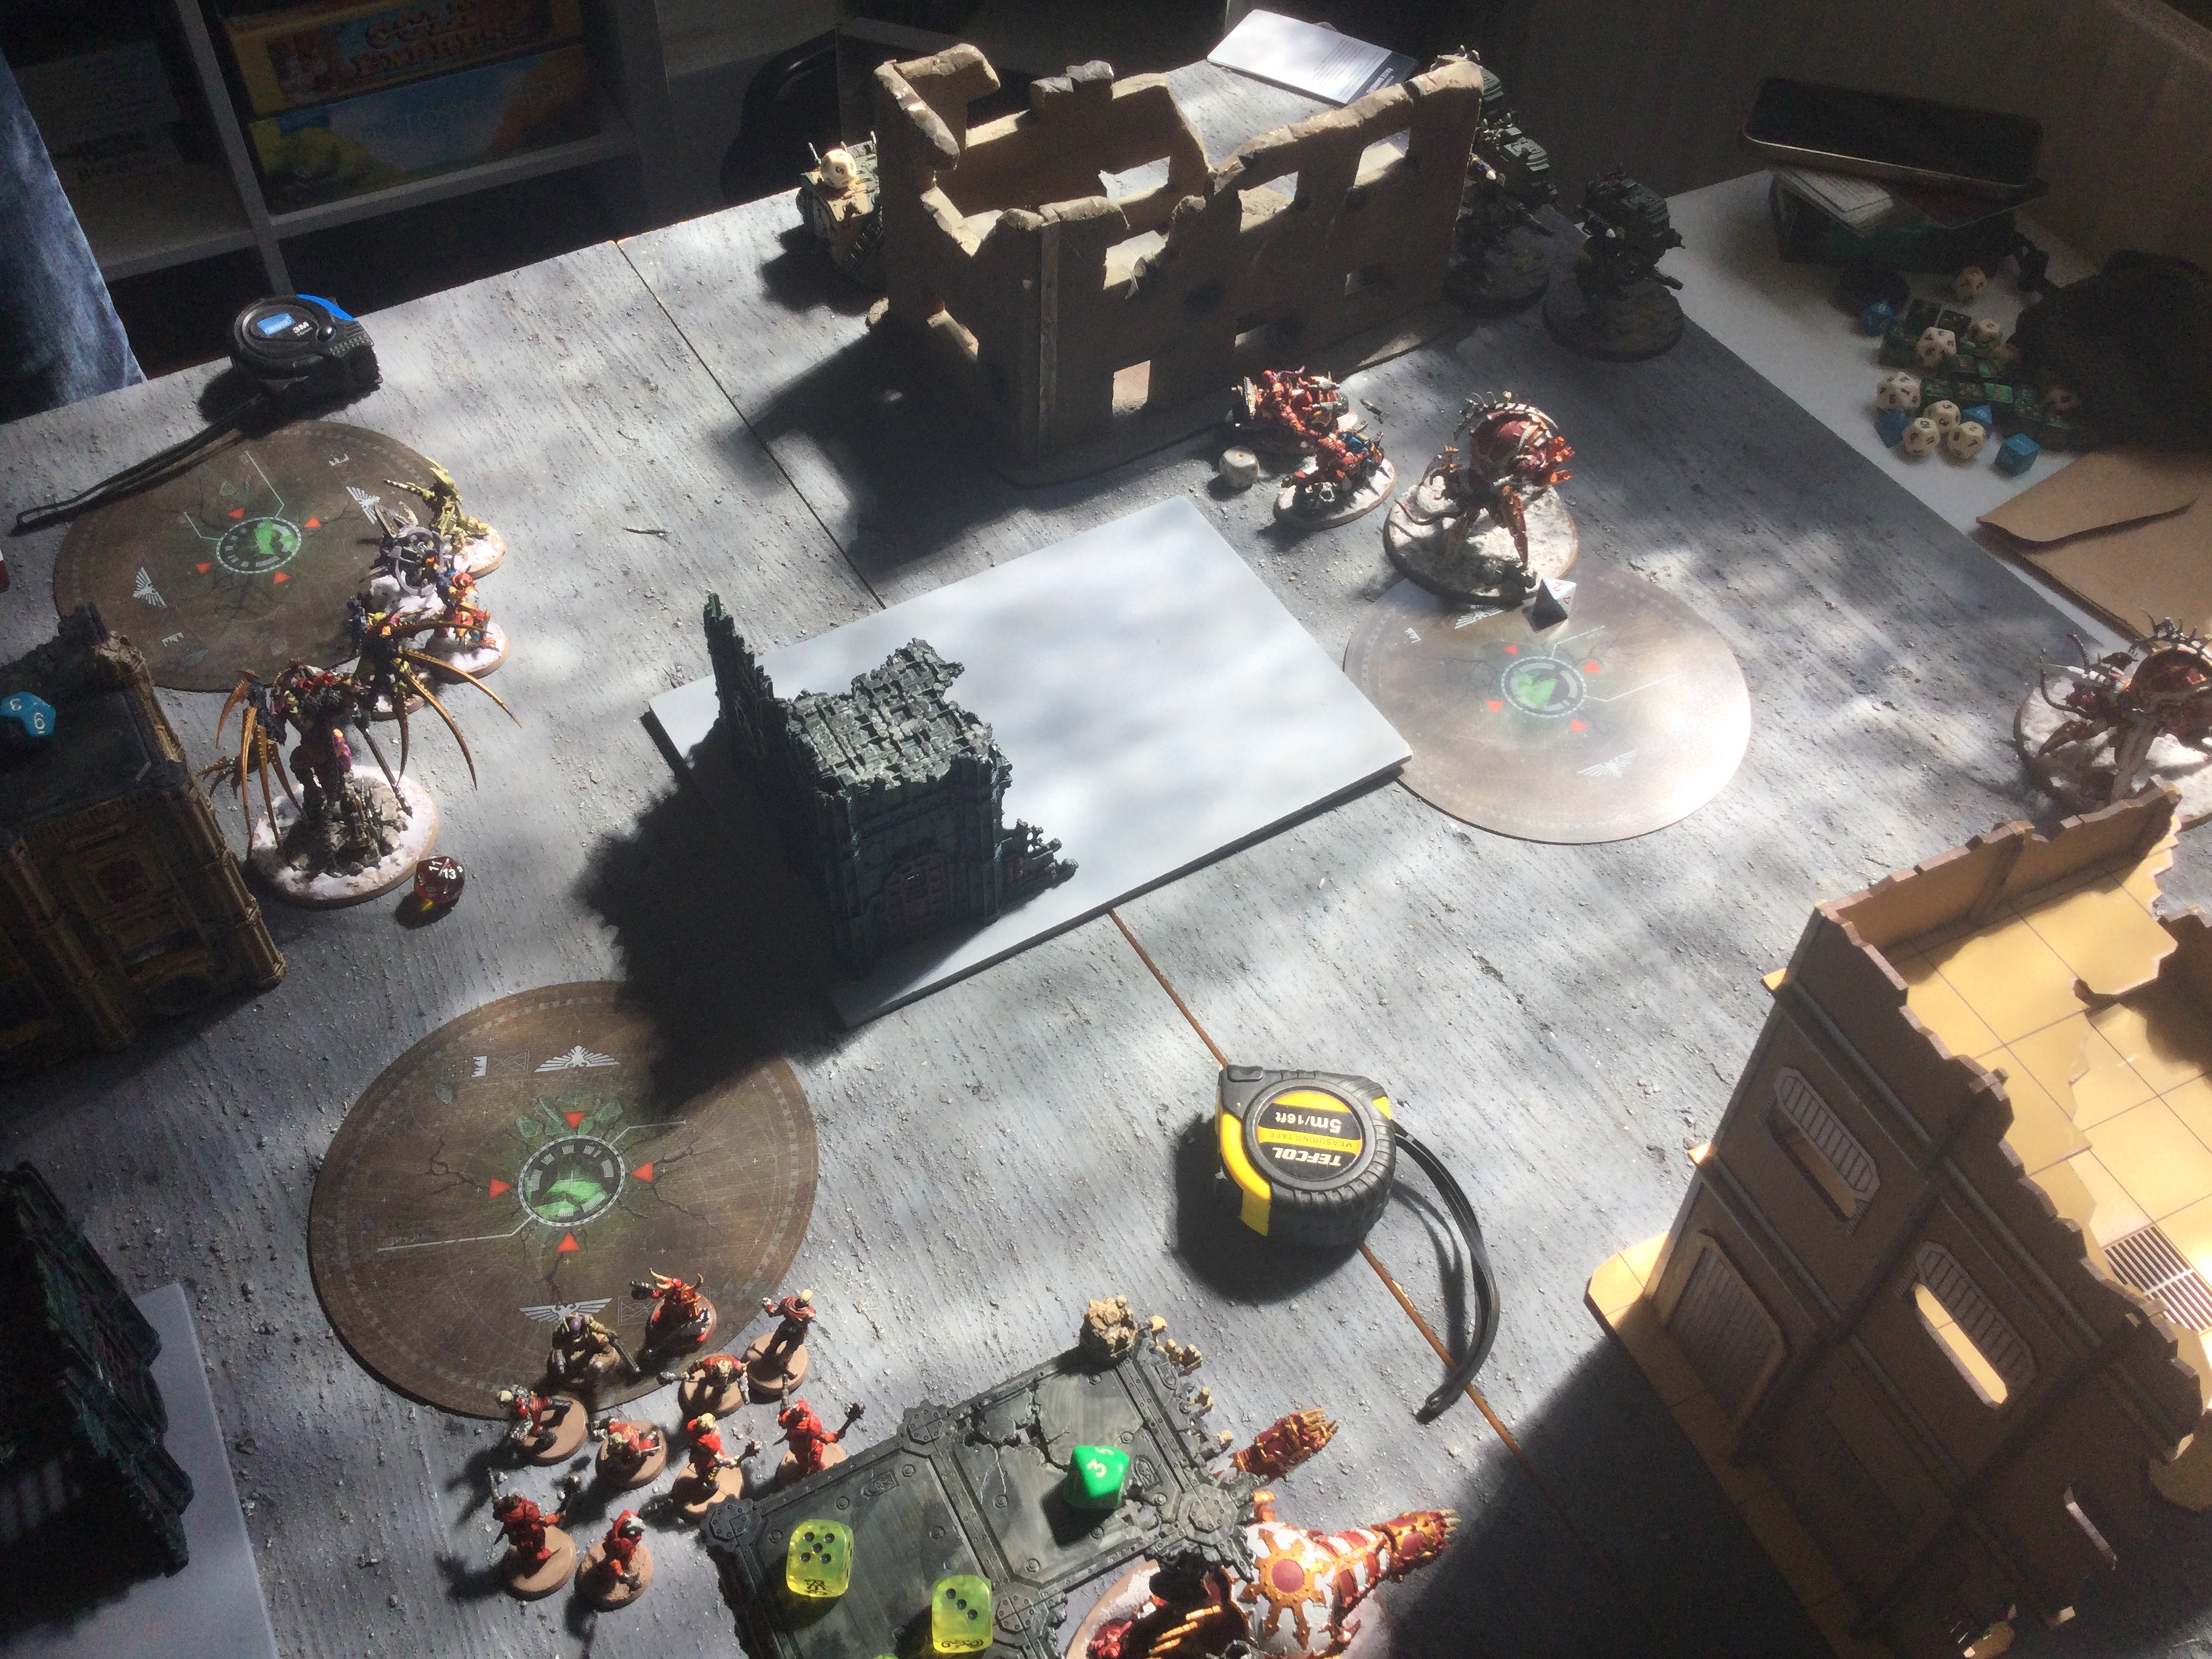
| Board position going into TS turn 2. |
 |
| TS move up in response to losing their primarch, closing the gap on my right flank. |
 |
| Tzangor Enlighted flit around scoring some secondaries as TS try and push back the Daemon Engine advance. |
 |
| TS take out two Maulerfiend - their damage still hefty, but CSM are in a great position to keep the assault going. |
 |
| I'd like to get to Ahriman's 10 man flamer squad but its hiding too well, Tzaangor Enlighted reactive move at the top to make the charge longer but Bikers gun them down. |
 |
| TS lose the last of their big units as Crawlers start charging Rubrics, albeit to little success. |
 |
| CSM have the forward pressure on TS whilst their guns at the back are still untouched from TS...so naturally both Forgefiends are on 5-7 wounds each. |
 |
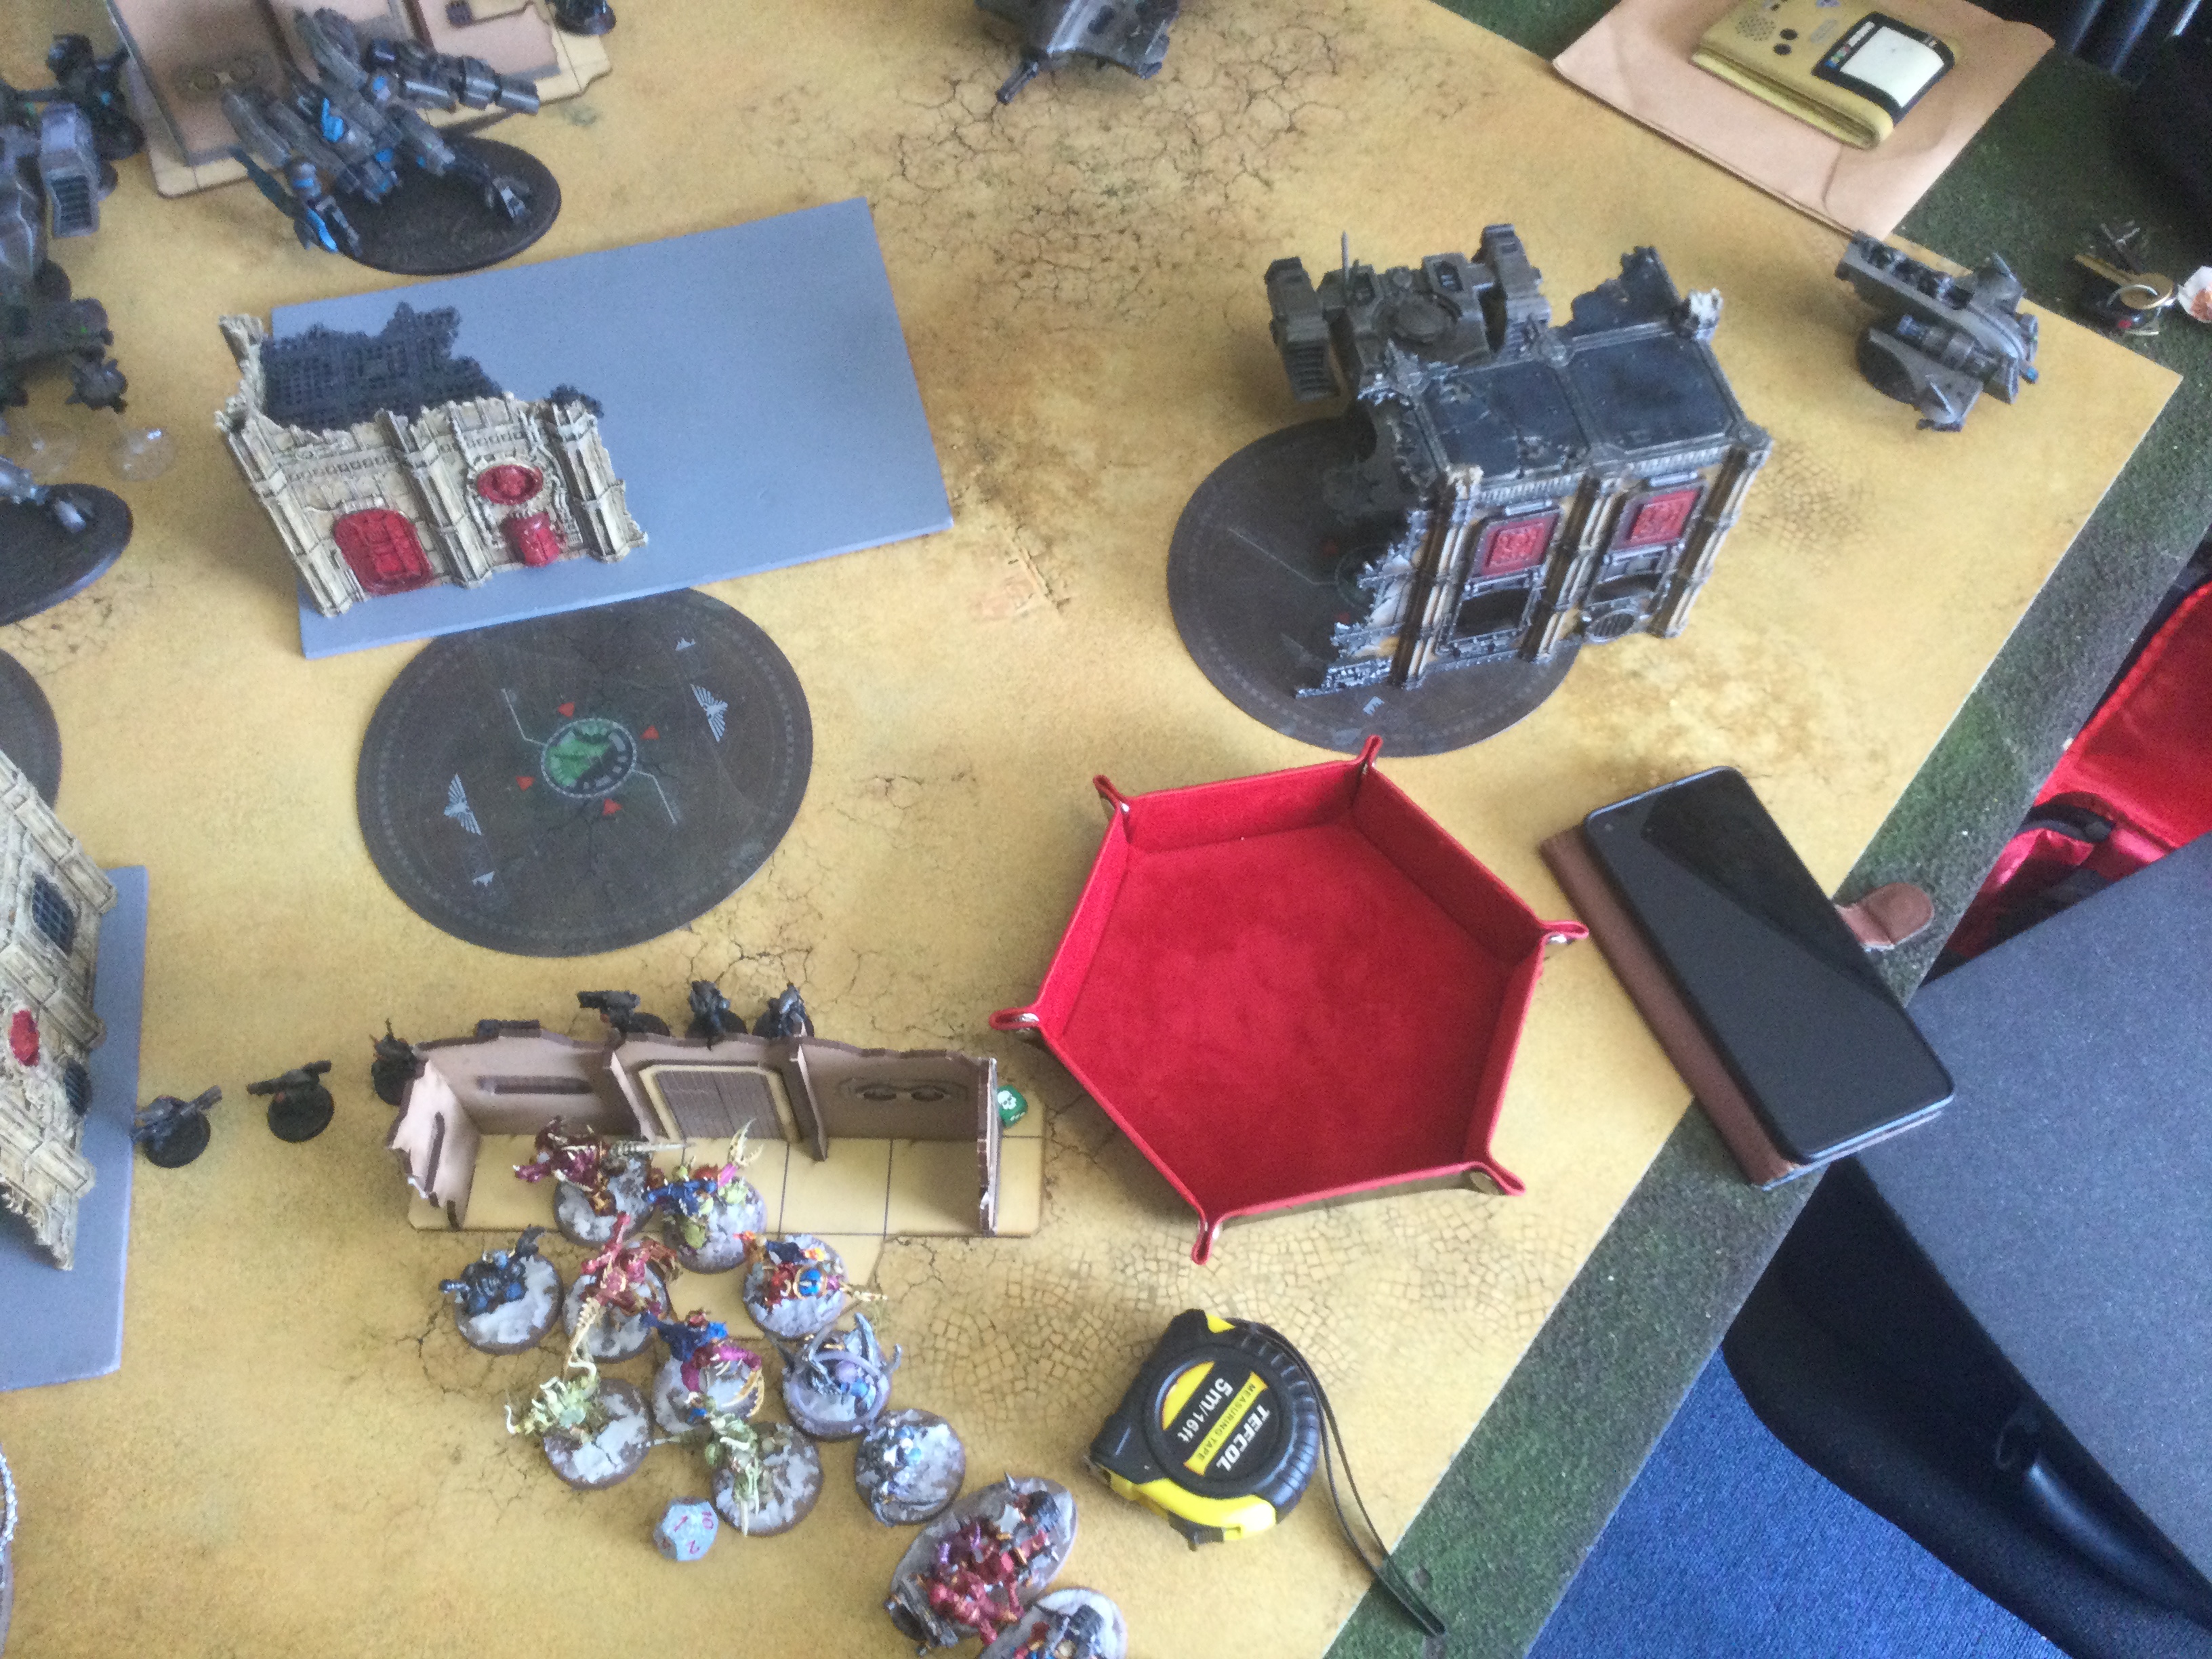
| TS position going into turn 3. They take out a Crawler...but that's about it. |
 |
| CSM move in for the final kills. Ahriman is forced to overwatch Bikers and they kill 2, as Forgefiends and Possessed line them up. |
 |
| With the wrath of various Daemons unleashed upon them the Rubrics don't stand a chance. |
 |
| Rubrics keep battling away against the Venomcrawler as Tzaangors look on, probably looking to run at the first chance. |
 |
| View from TS deployment turn four - Tzaangor Enlighted goes hunting some no prisoners points before CSM wrap up the win. |
Final Score - CSM win 88-44.
Postgame thoughts - Big win for CSM to finish the day. Tom was someone I had known and chatted to when I was at Woking so it was great to finally get a game against him. Killing Magnus turn one was pretty much game right there and then - the Predator started off hurtling damage at Magnus to give me the opportunity (if it had low rolled/done nothing of note I'd have switched to the Vortex beasts) and the Forgefiends kept the pressure up. From that setback - well to be honest TS did pretty well to compete at all after that - the Rubric squads wisely hugging the terrain to keep them safe and popping out to flame anything that got close but there was only so much they could do before getting overrun. Probably left a few points out their choosing violence too much > objectives but not a big deal.
So finished 2-1 and ended fourth on strength of schedule - would have narrowly clinched 3rd on VP scored but at least meant my thrashing against Max didn't cost me a higher place. Max took top with Tau with Matthew Drummond taking second with his Imperial Knights. My brother was at his first event with Space Wolfs had a great start to tournament life - beating Blood Angels and TS (same player as my game in round 3) before losing to Matthew's Knights to finish 6th overall also on a 2-1 record but had entered final round with an outside shot of winning the event which was promising and it was really cool to go to an event with Hal. If your think I'm being too nice to him, I did write a Cricket Match report recently which was about 2 pages of critising him for not giving me man of the match, so perhaps some balance is due.
 |
| Brothers Space Wolves in action |
 |
| Ok, maybe Space Bears, but successor Chapters are a thing. Pictures courtesy of Rob Waller |
As for the list - I liked it, but I didn't love it. It was fun, but didn't feel like a 'me' list so i'll probably try some other stuff whilst waiting for the next dataslate. The best parts of the list were Vashtorr - who honestly impressive even disregarding the Daemon Engine synergy. Awesome against Guard, a rare pain for Tau and even when he did nothing v TS he was what forced Magnus forward to doom bolt for assassinate so big (mostly accidental) impact on the game from him their. Forgefiends/Warpsmith with Tempting Addendum were by far the biggest threats outside of him. A big swingy (had a habit of low rolling shots) but incredibly scary even on overwatch - just assume that the Forgefiend datasheet says it has wound - 3/6 at all times rather than 12 at any point. I think they only killed themself once in the event which was impressive (in multiple practice games they have died turn 2 without a shot fired at them) but the potential output is worth it and the biggest draw to the detachment.
Venomcrawlers were good, although weirdly for a unit that can benefit from both the combat and ranged parts of the Pact, I rarely did. With only 9 wounds failing it with typically only ap-1 attacks that were getting reduced by cover meant it was better to such roll without any pact and hope for chip damage - only against Magnus/TS in the last game did I consistently pact and typically only when the Warpsmith was around to benefit from hit re-rolls. Still they were great filling the 'first wave', chaff removal and filling in for actions when required.
Bikers/Cultists get the - ok, did their jobs role. Possessed were on disappointing side of fine. I'd prefer them to Chosen in the same list still, but I'd have a look elsewhere for something. Mortals only once per game is probably fine, strength 5 ap-1 feels underwhelming which is a shame but I've talked about this before and this isn't a detachment they shine in to be fair - was hoping their natural toughness complemented the list but more smaller squads would probably be better. I like the idea of Raptors for this, I don't want to pay 90 points for them though, so another biker squad and maybe another Predator/Vindicator? Don't love the idea of more tanks though.
Maulerfiends felt like the week link. Whilst they were used expendably for sure, they didn't impress on the rare occasions they made combat. The question they posed is one I have of the list in general - if they are just their to catch bullets are they the best answer, and if not is Soulforged the way to go? Only really the Forgefiends were benefiting consistently from the detachment rule and a third feels like a very fragile list with the way they self-harm as they certainly need protection/distractions. Predator did as well to be fair but didn't 'shine' and it feels like Crawlers, Maulerfiends and itself would be as good in Raiders whilst adding more avenues for other units. Given the units that truly benefit from the detachment are so narrow it feels this might be something to revisit if/when some Daemon Engines get a cut (2 Defilers might be genuinely interesting with a lower price here to make use of interrupt/all aspects of the detachment rule) but until then probably give some detachment a run....or just use TS (DG are fun at the moment as well enjoy Blightlords at their new price.)
Thanks for reading!


Comments
Post a Comment