Beachhead has been one of my favourite tournaments for awhile now, I think its now the one I've been to most (4th time.) Partly its because its a nice venue which isn't tooo far with a lot on, partly its because the other events means I go down there with one of my brothers now who does blood bowl. My other brother was planning on coming but a second child being born the Monday before the event meant he felt he couldn't attend, which feels like prioritising the wrong thing.
 |
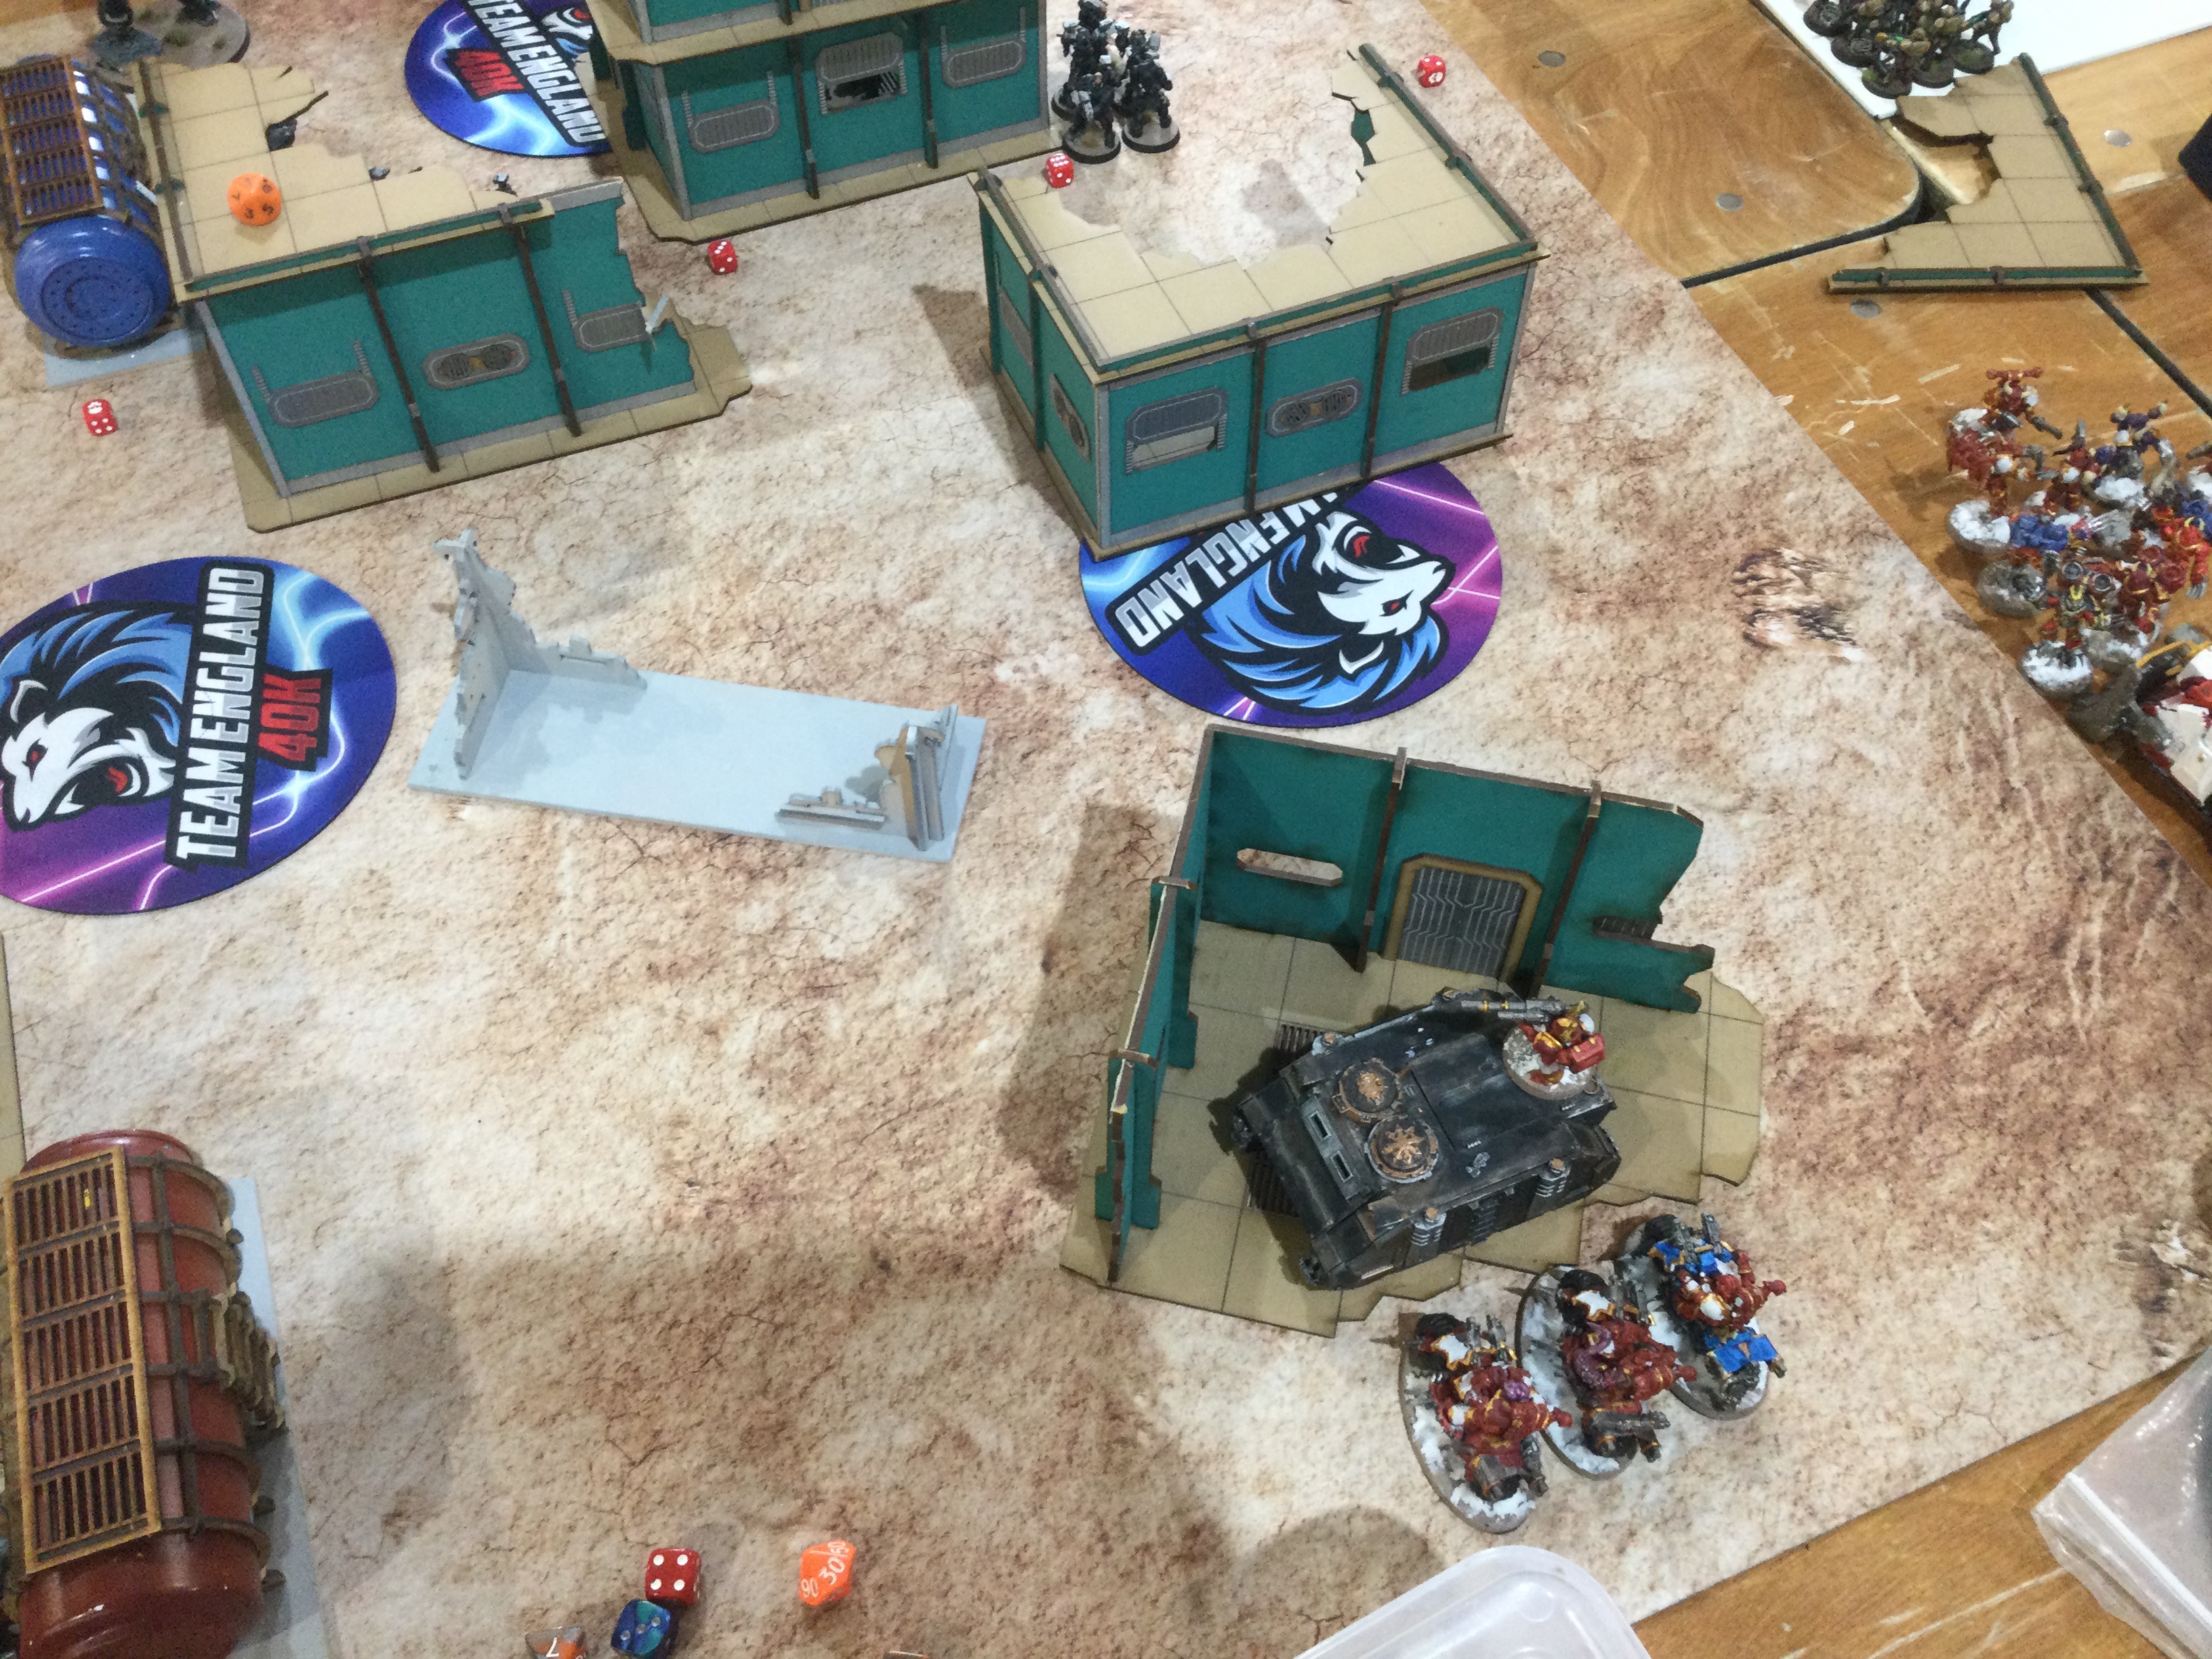
| Normally I try and avoid game one pictures for the banner picture, but if this is a scene your familiar with then I envy your life. |
As I hinted last week I took CSM. Partly, mostly because I love Chaos (new years resolution play less Chaos going super well) but also with 6 games over 2 days I wanted an army that was easier a few big models or one I was super familiar with. As I didn't feel comfortable with Daemons, CSM it was. Having experimented with all the detachments baring Cult I'd come back around to Pactbound Zealot/Index. It felt the most well rounded of them all, it had made Possessed (my favourite unit in 10th) absolute blenders once a game and Nurgle strat for Lone opp 18 caused so many headaches and combined with Cypher helped round out what was otherwise rough games into gunlines. It also felt more measured than the other CSM hotness of Bile - enjoy the playstyle but it felt very all in compared to Zealots.
Beach time (1995 points)
Chaos Space Marines
Strike Force (2000 points)
Pactbound Zealots
CHARACTERS
Cypher (90 points)
• Warlord
• 1x Cypher’s bolt pistol
1x Cypher’s plasma pistol
BATTLELINE
Cultist Mob (50 points)
• Mark of Chaos: Nurgle
• 1x Cultist Champion
• 1x Bolt pistol
1x Brutal assault weapon
• 9x Chaos Cultist
• 9x Autopistol
9x Brutal assault weapon
Legionaries (90 points)
• Mark of Chaos: Slaanesh
• 1x Aspiring Champion
• 1x Chaos Icon
1x Close combat weapon
1x Heavy melee weapon
1x Plasma pistol
• 4x Legionary
• 2x Astartes chainsword
4x Bolt pistol
4x Close combat weapon
1x Heavy melee weapon
1x Lascannon
Legionaries (90 points)
• Mark of Chaos: Slaanesh
• 1x Aspiring Champion
• 1x Chaos Icon
1x Close combat weapon
1x Heavy melee weapon
1x Plasma pistol
• 4x Legionary
• 2x Astartes chainsword
4x Bolt pistol
4x Close combat weapon
1x Heavy melee weapon
1x Lascannon
Legionaries (90 points)
• Mark of Chaos: Slaanesh
• 1x Aspiring Champion
• 1x Chaos Icon
1x Close combat weapon
1x Heavy melee weapon
1x Plasma pistol
• 4x Legionary
• 2x Astartes chainsword
4x Bolt pistol
4x Close combat weapon
1x Heavy melee weapon
1x Lascannon
DEDICATED TRANSPORTS
Chaos Rhino (75 points)
• Mark of Chaos: Slaanesh
• 1x Armoured tracks
1x Combi-bolter
1x Combi-weapon
1x Havoc launcher
Chaos Rhino (75 points)
• Mark of Chaos: Slaanesh
• 1x Armoured tracks
1x Combi-bolter
1x Combi-weapon
1x Havoc launcher
OTHER DATASHEETS
Chaos Bikers (70 points)
• Mark of Chaos: Nurgle
• 1x Biker Champion
• 1x Chaos Icon
1x Close combat weapon
1x Combi-bolter
1x Power fist
• 2x Chaos Biker
• 2x Astartes chainsword
2x Close combat weapon
2x Combi-bolter
2x Meltagun
Chaos Predator Destructor (140 points)
• Mark of Chaos: Nurgle
• 1x Armoured tracks
1x Combi-weapon
1x Havoc launcher
2x Lascannon
1x Predator autocannon
Chaos Predator Destructor (140 points)
• Mark of Chaos: Nurgle
• 1x Armoured tracks
1x Combi-weapon
1x Havoc launcher
2x Lascannon
1x Predator autocannon
Chaos Vindicator (185 points)
• Mark of Chaos: Nurgle
• 1x Armoured tracks
1x Combi-weapon
1x Demolisher cannon
1x Havoc launcher
Chaos Vindicator (185 points)
• Mark of Chaos: Nurgle
• 1x Armoured tracks
1x Combi-weapon
1x Demolisher cannon
1x Havoc launcher
Nemesis Claw (110 points)
• Mark of Chaos: Slaanesh
• 1x Visionary
• 1x Plasma pistol
1x Power fist
• 4x Legionary
• 1x Accursed weapon
1x Astartes chainsword
4x Bolt pistol
4x Close combat weapon
1x Nostraman chainglaive
1x Paired accursed weapons
1x Voice Eater
Possessed (240 points)
• Mark of Chaos: Chaos Undivided
• 1x Possessed Champion
• 1x Hideous mutations
• 9x Possessed
• 9x Hideous mutations
Possessed (240 points)
• Mark of Chaos: Chaos Undivided
• 1x Possessed Champion
• 1x Hideous mutations
• 9x Possessed
• 9x Hideous mutations
Warp Talons (125 points)
• Mark of Chaos: Slaanesh
• 1x Warp Talon Champion
• 1x Warp claws
• 4x Warp Talon
• 4x Warp claws
List starts with 20 Possessed. Any more and I'd run Bile, any less and I'd probably drop them all and run Raiders. 20 felt like the right amount, enough to bully some match ups, not enough to be all in in matchups were they did nothing. 2 each of Predator/Vindicators gave me some swingy punch and these 4 have been staples in just about every CSM list I've run in 10th. 4 Legionnaires became 3 when I wanted Nemisis Claw to turn off strats in engagement range. Playing DG last weekend make me terrified of CSM match ups just on this alone so I had to include it. Otherwise went light on characters - most Characters in armies tend to give sustained/lethal affects to units and given that's CSM's army rule I didn't feel the need to include it. Slaanesh Legionnaires (with sustained 5's) hit hard enough without a Lord in trading wars, so saved points to go wide. Cypher was the lone exception A - Because I need a character and B - He just such a pain for gunlines due to lone opp, and combat due to extra CP vect aura.
The one match up I was really worried about was Bridgehead Guard - I had Lone opps for Gunlines, trading pieces for combat, Possessed for pressure/counter pressure but nothing for Scions teleporting in and blowing something up within 18.
Game 1 – Mission J – Linchpin/Raise Banners/Search & Destroy v James Mccann.
beachhead (1995 points)
Aeldari
Strike Force (2000 points)
Battle Host
CHARACTERS
Autarch (75 points)
• Warlord
• 1x Dragon fusion gun
1x Howling Banshee Mask
1x Star glaive
BATTLELINE
Guardian Defenders (100 points)
• 10x Guardian Defender
• 10x Close combat weapon
10x Shuriken catapult
• 1x Heavy Weapon Platform
• 1x Close combat weapon
1x Starcannon
Guardian Defenders (100 points)
• 10x Guardian Defender
• 10x Close combat weapon
10x Shuriken catapult
• 1x Heavy Weapon Platform
• 1x Close combat weapon
1x Starcannon
Guardian Defenders (100 points)
• 10x Guardian Defender
• 10x Close combat weapon
10x Shuriken catapult
• 1x Heavy Weapon Platform
• 1x Close combat weapon
1x Starcannon
Guardian Defenders (100 points)
• 10x Guardian Defender
• 10x Close combat weapon
10x Shuriken catapult
• 1x Heavy Weapon Platform
• 1x Close combat weapon
1x Starcannon
Guardian Defenders (100 points)
• 10x Guardian Defender
• 10x Close combat weapon
10x Shuriken catapult
• 1x Heavy Weapon Platform
• 1x Close combat weapon
1x Starcannon
Guardian Defenders (100 points)
• 10x Guardian Defender
• 10x Close combat weapon
10x Shuriken catapult
• 1x Heavy Weapon Platform
• 1x Close combat weapon
1x Starcannon
Storm Guardians (100 points)
• 10x Storm Guardian
• 2x Aeldari flamer
2x Aeldari power sword
8x Guardian combat weapon
2x Guardian fusion gun
6x Shuriken pistol
• 1x Serpent’s Scale Platform
• 1x Guardian combat weapon
1x Serpent shield
Storm Guardians (100 points)
• 10x Storm Guardian
• 2x Aeldari flamer
2x Aeldari power sword
8x Guardian combat weapon
2x Guardian fusion gun
6x Shuriken pistol
• 1x Serpent’s Scale Platform
• 1x Guardian combat weapon
1x Serpent shield
Storm Guardians (100 points)
• 10x Storm Guardian
• 2x Aeldari flamer
2x Aeldari power sword
8x Guardian combat weapon
2x Guardian fusion gun
6x Shuriken pistol
• 1x Serpent’s Scale Platform
• 1x Guardian combat weapon
1x Serpent shield
Storm Guardians (100 points)
• 10x Storm Guardian
• 2x Aeldari flamer
2x Aeldari power sword
8x Guardian combat weapon
2x Guardian fusion gun
6x Shuriken pistol
• 1x Serpent’s Scale Platform
• 1x Guardian combat weapon
1x Serpent shield
Storm Guardians (100 points)
• 10x Storm Guardian
• 2x Aeldari flamer
2x Aeldari power sword
8x Guardian combat weapon
2x Guardian fusion gun
6x Shuriken pistol
• 1x Serpent’s Scale Platform
• 1x Guardian combat weapon
1x Serpent shield
Storm Guardians (100 points)
• 10x Storm Guardian
• 2x Aeldari flamer
2x Aeldari power sword
8x Guardian combat weapon
2x Guardian fusion gun
6x Shuriken pistol
• 1x Serpent’s Scale Platform
• 1x Guardian combat weapon
1x Serpent shield
OTHER DATASHEETS
Hornet (100 points)
• 2x Bright lance
1x Wraithbone hull
Hornet (100 points)
• 2x Bright lance
1x Wraithbone hull
Rangers (55 points)
• 5x Ranger
• 5x Close combat weapon
5x Ranger long rifle
5x Shuriken pistol
Rangers (55 points)
• 5x Ranger
• 5x Close combat weapon
5x Ranger long rifle
5x Shuriken pistol
Scorpion (410 points)
• 1x Bright lance
1x Twin Scorpion pulsar
1x Wraithbone hull
Pregame thoughts:
Well, I wasn't prepared for this list. There were two options with a list like this - its either a tournament veteran whose finely crafted a number of weapon options around a mass of OC denial (similar to how Nids use gaunts) or its a meme list from someone just having some fun. I had to presume the former and whilst its a silly list, its also scary. Fate dice for days, lots of bodies and more OC combining with plenty of anti tank firepower. Basic plan was simple - trade out legionnaires and use Nurgle to protect a tank whilst keeping others back (unless Scorpion presented itself to Vindicators in which case full send to take it out.) Whilst Eldar had a lot of firepower that took out tanks, I could probably survive a turn in the middle if sending two Possessed blobs.
 |
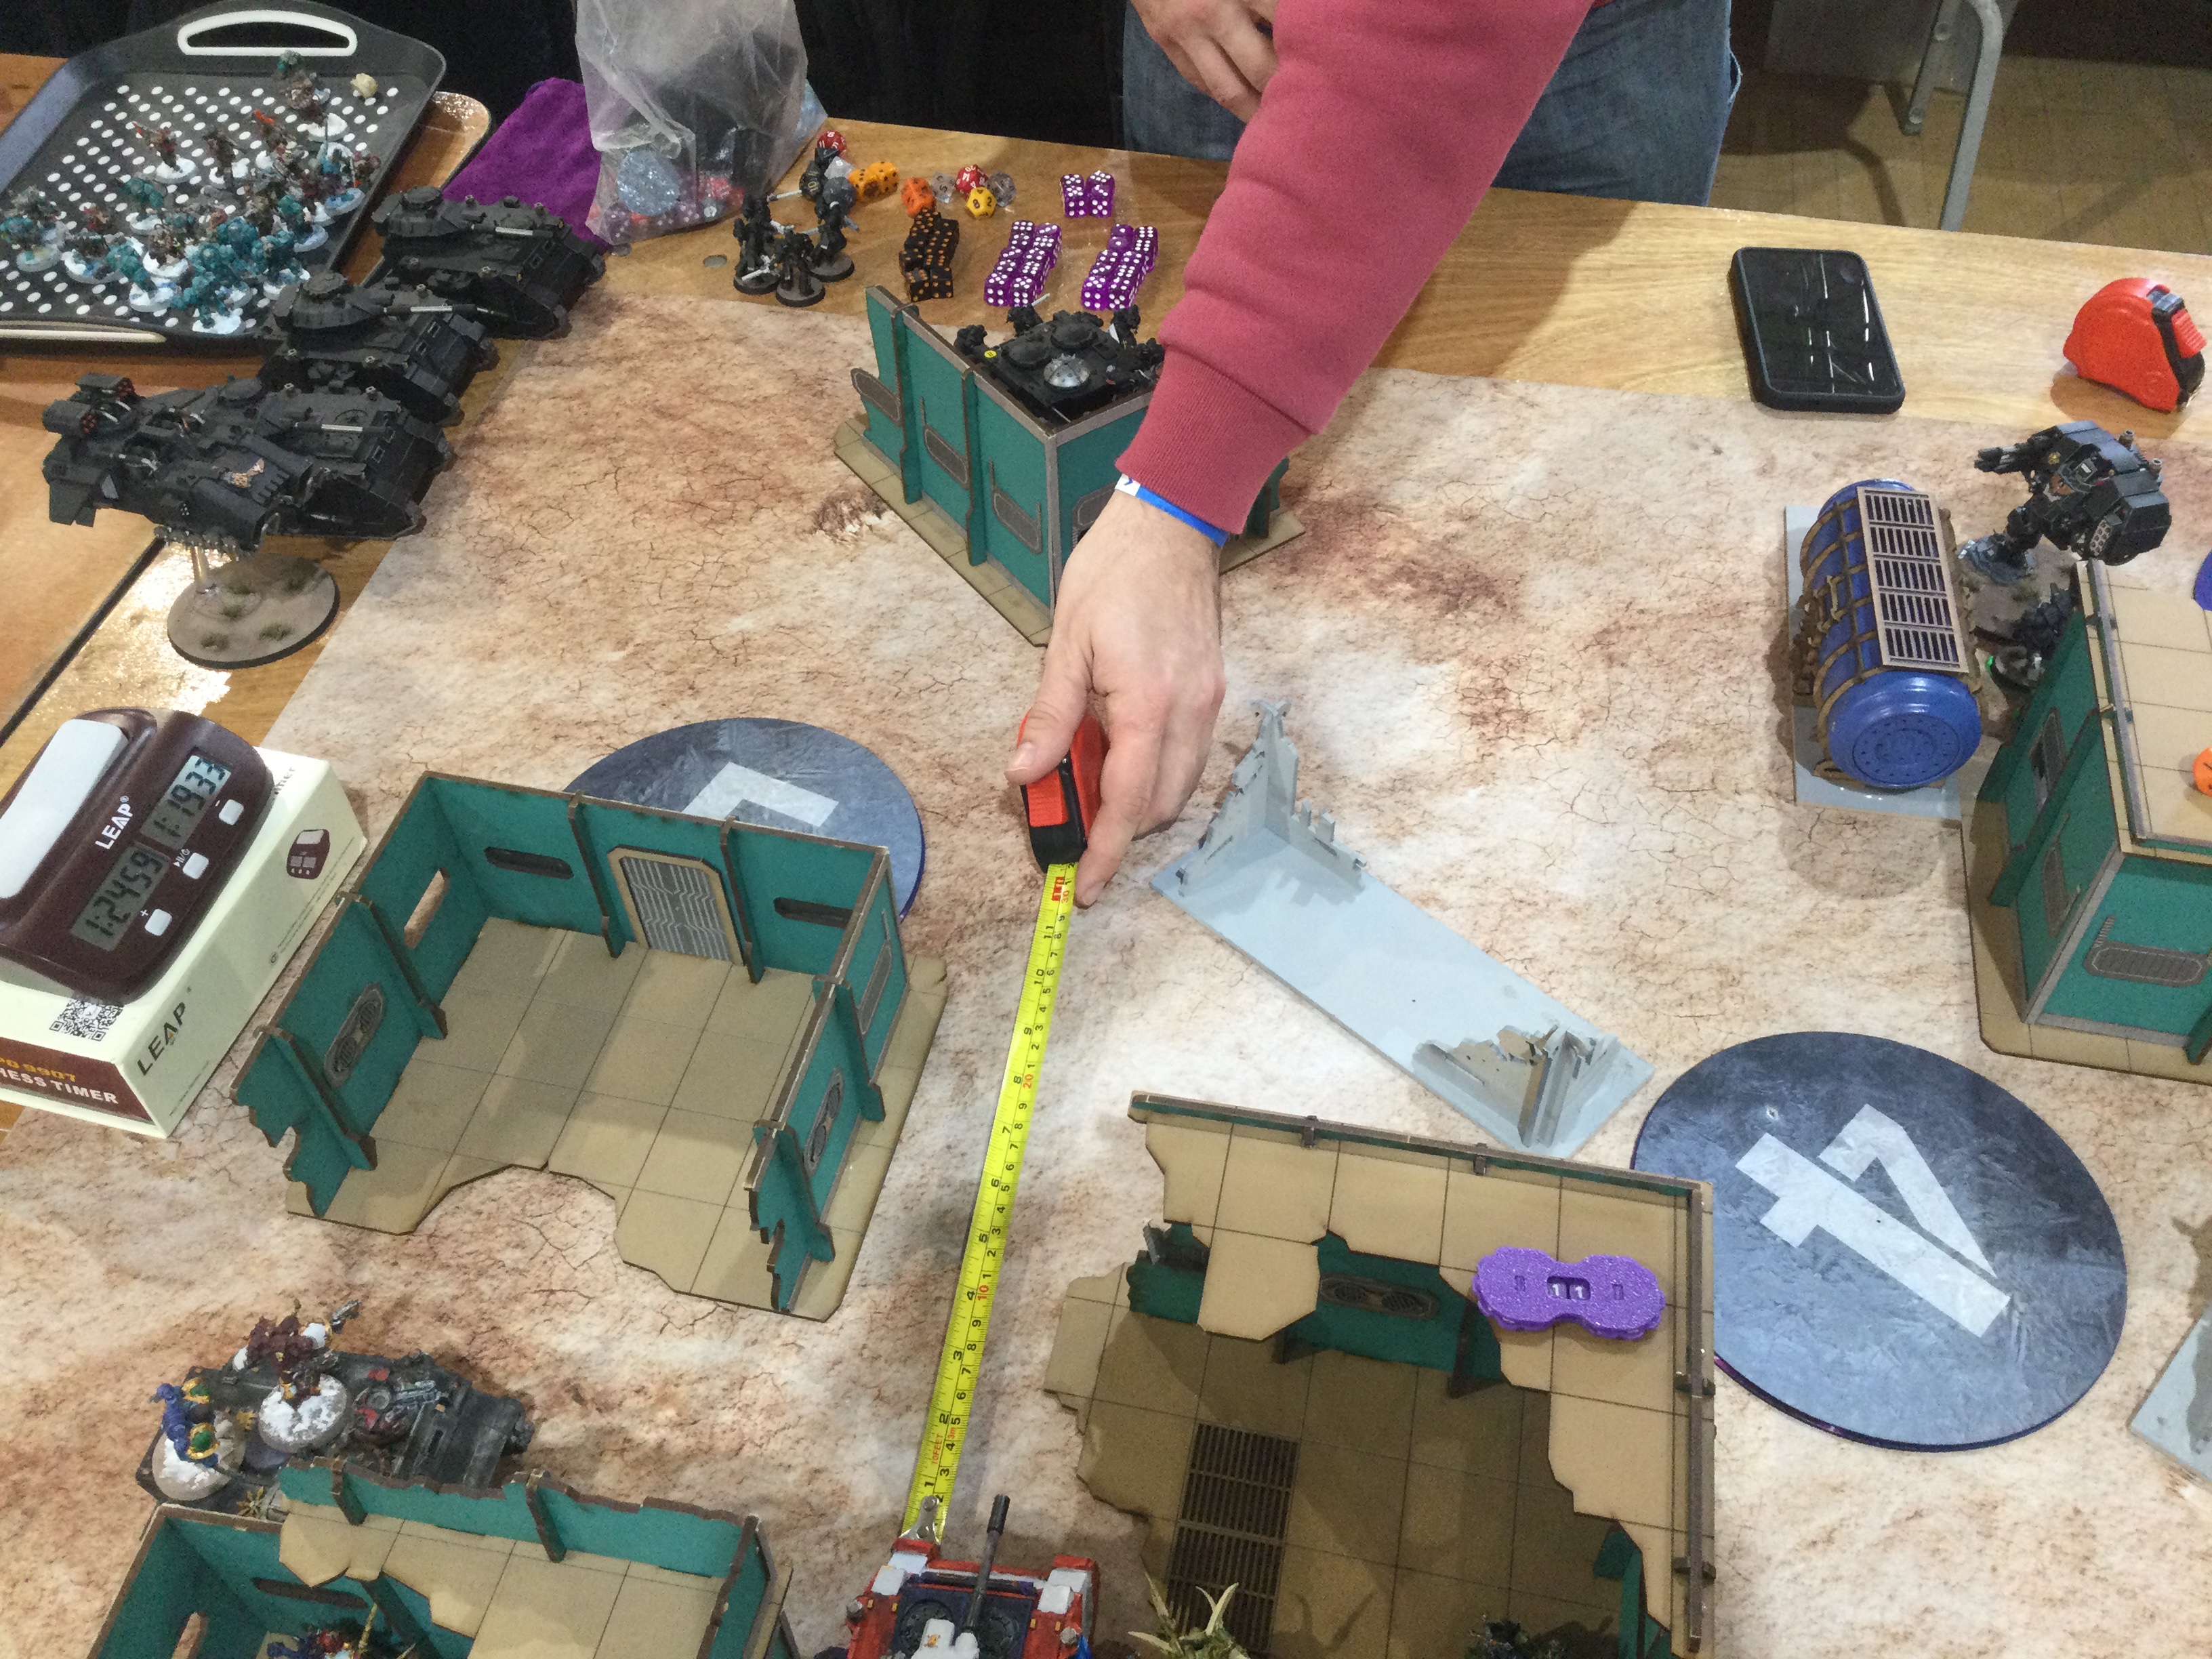
| CSM deployment - trying to hide all my tanks with Possessed up front to take fight head on if needed. Cypher front and centre to provide maximum annoyance with his aura. |
 |
| Eldar deployment - ran out of hiding space quickly in that sea of white and red. |
 |
| Eldar win first turn, advance upfield and that's their turn one without any targets |
 |
| CSM meet Eldar aggression head on mostly, although one Legionnaire squad moves back to plant a banner. I only expose one of my Nurgle tanks to get some shots but can lone opp it to keep it safe whilst the other tanks hide waiting for the Scorpion. |
 |
| Its mostly full send from CSM in the face of all the bodies. Rhino's are pretty effective into Aeldari bodies so make sure to give them some LoS on targets. |
 |
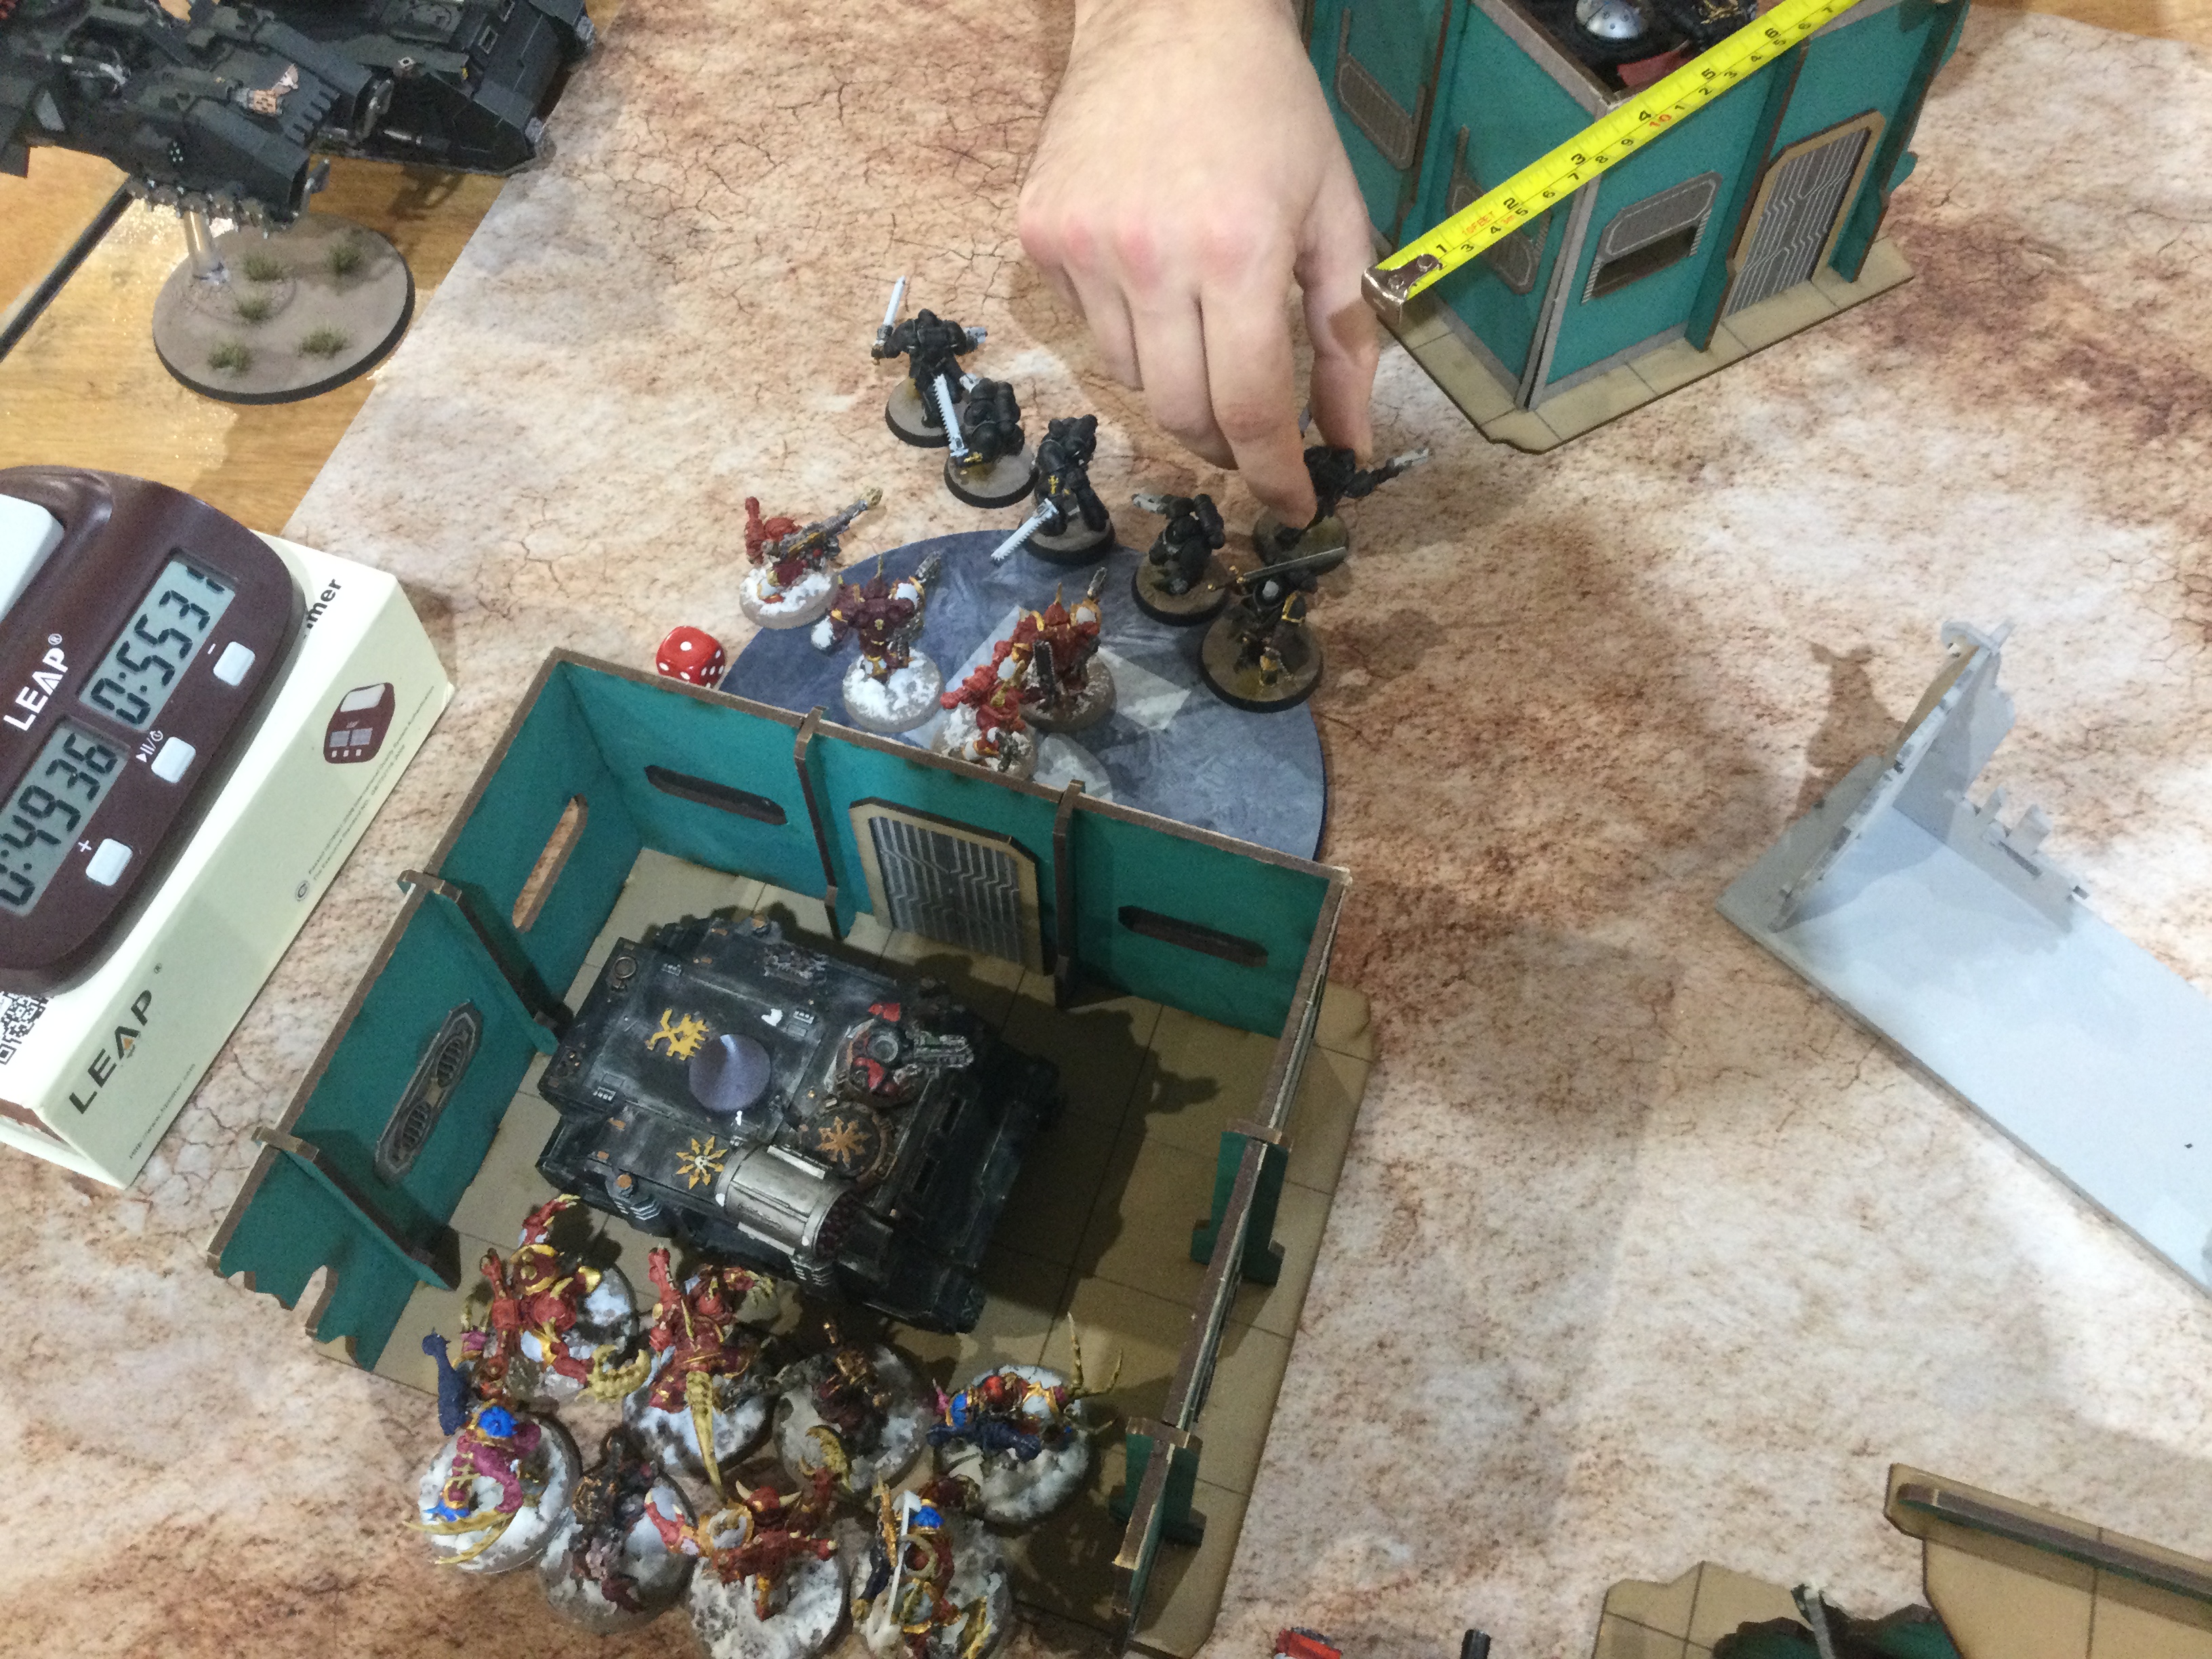
| Soften up the middle with some shooting before Nemesis claw and Possessed charge in. |
 |
| CSM crash into Guardian horde and try to pile in/consolidate into as much as possible not fearing the attacks back. |
 |
| Eldar are purged from left/middle with extreme efficiency. |
 |
| Second wave of Guardians comes forward led by their Autarch. |
 |
| Rangers pop out to take some potshots having moved away from Possessed in CSM turn. Scorpion is so big and their are so many Eldar bodies it struggles to get into position to shoot anything. |
 |
| Warp Talons Rapid Ingress in - there's never going to be any space in Aeldari backfield with this many bodies and I want every attack possible to help clear Guardian bodies. |
 |
| Middle after Eldar shooting phase, bikes are killed and Possessed take a beating (using Nurgle strat to stealth them saves some damage) but a few cling to life. |
 |
| So Guardians decide if they can't kill the Possessed with shuriken its time to draw bayonets (or some sort of elctro blade?) and charge in swarming the Possessed. |
 |
| I'll be honest, I wouldn't have predicted this list, or game state on the journey down. Guardians don't deal much damage and their are too many bodies for Possessed to take out effectively. |
 |
| CSM turn 2 - Cypher stays back to try and hold primary and use lone opp to protect him. Hornets are exposed so I throw tanks forwards to try and take them out - Scorpion counter attacking next turn will be nasty but it can only take out one tank so I want to overload it. |
 |
| CSM second waves comes out to play as I full send in response to Eldar. Didn't expect to be out-aggro'd by Eldar but glad to take the brawl. Don't suspect the trend will continue with their new book. |
 |
| Possessed move upfield ready to charge after falling back and put some pressure onto Eldar's objective whilst Nemeis claw prepares to charge Autarch squad so it can't interrupt. |
 |
| One Vindicator back so the other than be protected from Scorpion with Lone opp if needed. |
 |
| As it turns out Autarch squad is blown away by shooting so CSM squads can charge in to a variety of Guardian squad each. |
 |
| Possessed deal virtually no damage put keep Eldar pinned back. |
 |
| Second Possessed squad completes the pincer putting pressure onto Aeldari deployment zone, taking out the last Hornet after the other is shot off. |
 |
| CSM can't complete their purge of Aeldari from the middle completely but its a brutal turn none the less |
 |
| Overview of battlefield going into Aeldari turn 3 - you can see the waves of dead bodies in their deployment zone. Yes I have swapped from calling them Eldar to Aeldari, no I don't know why. |
 |
| For comparison - CSM losses to this point - a few Possessed, 3 bikers and odd Legionnaire. |
 |
| Overview going into Eldar turn 3. |
 |
| Scorpion lines up some shots and that's pretty much it of note for Eldars turn. CSM charge in their turn 3 ready to finish the job. |
 |
| No Aeldari in the middle of table and only a few in their own deployment as CSM start running around doing actions/planting banners in midboard. |
 |
| CSM butcher their way to Eldars home objective and by Eldars turn 4 they are left with only the Scorpion. |
 |
| Scorpion finds a spot to land and blows up a Vindicator before CSM blow it to pieces in response before they get a chance to charge in. |
 |
| Final CSM dead pile at end of game. |
Final Score - CSM win 100 - 24.
Postgame thoughts - Not too much to say here, my pregame worries weren't founded in the end. A slow trading game using Guardians OC to deny primary repeatedly I do think could cause real problems but an aggressive push into CSM wasn't really ever going to end well as the final score showed. I suspect with the new book out and live Eldar going to get their revenge in spades but for now Slaanesh will be happy and great to start the event with a big win.
Game 2 – Mission I – Burden of Trust/Prepared Positions/Search & Destroy v Damian Corbett
Wake up, it's Gauss O'clock (1990 points)
Necrons
Strike Force (2000 points)
Awakened Dynasty
CHARACTERS
Hexmark Destroyer (110 points)
• 1x Close combat weapon
1x Enmitic disintegrator pistols
• Enhancement: Phasal Subjugator (Aura)
Imotekh the Stormlord (100 points)
• Warlord
• 1x Gauntlet of Fire
1x Staff of the Destroyer
Skorpekh Lord (80 points)
• 1x Enmitic annihilator
1x Flensing claw
1x Hyperphase harvester
Technomancer (85 points)
• 1x Staff of light
Technomancer (85 points)
• 1x Staff of light
OTHER DATASHEETS
Canoptek Reanimator (75 points)
• 2x Atomiser beam
1x Reanimator’s claws
Canoptek Wraiths (230 points)
• 6x Canoptek Wraith
• 6x Particle caster
6x Vicious claws
Canoptek Wraiths (230 points)
• 6x Canoptek Wraith
• 6x Particle caster
6x Vicious claws
Doomsday Ark (190 points)
• 1x Armoured bulk
1x Doomsday cannon
2x Gauss flayer array
Doomsday Ark (190 points)
• 1x Armoured bulk
1x Doomsday cannon
2x Gauss flayer array
Flayed Ones (60 points)
• 5x Flayed One
• 5x Flayer claws
Flayed Ones (60 points)
• 5x Flayed One
• 5x Flayer claws
Lokhust Heavy Destroyers (165 points)
• 3x Lokhust Heavy Destroyer
• 3x Close combat weapon
3x Enmitic exterminator
Skorpekh Destroyers (180 points)
• 6x Skorpekh Destroyer
• 2x Plasmacyte
6x Skorpekh hyperphase weapons
Tomb Blades (75 points)
• 3x Tomb Blade
• 3x Close combat weapon
3x Twin gauss blaster
Tomb Blades (75 points)
• 3x Tomb Blade
• 3x Close combat weapon
3x Twin gauss blaster
Pregame thoughts: Second emergence of Wraith heavy builds is generally a good thing for CSM. CSM damage works very well into Wraith profiles and whilst its never easy to chew through Undivided Pactbound Possessed were my answer when Canoptek Wraiths were meta first time around - maths is very dependant on how FNP's roll out but my expectation is if I go in, pop full re-roll wounds and devs I should cripple a Wraith blob on the charge with Possessed and win combat next round. I have a big damage advantage in the match up - although I don't have any good answer to Doomsday Arks and with only really Nurgle strat to protect my tanks I have to cross fingers and hope they low roll at some stage and only expose one tank at a tank to them until I go full send and try and overload them with targets.
 |
| CSM deployment on the left side... |
 |
| ...and in Centre/right. Very similar to last game - hiding tanks from DDA's whilst Possessed and Bikers can threaten middle/flanks. |
 |
| Necron deployment with Wraiths ready to contest the flanks and trade pieces for the middle. DDA are right at the back which is good for me - there are only a few angles they can take so much easier to play around. |
 |
| CSM go first and I start to stage. My Possessed on left can't be shot and its a very long charge for the Wraiths to get in so I'm happy throwing them forward. |
 |
| Bikers take objective for CSM in their turn, so Wraiths move up to take it for Necrons as Tomb Blades come out to contain. |
 |
| CSM turn 2 I debate the merits of going all in on a Wraith blob and eventually decide to go all in, throwing Possessed and 5 Legionnaires at the problem leaving only a technomancer hiding behind the wall alive. Bikers shoot and charge the Tomb Blades but bounce off. |
 |
| On my left flank Predator moves up to get some shots on some more Tomb Blades hiding at the back, whilst keeping as far back as possible to hide from DDA's. 5 Flayed ones on the far side of the same wall, I move up Possessed so 6 are on the objective whilst trying to stay as far away from Necron deployment zone as possible. |
 |
| Necrons don't have any combat troops left on the right flank to take the objective so line up shots. Rhino hiding behind the wall means CSM will hold objective regardless. |
 |
| Skorpeks move out targeting the Possessed with a decently long charge. I Rapid Ingress Warp Talons behind them so I have a counter attacking option (I have shooting to hit them with, but worried about Lord coming back via Strat even if I kill him so need to punch him after.) Necrons blow up the Rhino in shot and the 2 Legionnaires from one squad pile out onto the objective to give Skorpeks choice of easy charge/objective but trade down or giving CSM primary and taking longer charge into Possessed. |
 |
| Necrons elect for damage and charge in to Possessed who pop fight on death. |
 |
| Possessed take out a couple of Skorpeks but take a battering and Necrons retake the objective, although the Legionaries in the middle mean CSM take a strong lead on primary. |
 |
| CSM turn 3 on my top left flank- my tanks combine to blow Skorpeks away and the Lord doesn't come back. Warp Talons go in to take out Flayed ones and Necrons have lost their hold on the flank. |
 |
| CSM get aggressive on the right flank - they don't deal much damage (this is after combat, taking out only a Heavy Destroyer and Technomancer) but it push's Necron back. I don't have any combat units in a state to take the Wraiths on, so similar to last week with Death Guard I try and force Wraiths attention between 3 objectives. |
 |
| Wraiths choose the middle, they can't deal any meaningful damage to CSM who have taken a 20 point lead in primary. However despite keeping Necrons to 2 primary scores are effectively tied thanks to some strong Necron/poor CSM secondaries. |
 |
| CSM turn 4 - shooting Necrons Wraiths is a thankless task buy Cypher and Nemesis claw combine to limit Necron reanimation shenanigans. Vindicator moves up to get involved as well - hoping to tie Necrons up and stop Wraiths charging more juicy targets/threatening other objectives. |
 |
| Having drawn overwhelming force and being unsure if I can score it against Wraiths, Warp Talons move up to target the Destroyers and pressure Necron backfield after my last wave was taken out by Necron shooting. |
 |
| Necrons lines were wavering already but when CSM firepower softens up the Wraiths and Nemesis claw exact kills the last Wraith it ensures CSM's dominance of the primary. |
 |
| Necrons still have plenty of firepower but no real way to leverage it to primary at this stage. |
 |
| CSM have taken some hefty blows as well as game threatens to descend into a scrap as Flayed ones make a play for the middle. |
 |
| Nemesis claw however manage to take out Flayed ones and Warp Talons manage to survive on Necron objective for a turn after Imotekh fluffs his lines. |
 |
| CSM take control of the objectives till the end as Necrons score some last second secondaries. |
Final score - 95 - 52 to CSM.
Postgame thoughts - Very happy with the win, CSM really good profiles into Wraiths but they are always such a pain to take out regardless and I did get worried the second blob might just shrug a shooting phase and cause a pain for the rest of the game. As it was CSM bullied primary all game - Necrons managing just 2 points (but maxed out secondaries, Burdens an odd mission)
Game 3 – Mission M – Purge the Foe/Rapid Escalation/Crucible of Battle v Adam Todd-Sears
Cowboys from hell (2000 Points)
World Eaters
Berzerker Warband
Strike Force (2000 Points)
CHARACTERS
Angron (435 Points)
• Warlord
• 1x Samni’arius and Spinegrinder
Khârn the Betrayer (100 Points)
• 1x Gorechild
• 1x Khârn’s plasma pistol
Lord Invocatus (140 Points)
• 1x Bolt Pistol
• 1x Coward’s Bane
• 1x Juggernaut’s bladed horn
World Eaters Master of Executions (135 Points)
• 1x Axe of dismemberment
• 1x Bolt pistol
• Enhancements: Berzerker Glaive
BATTLELINE
Jakhals (65 Points)
• 1x Jakhal Pack Leader
◦ 1x Autopistol
◦ 1x Jakhal chainblades
• 1x Dishonoured
◦ 1x Skullsmasher
• 8x Jakhal
◦ 8x Autopistol
◦ 1x Icon of Khorne
◦ 7x Jakhal chainblades
◦ 1x Mauler chainblade
Khorne Berzerkers (90 Points)
• 1x Khorne Berzerker Champion
◦ 1x Berzerker chainblade
◦ 1x Plasma pistol
• 4x Khorne Berzerker
◦ 3x Berzerker chainblade
◦ 3x Bolt pistol
◦ 1x Icon of Khorne
◦ 1x Khornate eviscerator
◦ 1x Plasma pistol
Khorne Berzerkers (90 Points)
• 1x Khorne Berzerker Champion
◦ 1x Berzerker chainblade
◦ 1x Plasma pistol
• 4x Khorne Berzerker
◦ 3x Berzerker chainblade
◦ 3x Bolt pistol
◦ 1x Icon of Khorne
◦ 1x Khornate eviscerator
◦ 1x Plasma pistol
DEDICATED TRANSPORTS
World Eaters Rhino (75 Points)
• 1x Armoured tracks
• 1x Combi-bolter
• 1x Combi-bolter
• 1x Havoc launcher
OTHER DATASHEETS
Eightbound (140 Points)
• 1x Eightbound Champion
◦ 1x Lacerators
• 2x Eightbound
◦ 2x Eightbound eviscerators
Eightbound (140 Points)
• 1x Eightbound Champion
◦ 1x Lacerators
• 2x Eightbound
◦ 2x Eightbound eviscerators
Eightbound (140 Points)
• 1x Eightbound Champion
◦ 1x Lacerators
• 2x Eightbound
◦ 2x Eightbound eviscerators
Exalted Eightbound (310 Points)
• 1x Exalted Eightbound Champion
◦ 1x Paired Eightbound chainfists
• 5x Exalted Eightbound
◦ 5x Eightbound chainfist
◦ 5x Eightbound eviscerator
World Eaters Chaos Spawn (70 Points)
• 2x Chaos Spawn
◦ 2x Hideous mutations
World Eaters Chaos Spawn (70 Points)
• 2x Chaos Spawn
◦ 2x Hideous mutations
Pre game thoughts: World Eaters is always scary, but one I'm generally happy with as CSM. It feels like I play it well, I should win as long as mission isn't a pain - Purge isn't bad v World Eaters especially as I went second. Both of us has combat the other player has to respect, but I have considerably more ranged firepower to try and attrition. As long as I screen well (and don't allow WE to mutli-charge Rhino's to crack the contents) I should be able to out-trade World Eaters and force their big Eightbound units/Angron out first were I can either A - Murder them with big damage, or B - use Cypher/Nemesis Claw to help control the fight phase (particularly to stop either interrupt or -1 damage which would be their big counter to a big Possessed charge.) Angron as ever is a wild card though, I want to avoid him as long as possible, and hope to kill him late so he doesn't come back, committing to him early and either failing to connect or having him Rapid Ingress somewhere after resurrecting feels like WE's path to victory.
 |
| CSM reserves - WE tend to hate screening more than most armies so anything that can be done to help keep units back is great. Mission rule allowing Legionnaires to come in turn 1 means they go in reserve as well. |
 |
| CSM deployment - Cultists take a break from their normal 'hide at back' and take a more frontal screening option. |
 |
| Bulk of WE deployment with Spawn ready to move up as first wave. |
 |
| Rest of WE on my near right flank with Bezerkers/MoE/Kharn by himself. |
 |
| WE win first turn and start scouting up and staging in a mostly uneventful turn one. |
 |
| CSM turn 1 - I shoot off a squad of Bezerkers that had appeared and get some potshots into the Eightbound in the ruin. Otherwise my Cultists move up to take space and screen out. |
 |
| Predator gets some easy shots into some Jackals whilst Rhino moves up and touches objective - Angron can't clear it ad combined with my Cultists it means neither squad of Possessed can be charged. |
 |
| Overview from right of battlefield going into WE turn 2. |
 |
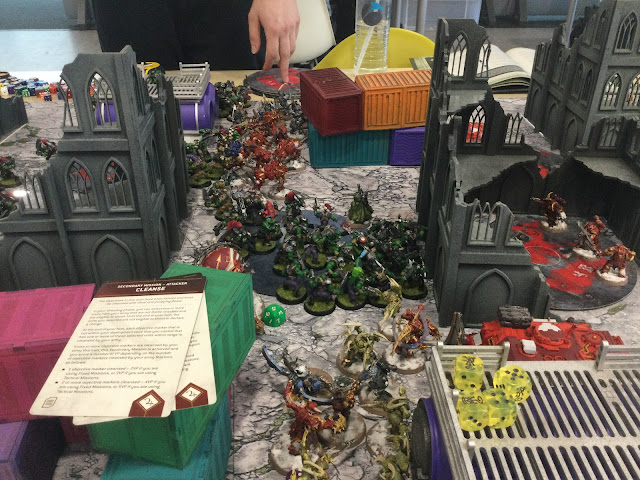
| WE have some awkward choices - they can't charge anything meaningful, but if they stay back CSM will get a big lead on primary early. Angron goes forward to take out Rhino and Spawn come into the middle. |
 |
| Invocatus joins the Spawn and kills the Cultist whilst I'll leave it to your imagination as to how Angron v Rhino went. |
 |
| Eightbound also joins the fray, charging into my bikers |
 |
| WE don't have space to screen out everything so Warp Talons Rapid Ingress behind their lines, keeping 11ish away in case Spawn decide to try and charge. |
 |
| CSM turn 2 - the tanks start to line up shots into Angron as Possessed commit to Angron. |
 |
| Not full send but close to it as CSM move up to fight on all 3 centre objectives. |
 |
| And the Warp Eagles fight on WE home objective, killing both spawn. |
 |
| Tanks soften up Angron and Possessed charge in with full wound re-rolls and dev wounds to with Khorne approved overkill on Angron. |
 |
| CSM has easy control of their home and top left objective, middle and bottom right are being traded over hard and WE are behind on attrition. |
 |
| With Raptors on home objective there are a lot of front for just a couple of WE units to fight over now. |
 |
| Eightbound split up, they want to charge Possessed but are wary of CSM overwatch into them so elect to charge Legionnaires through to wall to avoid it. |
 |
| Kharn comes out solo taking out a Legionnaire squad. |
 |
| Exalated Eightbound butcher through my Legionnaires in the middle |
 |
| And WE retake their home objective, Warp Talons fighting on death for some minor damage back. |
 |
| WE are exposed now - I elect to keep the pressure up on the backfield with Legionnaire unit arriving from reserve to split attention of Eightbound. |
 |
| Possessed move up to take on their WE cousin's. |
 |
| CSM tanks are unchallenged and start to take out Eightbound. |
 |
| Nemesis claw not needed still so Rhino drives onto objective keeping them safe. |
 |
| Exalted Eightbound are taken out, I still have a Possessed squad at the babysitting objective just in case Angron comes back and wants to Rapid Ingress onto it. |
 |
| WE are fighting on fumes, when Angron doesn't come back last of the Bezerkers come out to fight along with the Rhino. |
 |
| 2 Eightbound squads left for WE, one here charging into Possessed hoping for something crazy. |
 |
| Last reluctantly sits on home objective. |
 |
| WE scratch up some paint whilst CSM tanks await their chance to shoot. |
 |
| Possessed take their blows but win the fight regardless. CSM finish off the game as Angron stays away. |
Final score - 95 - 61 win for CSM.
Postgame thoughts - Very happy with the win. WE are a strong army, but this highlights why I tend not to play them much. I'm not sure there is much Adam could have done differently here to change the result - WE have to either trade a more expensive unit or let CSM get primary and if they go all in YOLO charge the Possessed just rip them apart (with Cypher/Nemesis claw helping shut down WE options.) To analogise further - CSM always felt like the main character of the game, whilst WE kept having to react in ways that always gave them bad options. Game plan on tactical level worked well and a strong win to round out the day.
Game 4 – Mission O – Terraform/ Stalwarts/ Crucible of Battle v Louise Ballington
Sanguinius is in the box (1995 Points)
Space Marines
Blood Angels
Liberator Assault Group
Strike Force (2000 Points)
CHARACTERS
Techmarine (55 Points)
• Warlord
• 1x Forge bolter
• 1x Grav-pistol
• 1x Omnissian power axe
• 1x Servo-arm
Techmarine (55 Points)
• 1x Forge bolter
• 1x Grav-pistol
• 1x Omnissian power axe
• 1x Servo-arm
Techmarine (55 Points)
• 1x Forge bolter
• 1x Grav-pistol
• 1x Omnissian power axe
• 1x Servo-arm
BATTLELINE
Assault Intercessor Squad (75 Points)
• 1x Assault Intercessor Sergeant
◦ 1x Hand flamer
◦ 1x Power fist
• 4x Assault Intercessor
◦ 4x Astartes chainsword
◦ 4x Heavy bolt pistol
Assault Intercessor Squad (75 Points)
• 1x Assault Intercessor Sergeant
◦ 1x Hand flamer
◦ 1x Power fist
• 4x Assault Intercessor
◦ 4x Astartes chainsword
◦ 4x Heavy bolt pistol
Assault Intercessor Squad (75 Points)
• 1x Assault Intercessor Sergeant
◦ 1x Hand flamer
◦ 1x Power fist
• 4x Assault Intercessor
◦ 4x Astartes chainsword
◦ 4x Heavy bolt pistol
Intercessor Squad (80 Points)
• 1x Intercessor Sergeant
◦ 1x Bolt pistol
◦ 1x Bolt rifle
◦ 1x Power fist
• 4x Intercessor
◦ 1x Astartes grenade launcher
◦ 4x Bolt pistol
◦ 4x Bolt rifle
◦ 4x Close combat weapon
OTHER DATASHEETS
Assault Intercessors with Jump Packs (90 Points)
• 1x Assault Intercessor Sergeant with Jump Pack
◦ 1x Plasma pistol
◦ 1x Power fist
• 4x Assault Intercessors with Jump Packs
◦ 4x Astartes chainsword
◦ 3x Heavy bolt pistol
◦ 1x Plasma pistol
Assault Intercessors with Jump Packs (90 Points)
• 1x Assault Intercessor Sergeant with Jump Pack
◦ 1x Plasma pistol
◦ 1x Power fist
• 4x Assault Intercessors with Jump Packs
◦ 4x Astartes chainsword
◦ 3x Heavy bolt pistol
◦ 1x Plasma pistol
Assault Intercessors with Jump Packs (90 Points)
• 1x Assault Intercessor Sergeant with Jump Pack
◦ 1x Plasma pistol
◦ 1x Power fist
• 4x Assault Intercessors with Jump Packs
◦ 4x Astartes chainsword
◦ 3x Heavy bolt pistol
◦ 1x Plasma pistol
Ballistus Dreadnought (130 Points)
• 1x Armoured feet
• 1x Ballistus lascannon
• 1x Ballistus missile launcher
• 1x Twin storm bolter
Ballistus Dreadnought (130 Points)
• 1x Armoured feet
• 1x Ballistus lascannon
• 1x Ballistus missile launcher
• 1x Twin storm bolter
Ballistus Dreadnought (130 Points)
• 1x Armoured feet
• 1x Ballistus lascannon
• 1x Ballistus missile launcher
• 1x Twin storm bolter
Infiltrator Squad (100 Points)
• 1x Infiltrator Sergeant
◦ 1x Bolt pistol
◦ 1x Close combat weapon
◦ 1x Marksman bolt carbine
• 4x Infiltrator
◦ 4x Bolt pistol
◦ 4x Close combat weapon
◦ 1x Helix Gauntlet
◦ 1x Infiltrator Comms Array
◦ 4x Marksman bolt carbine
Predator Destructor (130 Points)
• 1x Armoured tracks
• 1x Hunter-killer missile
• 2x Lascannon
• 1x Predator autocannon
• 1x Storm bolter
Predator Destructor (130 Points)
• 1x Armoured tracks
• 1x Hunter-killer missile
• 2x Lascannon
• 1x Predator autocannon
• 1x Storm bolter
Predator Destructor (130 Points)
• 1x Armoured tracks
• 1x Hunter-killer missile
• 2x Lascannon
• 1x Predator autocannon
• 1x Storm bolter
Repulsor (180 Points)
• 1x Armoured hull
• 1x Heavy onslaught gatling cannon
• 1x Hunter-slayer missile
• 1x Repulsor defensive array
• 1x Twin lascannon
Scout Squad (70 Points)
• 1x Scout Sergeant
◦ 1x Astartes chainsword
◦ 1x Bolt pistol
◦ 1x Close combat weapon
• 4x Scout
◦ 4x Bolt pistol
◦ 4x Close combat weapon
◦ 3x Combat knife
◦ 1x Missile launcher
Storm Speeder Hammerstrike (125 Points)
• 1x Close combat weapon
• 1x Hammerstrike missile launcher
• 2x Krakstorm grenade launcher
• 1x Melta destroyer
Pre game thoughts - Played Louise before (although I did have to be reminded of it) in what was also a CSM v SM match up (10-10 draw in teams event) and this was clearly going to be a tough game - both because of a very strong list and Louise was coming off being part of the winning team at ITT previous weekend. Conceptually two very similar armies - lots of murderous trade pieces with BA having some excellent counters to Possessed with the Triple Predators (which as it isn't actually a Blood Angels Predator gets +1 to wound on oath target.) So this presented a real problem as I didn't really have a trading edge and if I committed hard I would get punished very hard by the Predators. BA were faster, hit comparably hard (if not harder and certainly more reliably) and outshot me - in my corner I had spike potential of Vindicators into BA tanks, and better CP manipulation. The main way I had of winning was Possessed - if I could engineer a situation they could get in combat without retribution from Predators that felt like one path to victory (ideally Heroically intervening to protect a smaller unit, BA didn't have a unit that could wipe out Possessed in combat.) In the end the game plan was determined more by a dice roll - I went second so I wanted to play a passive trading game, stay even on primary, redraw secondaries aggressively if I couldn't score them and stay level until the end were I could use last turn scoring to win.
 |
| CSM deployment - trying to balance between having enough threat on the south right object to keep BA from scoring it freely and not exposing trade pieces. Bikers can lone opp 18 to keep them from BA firebase. |
 |
| Top of CSM deployment - Possessed to stop a BA push and Rhino filled with Legionnaires ready to trade on objective. Retrospectively probably should have had the top Rhino on other flank. |
 |
| Very blurry shot of DA deployment with Predators covering firing lanes and Dreads in the middle |
 |
| A rather less blurry shot of south of BA deployment. |
 |
| CSM reserves - Vindicator to try and counter attack on the tanks, Warp Talons to Rapid Ingress/DS threat. |
 |
| BA go first and move up to start Terraforming. |
 |
| BA move their firebase taking care to avoid any firing lanes back from my Vindicator/Predator |
 |
| A huge bit of early luck. BA had put oath on the bikes, and kill one in overwatch meaning I need to kill all 5 scouts to stop terraform and deny primary. My shooting does nothing other than hurt myself thanks to pact. The bikes charge in and scouts armour of contempt. The powerfist kill 3 before the biker deals four wounds and scouts fail 4 saves (on top of the 3 from Powerfist) to die in a huge early moment. |
 |
| On my top left objectives Jump Pack Intercessors moves up and delete my Legionnaire unit to stop me trying the same trick back. |
 |
| BA firebase cuddles together with the infantry ready to charge onto objective if anything touches it. |
 |
| Dred starts to terraform with more JPI's coming up to deal with my bikers. |
 |
| Which they do very successfully. |
 |
| I'm happy staying even on primary and playing the long game. In order to secure top objective I send Possessed - enough of them that BA can't charge them and super hard to get shot. |
 |
| I move up my tanks to shoot and try and clear the objective, kill one JPI unit but another Rapid Ingress's to ensure the objective remains in BA hands (and Dred surives, bouncing the Vindicator after using AoC.) |
 |
| BA turn - the JPI's move upfield. I'm worried about 5 of them taking my objective or dealing notable damage to a tank so I elect to overwatch and take out 3 with a Predator. |
 |
| BA move up to take middle objective and screen Possessed. I'm trying to hold my assets as long as possible and didn't plan to charging them in unless BA tanks/Dreads move upfield. |
 |
| BA reinforcements come in and start blasting away at my Predator/Vindicator with Predator clinging to life on a wound. |
 |
| With Dread moves up I try and counter attack on the flank - I blast the Predator away, kill the Dread in combat and deny BA the objective to even up them denying my primary on top left early. |
 |
| Still trying to keep my other Possessed squad back as I move Nemesis claw and Legionnaires forward. |
 |
| Score is pretty much dead level, I'm trying to wait out for last turn scoring to tip game in my favour. Annoyed that Legionaires failed to kill the Incursors and BA start to move up in their turn. |
 |
| Overview of my half of table. Warp Talons have to deepstrike backfield due to screening out BA half as game remains very cagey. Predator at top hasn't had chance to shoot all game. |
 |
| Possessed do require a big response from BA as they move in to counter attack on their objective. |
 |
| Repulsor moves up to contest middle and BA swarm behind, unable to be too aggressive due to continued presence of second Possessed squad. |
 |
| Two remaining Predators line up shots in my Possessed and start to butcher them with autocannons. |
 |
| Overview of middle. |
 |
| Run out of units to take the bottom right objective... |
 |
| BA shooting murders most of the Possessed. I try and make the charge longer but BA make it to retake their own objective. |
 |
| Repullsor and Assault Marines charge in, Nemesis Claw are taken out by the Assault Intercessors and the two Legionnaires get to do some chip damage into the Repulsor... |
 |
| ...at least until they pop off like never before. The two powerfists get something like 8 hits from their 6 attacks, 7 wounds and the Repulsor fails 5 saves to take 10 damage. |
 |
| BA secure their bottom right objective and I can't get a bead on the Dreadnaught to kill it/whilst bieng too far me to move onto it (Warp Talon Advance/charging is technically possible but hard.) |
 |
| Turn 4 for CSM. I try and commit as little to the centre as possible whilst still being happy I can clear it - Warp Talons take the sure option to get in rather than contest objective 3 as I keep a Legionnaire and Possessed squad back for turn 5. |
 |
| Top Predator finally gets into the game helping to shoot down the Repulsor and techmarine. |
 |
| BA turn 5 I hold a 4 point lead on primary with BA up on secondaries by 2. |
 |
| Cultists to far left of shot had run back last turn so I could keep them safe and run back on last turn. |
 |
| Hammerstrike moves around to try and take out my Rhino containing last Legionnaire unit. |
 |
| DA throw everything onto the objective, trying to swarm the middle with bodies and OC. |
 |
| DA smash there way onto the objective, killing everything bar the Rhino. I hoped the Warp Talon would live but the Predator kills the last one. Going into last turn we work out that I'm equal on score if I don't move and just need a secondary point or take the middle to win. I draw Behind enemy lines (which I can't do) and Marked for Death (which is impossible.) Suddenly nervous I redraw into Extend thankfully with several dead draws still possible. |
 |
| One last charge happens to be sure - Possessed butcher the last Assault Intercessor squad so the Legionnaires take the objective. |
Final score - 77 - 68 win for CSM.
Postgame thoughts - Very happy at the win, probably the best game I played over the weekend - with some notable luck. I certainly got the luck of the green as several moments, most notably the Bikers turn one which probably should have just resulted in a lost asset for me and extra points for BA. As it was I could ride the luck and managed to grind out a result. As someone that loves a full push, I'm always somewhat overly proud of myself when I manage to stay patient win a trade war (maybe I'm a good fit for politics at the moment?)
Game 5 – Mission Q – Supply Drop/ Rapid Escalation / Sweeping Engagement v Nicholas Willingale
Space Marines
Blood Angels
Strike Force (2000 points)
Liberator Assault Group
CHARACTERS
Captain (105 points)
• 1x Plasma pistol
1x Power fist
• Enhancement: Speed of the Primarch
Judiciar (85 points)
• Warlord
• 1x Absolvor bolt pistol
1x Executioner relic blade
• Enhancement: Gift of Foresight
BATTLELINE
Assault Intercessor Squad (75 points)
• 1x Assault Intercessor Sergeant
• 1x Plasma pistol
1x Power fist
• 4x Assault Intercessor
• 4x Astartes chainsword
4x Heavy bolt pistol
Assault Intercessor Squad (75 points)
• 1x Assault Intercessor Sergeant
• 1x Plasma pistol
1x Power fist
• 4x Assault Intercessor
• 4x Astartes chainsword
4x Heavy bolt pistol
Assault Intercessor Squad (75 points)
• 1x Assault Intercessor Sergeant
• 1x Plasma pistol
1x Power fist
• 4x Assault Intercessor
• 4x Astartes chainsword
4x Heavy bolt pistol
DEDICATED TRANSPORTS
Impulsor (80 points)
• 1x Armoured hull
1x Ironhail heavy stubber
1x Shield Dome
2x Storm bolter
OTHER DATASHEETS
Assault Intercessors with Jump Packs (90 points)
• 1x Assault Intercessor Sergeant with Jump Pack
• 1x Plasma pistol
1x Power fist
• 4x Assault Intercessors with Jump Packs
• 4x Astartes chainsword
4x Heavy bolt pistol
Assault Intercessors with Jump Packs (90 points)
• 1x Assault Intercessor Sergeant with Jump Pack
• 1x Plasma pistol
1x Power fist
• 4x Assault Intercessors with Jump Packs
• 4x Astartes chainsword
4x Heavy bolt pistol
Assault Intercessors with Jump Packs (90 points)
• 1x Assault Intercessor Sergeant with Jump Pack
• 1x Plasma pistol
1x Power fist
• 4x Assault Intercessors with Jump Packs
• 4x Astartes chainsword
4x Heavy bolt pistol
Ballistus Dreadnought (130 points)
• 1x Armoured feet
1x Ballistus lascannon
1x Ballistus missile launcher
1x Twin storm bolter
Ballistus Dreadnought (130 points)
• 1x Armoured feet
1x Ballistus lascannon
1x Ballistus missile launcher
1x Twin storm bolter
Ballistus Dreadnought (130 points)
• 1x Armoured feet
1x Ballistus lascannon
1x Ballistus missile launcher
1x Twin storm bolter
Incursor Squad (80 points)
• 1x Incursor Sergeant
• 1x Bolt pistol
1x Occulus bolt carbine
1x Paired combat blades
• 4x Incursor
• 4x Bolt pistol
1x Haywire Mine
4x Occulus bolt carbine
4x Paired combat blades
Incursor Squad (80 points)
• 1x Incursor Sergeant
• 1x Bolt pistol
1x Occulus bolt carbine
1x Paired combat blades
• 4x Incursor
• 4x Bolt pistol
1x Haywire Mine
4x Occulus bolt carbine
4x Paired combat blades
Infiltrator Squad (100 points)
• 1x Infiltrator Sergeant
• 1x Bolt pistol
1x Close combat weapon
1x Marksman bolt carbine
• 4x Infiltrator
• 4x Bolt pistol
4x Close combat weapon
1x Helix Gauntlet
1x Infiltrator Comms Array
4x Marksman bolt carbine
Predator Destructor (130 points)
• 1x Armoured tracks
1x Hunter-killer missile
2x Lascannon
1x Predator autocannon
1x Storm bolter
Predator Destructor (130 points)
• 1x Armoured tracks
1x Hunter-killer missile
2x Lascannon
1x Predator autocannon
1x Storm bolter
Predator Destructor (130 points)
• 1x Armoured tracks
1x Hunter-killer missile
2x Lascannon
1x Predator autocannon
1x Storm bolter
Scout Squad (70 points)
• 1x Scout Sergeant
• 1x Astartes chainsword
1x Bolt pistol
1x Close combat weapon
• 4x Scout
• 4x Bolt pistol
4x Close combat weapon
3x Combat knife
1x Missile launcher
Storm Speeder Hammerstrike (125 points)
• 1x Close combat weapon
1x Hammerstrike missile launcher
2x Krakstorm grenade launcher
1x Melta destroyer
Pregame thoughts - Second no Blood Angel Blood Angel list and second familiar face in a row having played Nicholas in a Disciples of Belakor v GSC list back in 9th edition (which I thought was CSM v GSC until Nicholas reminded me about overwatching a Slaanesh chartiot to death with a couple of webbers which brought back some hidden trauma.) So having felt I'd gotten the rub of the green v BA and playing them again was daunting (especially as Nicholas had won 2 GTs in previous weeks with this list) especially as the changes in the list made this match up even harder - two fights first units made trading harder, whilst Possessed could probably tank the fights first it meant committing my key units and trading down. The mission was another twist - with objectives disappearing it could swing the entire game with a dice roll - and sadly it ended up with the BA close objective the close one, although me going second did help balance it out it was a very exposed path to the objective. Game plan was similar to last time - try and match trading, score later on but I also had to try and take out their tanks before committing Possessed on an exposed objective.
 |
| CSM deployment mostly to centre/left - terrain bit more open than on the ITC missions so have to have the Red Possessed squad out the way. |
 |
| Much more limited presence on the right flank with very little space to hide. |
 |
| BA deployment on the left. |
 |
| And BA deployment on the right. |
 |
| Two objectives that disappear have the numbers/double matts objective marker. Middle one going favour neither but my home left objective is such an early blow. Aside from units being the wrong side of the table the BA objective is so open and with 3 Predators in reserve its a huge hurdle. |
 |
| BA get first turn and stage. I move up and advance and charge some Legionnaires on the right side. BA HI with a JPI that was behind the ruin up top - I'd expected a HI but only from the ones on right of shot and my power fists are out of position and I get cut down for effectively no damage. Its a big early tactical blunder. |
 |
| Otherwise CSM play it cagey, moving upfield and hiding from angles Predators can target Possessed. |
 |
| BA have early control of right flank and position to move upfield going into their turn 2. I can't put anything on the objective other than Bikers who don't have enough OC to control it. |
 |
| Not often your playing 40k and you see the Mandalorian in the window. |
 |
| Cypher had moved upfield to start a trading war and gets Grenadeded (even for 2 cp) and shot off. I'd hoped he live on a wound so Possessed could potentially HI but alas not to be. |
 |
| BA reinforcement look on on the left flank before BA advance onto objective to deny me primary. |
 |
| On the right flank JPI move up to take out my bikers. Away I'm struggling for assets already on the right I Rapid ingress my Warp Talons to try and stop the bleeding. |
 |
| CSM turn two - behind on primary and its an effort to keep level on Primary. Warp Talons go hunting JPI to try and take out trade pieces and BA repeat their HI from behind the wall. |
 |
| Try to keep Possessed back until I can take out some Predators so Legionnaires go forth to fight BA. |
 |
| Warp Talons fail to deal any meaningful damage and BA prepare to strike back. |
 |
| Manage to remove BA from centre/left objective and its turn 3 so Predators have to commit now. |
 |
| Next wave of BA move in lead by the Judicar. Legionnaires die as expected but I hope to use the Predator to remove Judicar squad so I don't have to charge them. |
 |
| Nemeis claw are in the open as BA move up to contest objective. |
 |
| Dreads have no tanks to target but start to move towards firing lanes, with Predators coming in they are going to overload me with targets. |
 |
| My tanks have cleared what they can from the right flank but BA are safe in their ruin. |
 |
| But they bring in Speeder to take out my Rhino and its the last unit on this half of the table. |
 |
| Like a Nordic concert a wall of black metal suddenly appears, although it has no real target outside of Nemesis claw which aren't long for this world.. |
 |
| I'm behind on primary, secondary and attrition, but BA have had to expose themselves first. I'm feeling the pressure and decide its go time. I throw my tanks forward - trying to take out the Predators to ensure my Possessed can strike next turn. This entire flank kills 4 intercessors and deals no damage to any tank. |
 |
| Sometimes CSM vindicators do crazy stuff...but it works both ways. I roll 1, CP rerolling into 1 shot and deal 6 damage on this flank. Which is technically the most damage out of any tank as my go turn fizzles. |
 |
| Nicholas offers before my shooting phase to remove his Judicars squad if I shoot Predator autocannons at them. I need a greedier turn so decline and end up shooting them with more than that, failing to kill them. I charge the Judicar and last Assault Intercessor with Possessed. The Judicor attacks 6 times with dev wounds and...yeah look at the dice. The lone Powerfist then kills 2 from 4 attacks and I pact and deal another 3 wounds to myself. As if to rub insult to massive injury I pop dev wounds and full rerolls and fail to make a single dev wound with 20 attacks. I kill them anyone but its a hammerblow to morale! |
 |
| You know what's a really bad idea? Putting Possessed slightly in the open on a objective that's about to disappear opposite a bunch of Predators. My worse move of a already badly played game total mind blank moment. |
 |
| Predators and Captain move in to take out the red Possessed squad. |
 |
| There's a glimmer of hope when Vindicator overwatchs the Speeder to death but when Predators open up into Possessed its the only unit to survive on the right. |
 |
| BA crush the left flank. CSM have a few tanks left and no way to take objectives. Baring some secondary points game is over. |
Final Score - 78 - 42 to Blood Angels
Postgame thoughts - Brutal from BA. So there was a cascade of misplays and bad luck here. The overall gameplan was fine, but the just about every play was flawed and I needed a monster of turn 3 to come back and got a tickle. So what went wrong from last game -
1. I felt pressured by the objectives disappearing, in particular with the objective. This had a huge difference as I was trying to push into BA rather than the other way around which was compounded by...
2... Deployment. Even if the objectives were switched around I needed 2 Legionnaire units on the right to delay BA scoring and use my tanks to clean things up this was compounded by .....
3... Wasting resources. Last time game almost every time a CSM unit died it was on an objective contesting, taking or denying points in some fashion. Look at the Legionnaires and Warp Talons - they are trying to take out trade pieces and not denying objectives.
4. Underestimating HI from BA. Didn't realise they got charge bonus including mortals from JPI and the extra attacks/strength. This ties in wasting resources a lot and pushing too aggressively.
5. Dumb errors - Possessed going on a objectives that was about to go is probably the stupidest thing I've done in 40k. Put it down to 5th game fatigue and move on!
6. General game plan - so out trade BA like last game was harder given the list variants and fight first but more than that I never had a good answer to take the objective last turn regardless. Potentially having one Possessed in reserve to Rapid ingress reactively onto whichever flank allows me to split my bets more.
7. Edged the luck last time, and whilst I don't think any sequence of dice rolls this game make a material difference, my big go turn failing to connect was a death blow. Having couple extra Possessed survive against the Judicar later wouldn't make a difference.
Always worth pointing out how well Nicholas played, clinical was how I described it to him chatting after the game. It felt a bit like the reverse of my game 3 - BA felt like the main characters and I was playing reactively trying to pick the best of bad options (and failing at that too.) One of the games were 78-42 flattered me honestly. Lessons to take away!
Game 6 – Mission R – Terraform/ Swift Action / Sweeping Engagement v Michael Murrell
House Malinax (2000 points)
Chaos Knights
Strike Force (2000 points)
Traitoris Lance
CHARACTERS
Knight Desecrator (435 points)
• Warlord
• 1x Desecrator laser destructor
1x Diabolus heavy stubber
1x Reaper chainsword
• Enhancement: Aura of Terror
BATTLELINE
War Dog Brigand (165 points)
• 1x Armoured feet
1x Avenger chaincannon
1x Daemonbreath spear
1x Havoc multi-launcher
War Dog Brigand (165 points)
• 1x Armoured feet
1x Avenger chaincannon
1x Daemonbreath spear
1x Havoc multi-launcher
War Dog Brigand (165 points)
• 1x Armoured feet
1x Avenger chaincannon
1x Daemonbreath spear
1x Havoc multi-launcher
War Dog Brigand (165 points)
• 1x Armoured feet
1x Avenger chaincannon
1x Daemonbreath spear
1x Havoc multi-launcher
War Dog Brigand (165 points)
• 1x Armoured feet
1x Avenger chaincannon
1x Daemonbreath spear
1x Havoc multi-launcher
War Dog Karnivore (140 points)
• 1x Havoc multi-launcher
1x Reaper chaintalon
1x Slaughterclaw
War Dog Karnivore (140 points)
• 1x Havoc multi-launcher
1x Reaper chaintalon
1x Slaughterclaw
War Dog Karnivore (140 points)
• 1x Havoc multi-launcher
1x Reaper chaintalon
1x Slaughterclaw
War Dog Karnivore (140 points)
• 1x Havoc multi-launcher
1x Reaper chaintalon
1x Slaughterclaw
War Dog Karnivore (140 points)
• 1x Havoc multi-launcher
1x Reaper chaintalon
1x Slaughterclaw
ALLIED UNITS
Nurglings (40 points)
• 3x Nurgling Swarm
• 3x Diseased claws and teeth
Pregame thoughts - Its not BA again hurrahs! Armiger/Wardog heavy match ups are one of the archetypes I've always struggled against. CSM damage doesn't line up great into them, Vindicators are one of those units that will either obliterate Wardogs or do nothing and get murdered on the swing back and otherwise my ranged anti-tank is very swingy relying on lots of sustained Lascannons to go off. I can only deal with OC8 on objectives for so long, so I approached this as a pure damage match up - try and take big swings were ever possible and deal the first big blow and worry about primary/secondary later as I couldn't deal with 5 turns of OC8 popping into objectives. I wanted to get greedy with Possessed were possible, ideally charging two War Dogs or the Desecrator before popping their dev wounds and try and take out two in a go.
Also - given how tired I was after 5 games and a long drive I'd made my mind up to concede and make an early getaway if I was paired into Bridge Head IG, so hurrah for game 6 at all!
 |
| Super blurry shot of deployment - Possessed in ruins and tanks hidden back from Melta range! |
 |
| Opposite side of same table as last game. 2 Legionnaire squads on the right this time! |
 |
| Overview of CK deployment on left as they prepare to move up. |
 |
| Knights move up, shoot some Havocs into my backfield and pass the turn - they elect to take chip damage over chance to start terraforming (presumably to try and start battleshocking.) |
 |
| I ponder my options - and rely on the good fashion 'its turn 6, lets just send and see what happens' tactic. |
 |
| Nemesis claw charge Karnivore so it can't interrupt and Rhino moves up to tag Brigand after it bounces 2 Predators shooting. |
 |
| So this turn was meant to be a big early blow to CK. I charged Possessed forwards and popped full re-rolls and dev wounds. I internally raised an eyebrow (which is hard in the literal sense when your not a Bloodborne character) when CK popped 6+ FNP and unleashed something like 26 dev wounds. In the end it died to exact wounds just when I thought it had passed enough to survive. |
 |
| Turn best encapsulated with this blurry shot of the right flank - Vindicator into Brigand had no damage, Legionnaires charge Karnivore in ruin, 2 hits, minimal damage. |
 |
Turn best encapsulated with this shot of the right flank - Vindicator into Brigand 1 damage, Legionnaires charge Karnivore in ruin, 2 hits, minimal damage.
|
 |
| CSK position going into turn 2. |
 |
| With Possessed exposed CK start to come out to take their revenge. |
 |
| War dogs start to go hunting on the right flank Rhino is fortunate to survive the attacks. |
 |
| CK reserves look on as they shoot out of combat. |
 |
| Karnivore charges in, after combat 2 Possessed survive the onslaught and have had to trade down. |
 |
| A wall of angry steel on the right however having stickied their home object CK leave it alone despite having defend stronghold. |
 |
| CSM turn 2 - Warp Talons make a big play, DS into CK deployment zone objective and charging in. Denying 8 points and chipping at the Knight. I want to charge the Red Possessed into the 2 Knight at right of shot but its a awkward charge and settle for killing the Knight on the objective instead. |
 |
| I send a second Legionnaire squad at the Kanivore on 3, but they again forget how to hit and just scratch some paint. |
 |
| I'm failing almost every pact i'm making (even before CK modifiers) but I do manage 3 kills in the turn, the two on the left to secure it and Possessed in the middle. |
 |
| Whilst I haven't done much damage on the right, I have at least kept CK mostly locked in. |
 |
| Fun fact the C in CSM doesn't stand for Chaos in this army, its Casino. Vindicator from reserve does only minor damage in its turn... |
 |
| I'm losing attrition war and decide to keep gambling on the Vindicator and it rolls an impressive overwatch to kill the Knight that had been on the right to slow CK momentum. |
 |
| Overview of middle. |
 |
| CK reinforcements appear. |
 |
| CK can't take out the Possessed in the middle and I auto-pass their battleshock. I now have a 14 primary lead and equal secondaries - its a case of if I hang on now as my damage starts to fade. |
 |
| Still the Possessed have their Dev wounds and they rip apart an Armiger whilst the remnant of the Green Possessed keep a Brigand busy. |
 |
| So much T10, so much OC. Right flank is lost beyond saving so its a case of trying to ensure that left flank is same in reverse. |
 |
| Predators line up the last Wardog on the right...and do 0 damage, other than to themselves (yay pacts.) I send the Rhino forwards to slow it down/force CP usage. |
 |
| Red Possessed look on as 3 angry knights start to blast them to pieces. They don't survive the turn. The Green ones win their battle against the top Brigand and fall back onto the objective. |
 |
| Karnivore v Rhino - sounds like a tough fight if you don't know anything about 40k and base it only on the name. |
 |
| CSM position turn 4. One of the Predators manages 3 Lascannon hits from 2 shots (YAY pacts) to take out the last Wardog on the left.) |
 |
| Well i'm not taking that back. |
 |
| Story is the same for Knights on this flank however as last Legionnaire darts upfield for Behind enemy lines. |
 |
| CK control the middle and right, but CSM have both players homefield objectives and the left flank at the end of the game. |
Final score - CSM win 88-61
Post game thoughts - seemed like my dice were actively trying to hurt me this game. Not sure if they were (I always loved the BB2 feature to show your average dice after game that showed, yes you did roll average you just sucked) but it felt that way and losing the attrition war to CK felt like it was going to be terminal. As it was plan B of actually playing primary and stopping CK whenever they left an objective resulted in me winning that areas 43-16 which felt kind of mad, but reflective that I held CK deployment objective longer than they did. Gameplan didn't really work, CSM really struggle with armour at ranged and if Vindicators low roll it can be terminal for attrition but thankfully my agility and remnants of battered units allowed me to slow CK down and keep primary ticking over. Very happy with win at the end.
So I finished 5-1 and with 45 minuites to go in the round I'd planned to make a getaway until I found my teammate Byron on table one v Stephen Box was in a really strong position. At 5-0 already he had a great chance to win the event and managed to pull out a win. Readers of this column from last week may notice this was the second time in two weeks these two had played with the reverse result last time (were Stephen won handsomely) to finish 6-0 so I stuck around to see if he'd won the event. Sadly their were 3 people that ended 6-0, Byron, Nicholas (round 5 opponent) and Martyn Cooper (who I'd also played at this event previously back in 9th) and Byron finished 3rd on strength of schedule with Nicolas winning and Martyn taking second. I finished in 6th place and picked up best in faction for Chaos which I was thrilled about.
 |
| Shiny thing is hard to read on camera. |
So as for my list - I loved it but it has one real issue. For the review itself - everything did its job really well - the only mild disappointments were Warp Talons and Nemesis claw. Claw are so strong enough in good match ups that they can change the game and whilst another squad of Legionnaires would have been better in this event, having been so scared of them when using DG last week its worth the points for a match up they change by themselves. Warp Talons were game changing...but only because they had deep strike. Their damage was a really a nice bonus and if I could have a cheap unit with 0 damage, 1 OC and DS I would take it over them. Damage is very reliant on pacts and without an icon they felt eh - either a 10 to solve damage or Raptors. Or Haarken. Eh Maybe a terminator sorcerer for extra ap, I don't love any of them really. The Vindicators occasionally earned my ire, but the upside for them is so much I can live with it, again gamechangers in the right circumstance and opponents have to fear them.
So the issue with the list, and its nothing to do with the list itself but its nice corpse worshipping cousins. Other than cos its CSM and they are cool, there isn't really a reason to run this over the BA lists above which do effectively the same game plan with more damage, speed, fights first and reliability. Cypher gets easily replaced with a Calldius assassin and whilst Nemesis claw is a point of difference for CSM, its hard to match that up against everything else 'Not BA BA' have available. BA comparisons aside though I loved the list, it feels really good to play.
 |
| If only their was some way to make Blood Angels more suitable to my tastes... (work in progress although lets face it no one comes here for my hobby tips.) |
Moving forward though...I'd want something else. Not because of the list itself but because of the Meta. I think its bad into both Eldar and Guard, and being a worse copy of a SM list (hardly first time CSM have been here) means big changes are needed. My typical reaction to Eldar being broken is go small and wide - if they are going to murder something make it cheap and annoying to kill (60 Poxwalkers with Stealth comes to mind, although scary v Guard's mortars) but haven't not played the match up its too early to say. Maybe its Fellhammer time at last!
Thanks for reading!


Comments
Post a Comment